24 | English 2 609 140 906 • 16.2.12
To activate the timer function, press and hold button 6
until the indicator appears in the display.
The time period from the actuation until the measure-
ment takes place is displayed in the measured-value
line a. The time period can be adjusted between 1 s
and 60 s by pressing the plus button 11 or the minus
button 5.
The measurement takes place auto-
matically after the set time period has
elapsed.
The timer function can also be used
for distance measurements within
other measuring modes (e.g. area/
surface measurement). Adding and
subtracting measuring results as well as continuous
measurements are not possible.
List of the last Measuring Values
The measuring tool stores the last 20 measuring val-
ues and their calculations, and displays them in re-
verse order (last measured value first).
To recall the stored measurements,
press button 7. The result of the last
measurement is indicated on the dis-
play, along with the indicator for the
measured-value list e and the memo-
ry location of the displayed measure-
ments.
When no further measurements are stored after
pressing button 7 again, the measuring tool switches
back to the last measuring function. To exit the meas-
ured-value list, press one of the measuring-mode but-
tons.
To continuously save the currently displayed length
measurement value as a constant, press and hold the
measured-value list button 7 until “CST” is indicated
on the display. A measured-value list entry cannot be
subsequently saved as a constant.
To use a length measurement value in a measuring
mode (e. g. area/surface measurement), press the
measured-value list button 7, select the desired entry
and confirm by pressing the result button 6.
Deleting Measured Values
Briefly pressing button 8 deletes the last individual
measuring value determined in all measuring func-
tions. Briefly pressing the button repeatedly deletes
the individual measured values in reverse order.
To delete the currently displayed measured-value list
entry, briefly press button 8. To delete the complete
measured-value list and the constant “CST”, press
and hold the measured-value list button 7 and at the
same time briefly press button 8.
In wall surface measurement mode, briefly pressing
button 8 the first time deletes the last individually
measured value; pressing the button a second time
deletes all lengths B
X
, and pressing the button a third
time deletes all room heights A.
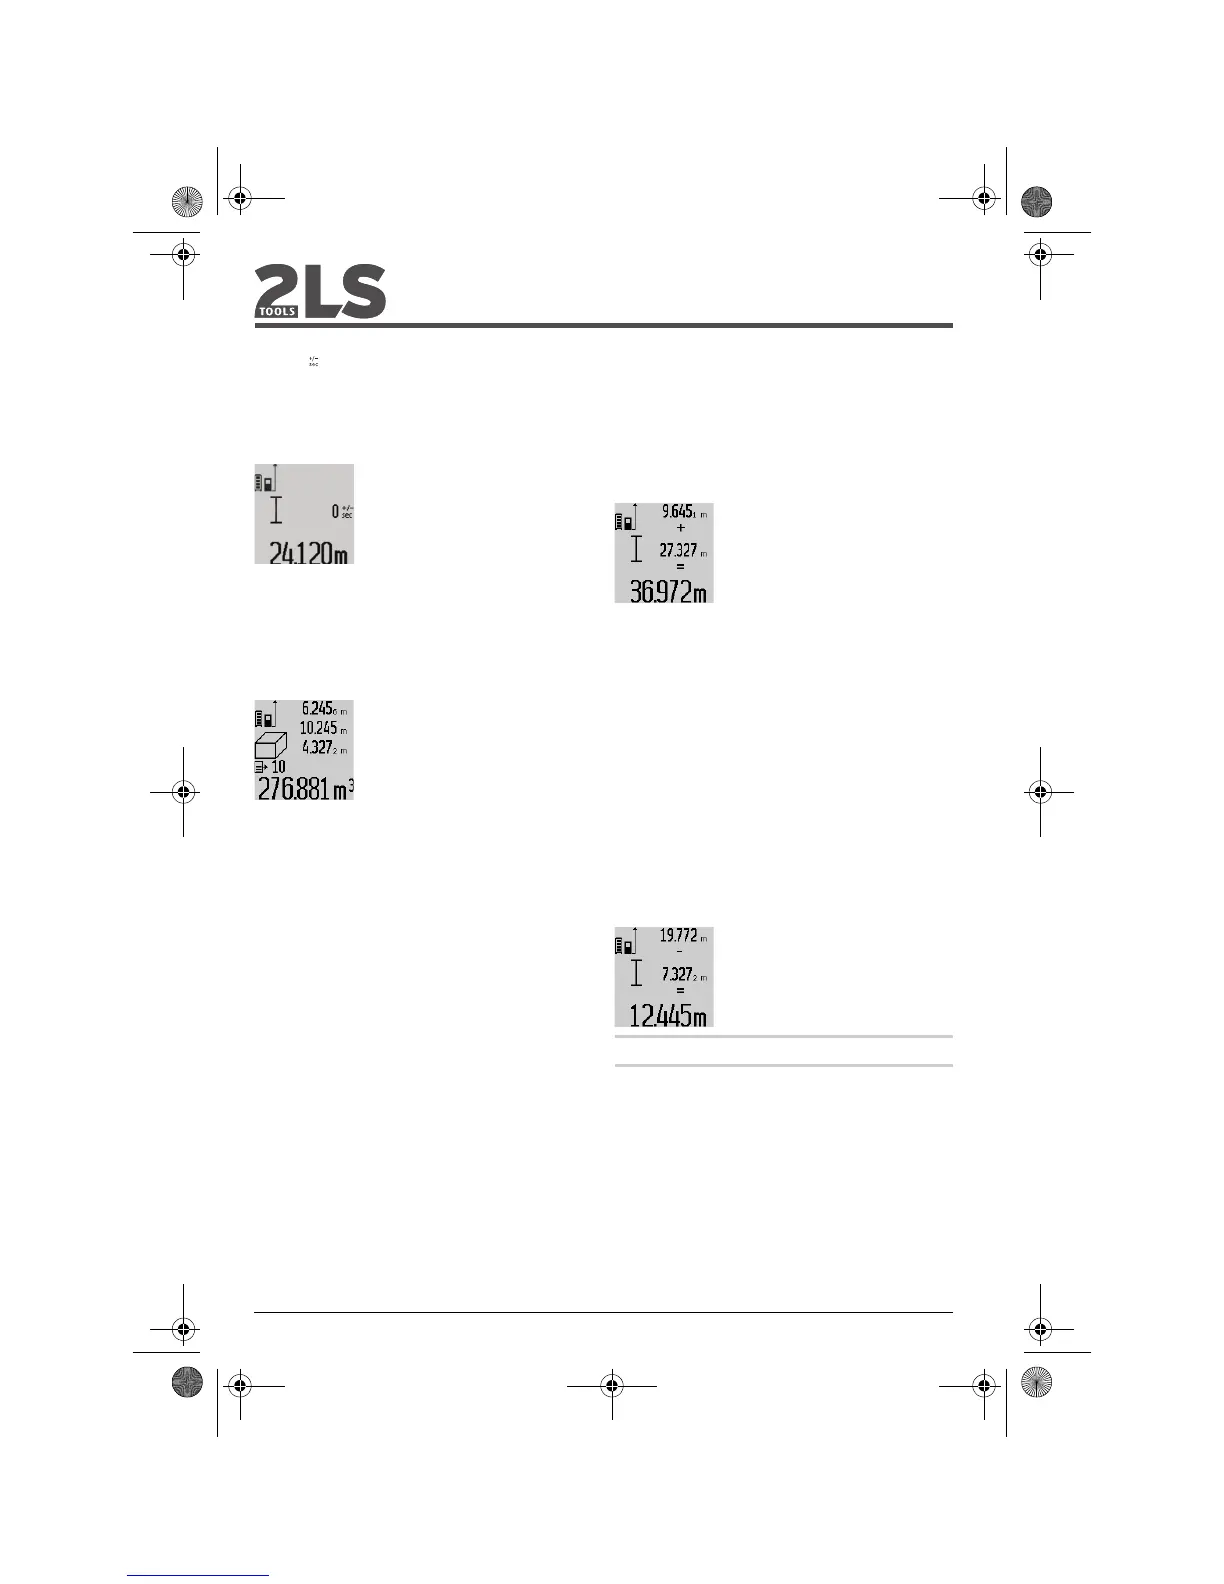
Adding Measured Values
To add measured values, firstly carry out any measure-
ment or select an entry from the measured-value list.
Then press the plus button 11. For confirmation, “+”
appears on the display. Then carry out a second
measurement or select another entry from the meas-
ured-value list.
To call up the sum of both measure-
ments, press the result button 6. The
calculation is indicated in the meas-
ured-value lines a, and the sum in the
result line c.
After calculation of the sum, further
measured values or measured-value
list entries can be added to this result when pressing
the plus button 11 prior to each measurement. Press-
ing the result button 6 ends the addition.
Notes on the addition:
– Mixed length, area and volume values cannot be
added together. For example, when a length and ar-
ea value are added, “ERROR” briefly appears on
the display after pressing the result button 6. After-
wards, the measuring tool switches back to the last
active measuring mode.
– For each calculation, the result of one measure-
ment is added (e.g. the volume value); for continu-
ous measurements, this would be the displayed
measured value in result line c. The addition of indi-
vidual measured values from the measured-value
lines a is not possible.
Subtracting Measured Values
To subtract measuring values, press
minus button 5; For confirmation,
“
–” is indicated on the display. The
further procedure is analog to “Add-
ing Measured Values”.
Working Advice
General Information
The reception lens 17 and the laser beam outlet 16
must not be covered when taking a measurement.
The measuring tool must not be moved while taking a
measurement (with the exception of the continuous
measurement and grade measurement functions).
Therefore, place the measuring tool, as far as this is
possible, against or on a firm stop or supporting sur-
face.
Influence Effects on the Measuring Range
The measuring range depends upon the light condi-
tions and the reflection properties of the target sur-
OBJ_BUCH-1618-001.book Page 24 Thursday, February 16, 2012 2:01 PM
 Loading...