Connecting to a Serial Management Console 29
3 Plug the power cord into the WX power supply.
The WX switch begins booting as soon as you plug in the power cord(s).
4 Observe the power supply LED for each connected power supply to verify
that the LED is steadily glowing green. This indicates normal power
supply operation.
Connecting to a
Serial Management
Console
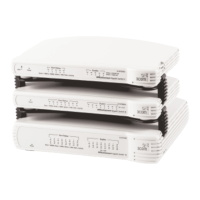
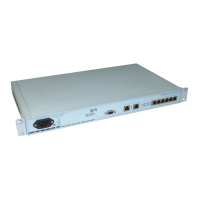
Initial configuration of the WX switch requires a connection to the
switch’s CLI through the serial console port. Figure 6 shows how to install
a serial cable on the WX switch. Refer to this figure as you perform the
procedure. (For cable requirements, see “Serial Console Cable” on
page 21.)
Figure 6 Serial Cable Installation
To connect a PC to the serial console port:
1 Insert the serial cable into the PC port as shown in Figure 6.
2 Insert the other end of the cable into the serial console port on the WX
switch as shown in Figure 6.
3 Start a standard VT100 terminal emulation application on the PC, and
configure the following modem settings:
■ 9600 bps
■ 8 bits
■ 1 stop
Serial port Serial cable Serial port on computer
 Loading...