Follow these steps to install the NIC in your PC:
1 Turn off power to the PC, and remove the power cord from
the PC.
2 Unscrew the cover screws and remove the cover.
On some PCs, it may be necessary to remove all cables before the
cover can be removed.
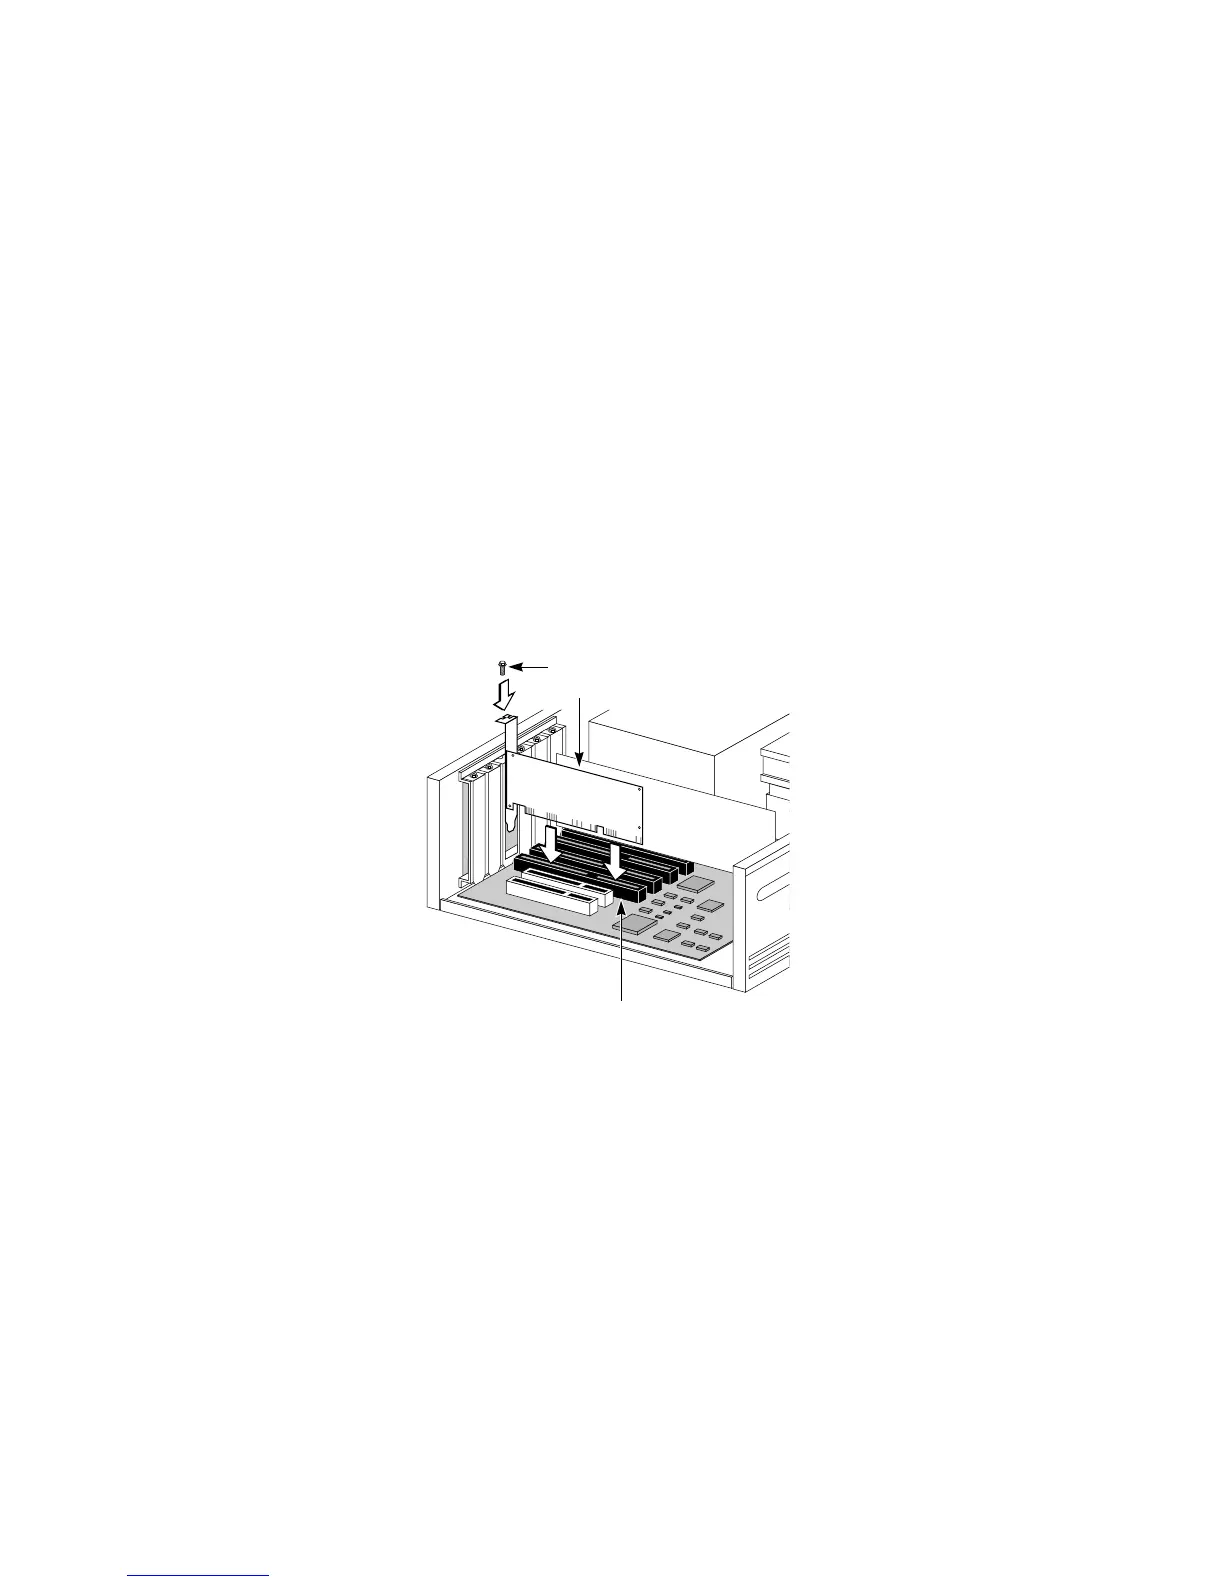
3 Locate an available ISA or EISA slot and remove the
screw from the corresponding backplate (Figure 1). Save
the screw.
Some PCs have both ISA and PCI slots. Make sure that you install the
EtherLink III ISA NIC in either an ISA or an EISA slot. See Figure 1.
PCI slots, the shortest of the three types of slots, are white. The
longer ISA slots are black. EISA slots, the longest, are brown.
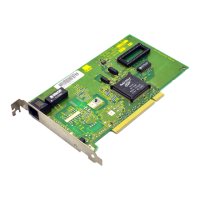
Figure 1
Installing the 3C509B NIC
4 Remove and discard the backplate.
5 Ensure that the shape and length of the edge connector
on the NIC match the slot in the PC that you intend to use
(Figure 1).
Backplate screw
3C509B NIC