1
CAUTION
To reduce the risk associated with property damage due to water leakage:
• Read and follow Use Instructions before installation and use of this system.
• Installation and use MUST comply with all state and local plumbing codes.
• Protect from freezing, remove fi lter cartridge when temperatures are expected to drop below 33° F (0.6° C).
• Do not install systems in areas where ambient temperatures may go above 110°F (43.3°C).
• Do not install on hot water supply lines. The maximum operating water temperature of this fi lter system is 100°F (37.8°C).
• Do not install if water pressure exceeds 125 psi (862 kPa). If your water pressure exceeds 80 psi (552 kPa), you must install a pres-
sure limiting valve. Contact a plumbing professional if you are uncertain how to check your water pressure.
• Do not install where water hammer conditions may occur. If water hammer conditions exist you must install a water hammer ar-
rester. Contact a plumbing professional if you are uncertain how to check for this condition.
• Where a backfl ow prevention device is installed on a water system, a device for controlling pressure due to thermal expansion must
be installed.
• Do not use a torch or other high temperature sources near system, cartridges, plastic fi ttings or plastic plumbing.
• On plastic fi ttings, never use pipe sealant or pipe dope. Use PTFE thread tape only, pipe dope properties may deteriorate plastic.
• Take care when using pliers or pipe wrenches to tighten plastic fi ttings, as damage may occur if over tightening occurs.
• Do not install in direct sunlight or outdoors.
• Do not install near water pipes which will be in path of a drilling tool when selecting the position to mount the bracket.
• Mount system in such a position as to prevent it from being struck by other items used in the area of installation.
• Ensure that the location and fasteners will support the weight of the system when installed and full of water.
• Ensure all tubing and fi ttings are secure and free of leaks.
• SHUT OFF FUEL OR ELECTRIC POWER SUPPLY TO WATER HEATER after water is shut off.
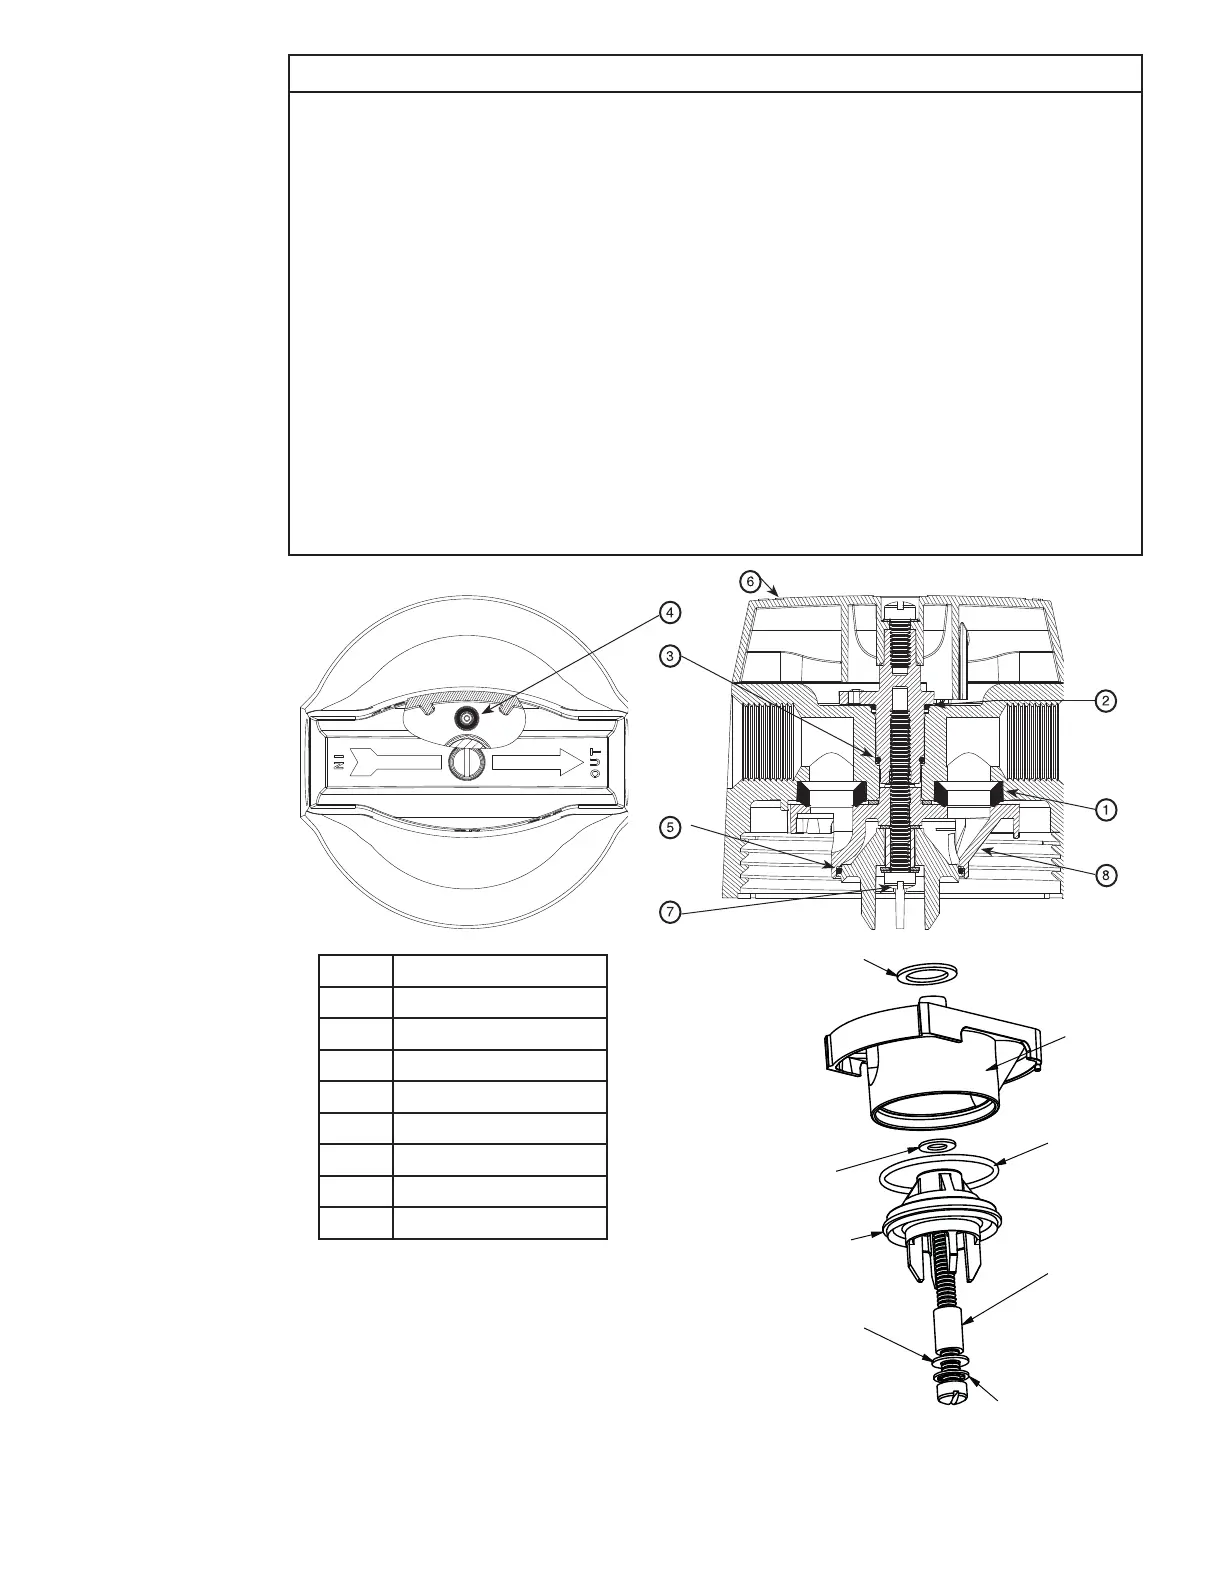
Item Description
1 Seal Rings
2 Large Shaft O-Ring
3 Small Shaft O-Ring
4 Vent O-Ring
5 Spool O-Ring
6 Filter Handle
7 Valve Screw
8
Valve Assembly
Figure 1
Valve Assembly (Item 8) Exploded View
small
washer
small
washer
spacer
internal
tooth lock
washer
large washer
o-ring
pronged
spool
valve
INSTR2221 1010 Seal Kit Instructions.indd 1 10/1/2010 4:02:21 PM
 Loading...