16
A
B
C
kN
19 kN
(4270 lb)
Warm
Weather
Cold
Weather
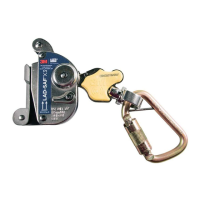
3. Tension the Cable Lifeline and then swage the Cable End in the Pass Through Hex Swage Stud:
A. Tension the Lifeline Cable to the required System Tension (0.8 kN or 5 kN) with the recommended Drill Driver
or Impact Driver (see Table 1 - Tool Spedcifi cations). When properly tensioned, the Shoulder Washer on the
Energy Absorber Tension Spring will be positioned in the Green Zone () on the Energy Absorber Tension
Label. The Shoulder Washer should be in the left 1/3 of the Green Zone on warm weather installations or in
the right 2/3 of the Green Zone on cold weather installations.
B. Apply one Swage to the Swage Terminal on the Pass Through Hex Swage Stud, remove the Tensioning Tool,
and then swage the Swage Terminal fi ve more times (see Swaging).
C. Trim excess cable extending outside of the Pass Through Hex Swage Stud.
3.8 SWAGING: Use only 3M supplied 8 mm 7x7 or 1x9 Stainless Steel Cable as the Cable Lifeline in 8mm
Permanent Horizontal Lifeline Systems (see Table 1 - Cable Lifeline Specifi cations). Swage the required End Connector
onto each end of the Lifeline Cable to a minimum strength of 38 kN (8,543 lbf) with a Hex Swager and 3M Part 7241122
10 mm Bite Die:
Hex Swaging Table
Cable Swage Die Swage Bites Bite Gap (A) Width Across Flats (B)
7 x 7 7241122 6 discountinuous 1 mm - 1.5 mm (0.04 in - 0.06 in) 11.2 mm - 11.9 mm (0.44 in - 0.47 in)
1 x 19 7241122 6 discountinuous 1 mm - 1.5 mm (0.04 in - 0.06 in) 11.4 mm - 12.4 mm (0.45 in - 0.49 in)
A
B
A
B
Part Number, Batch Number, and Swage Bite Dimensions are etched on the side of the swage part.
 Loading...