Troubleshooting & Maintenance
Regular Maintenance
• Use standard dry erase markers.
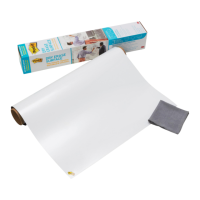
• Erase ink with the provided Post-it
®
Dry Erase Cleaning Cloth or
microfiber cloth. Felt erasers are not recommended.
• Erase ink when content is no longer needed.
• When needed, use a wet microfiber cloth to remove ink buildup.
Wet-cloth cleaning is recommended once per week.
• Never use permanent markers or pens. To remove permanent
marker, clean with isopropyl rubbing alcohol.
• Do not scratch the white film.
Installation Videos
For installation videos, please visit www.post-it.com/dryeraseinstall.
Preparation
Recommended Surfaces
Designed to Stick to:
• Primed and Painted Drywall
• Polished Steel
• Glass
• Finished Wood
• Existing Whiteboards or Chalkboards
Not recommended for unprimed
drywall, cinderblock, brick, wallpaper,
heavily textured or delicate surfaces.
Installation
Gently remove all blue tape. Unroll on a
flat, clean work surface
Surfaces to be covered must be clean,
smooth, dry and structurally sound.
Thoroughly clean wall surface with a
damp cloth. Let surface dry for 10
minutes before moving on to installation.
Using clean hands, hold onto the
white film while removing 12" of
the textured liner from the top edge.
Note: DO NOT REMOVE THE ENTIRE
LINER AT THIS POINT.
Continue to install by removing 12 inches of liner at a time.
Push firmly against the film moving any bubbles out to left
and right edges. Repeat peeling 12 inches of liner and
smooth film from middle to edge until it is completely
secured to the wall.
With the help of a friend, hold top edge
tightly and align top edge to desired spot.
Press top of film to wall with cloth
provided. If applying to an existing
whiteboard or chalkboard, use frame to
align top (only align the top).
Recheck alignment and adjust if
necessary. Use the cloth to press film to
the wall. Always start by pressing from
the middle and smoothing the film out to
the edges.
Do not fold or bend the film.
This can cause permanent
creasing or damage to the film.
Slowly peel film away from the side closest to the bubble,
peeling past the entire bubble. Re-apply this section by
using the cloth to rub up and down vertically while working
towards the edge of the film.
If applying to an existing
whiteboard or chalkboard,
use the existing frame as a
guide to trim excess film
with a utility knife.
DRY ERASE SURFACE
Installation Guide
 Loading...