Page 18 of 24
P/N 595370-01 Rev B 07/19
CHECK YOUR WORK!
BEFORE ASSEMBLING THE BATTERY COVER,
CHECK TO SEE THAT ALL BATTERIES ARE
FRESH, NEW BATTERIES OF ONE OF THE
TYPES LISTED AND THAT THEY HAVE BEEN
INSTALLED PROPERLY.
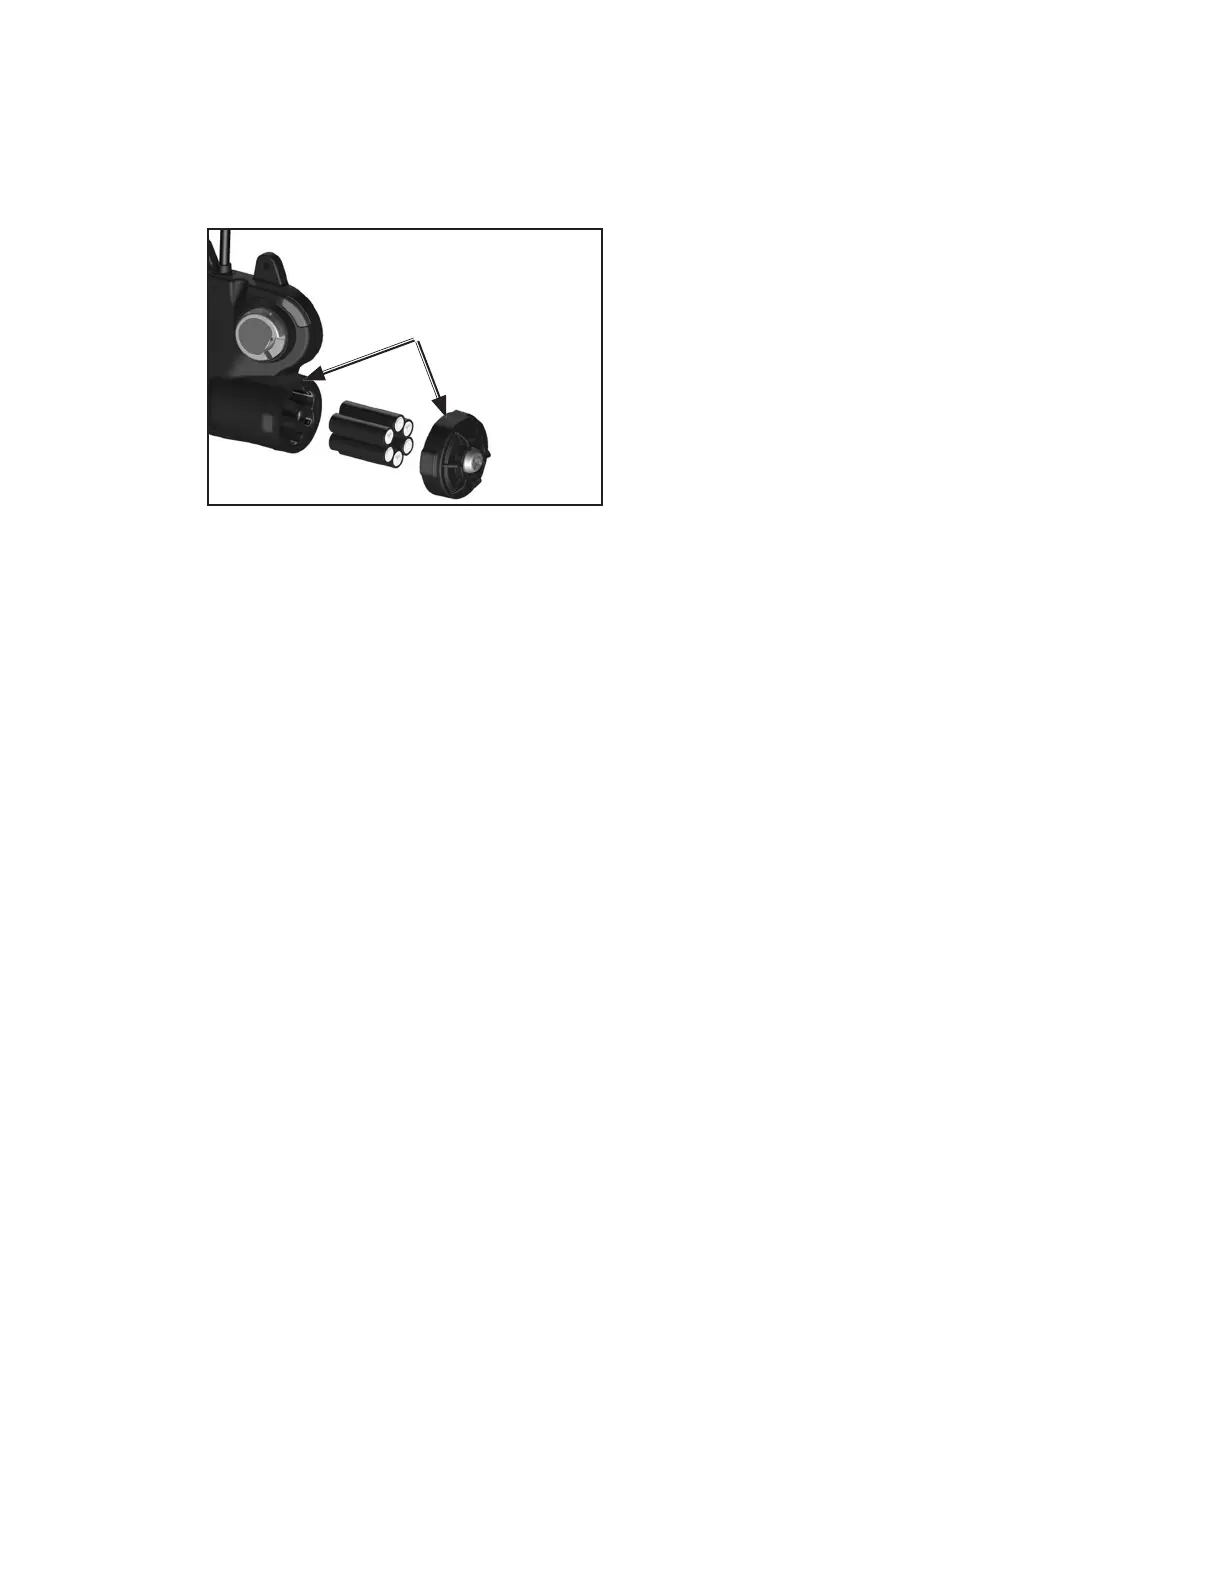
FIGURE 7
BE SURE SEALING
SURFACES ARE CLEAN
BEFORE REASSEMBLY
6. The battery cover must be installed so that it is water-tight after
replacement. Clean the sealing rib around battery compartment and
the sealing face of the cover, shown in FIGURE 7, by wiping with
a clean damp cloth to remove any dirt or foreign matter that might
prevent a proper seal. Check the cover gasket for tears or cuts. If
damage is found, remove the SCBA from service and tag it for repair
by authorized personnel.
7. To install battery cover, align the three grooves on the cover with the
three tabs on the battery compartment and tighten the cover screw to
13-15 in-lbs torque. The cover must be water-tight to prevent damage
to the equipment.
8. To test the batteries, verify that the distress alarm is in the off condition
(cylinder valve closed with no ashing green LED on the control
console).
• Press and hold the reset button on the console. A green light on
the console indicates sufcient battery power and that the batteries
are properly installed.
• If the unit displays the LOW BATTERY condition or no light at all,
verify that the batteries are properly installed. If the batteries were
properly installed, remove the batteries and replace with a new set
of six (6) batteries.
• If another set of properly installed batteries will still not produce a
green light on the battery test, remove the unit from service and
tag it for repair by authorized personnel.
After replacing the batteries, perform a regular operational inspection
before returning the SCBA to service.
CAUTION
IMPROPER BATTERY COVER INSTALLATION
CAN CAUSE BATTERIES TO OVERHEAT AND
MAY CAUSE DAMAGE TO THE PRODUCT.
ALWAYS MAKE SURE THAT THE ALIGNMENT
GROOVES ON THE BATTERY COVER ARE
ALIGNED WITH THE TABS ON THE BATTERY
COMPARTMENT DURING INSTALLATION OF
THE COVER.