Do you have a question about the 3nStar SC550 and is the answer not in the manual?
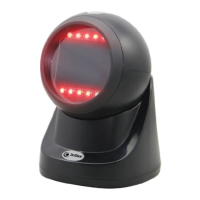
The SC550 2D Scanner is a versatile omnidirectional barcode scanner designed for efficient and reliable data capture. This user manual provides a comprehensive overview of its features, usage, and maintenance, ensuring a smooth experience for users.
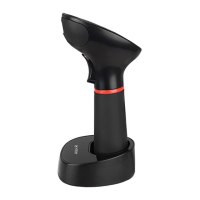
The SC550 scanner is primarily designed to read both 1D and 2D barcodes quickly and accurately. It features an omnidirectional scanning capability, meaning it can read barcodes from various angles without needing precise alignment, which significantly speeds up the scanning process. The device includes an LED indicator and a buzzer to provide immediate feedback on scanning status, configuration changes, and power status. It supports multiple connection interfaces, including USB and RS232, making it compatible with a wide range of host devices. An auxiliary interface is also available for connecting a handheld scanner, expanding its functionality. The scanner's ability to switch between 1D-only and 1D&2D decoding modes allows users to optimize its performance based on specific application requirements.
Scanning Method: To use the SC550 scanner, ensure all cables are securely connected. Position the barcode towards the scan window, ensuring it is within the effective range of the scanner. Once the barcode is successfully decoded, the scanner will emit a single beep, and the LED will flash, confirming the read. The omnidirectional design simplifies the scanning process, as precise orientation of the barcode is not required.
Reading Mode: The scanner offers two primary reading modes, selectable via the Decoder Mode button:
Adjusting Volume: The SC550 includes a volume control button, allowing users to adjust the buzzer's loudness. The volume can be set to low, medium, or high, providing flexibility to suit different working environments and user preferences. This feature is particularly useful in noisy settings where a louder beep might be necessary, or in quiet environments where a softer sound is preferred.
Keyboard Layouts: The scanner supports various keyboard layouts to ensure compatibility with different regional systems. Users can configure the scanner to match their specific keyboard layout, such as US, French, Spanish, Czech, Italian, Turkish-Q, German, and Turkish-F, by scanning the corresponding function barcode directly. This ensures that the decoded data is transmitted correctly to the host device, regardless of the local keyboard configuration.
Suffix Value: Users can configure a suffix value to be appended to the decoded data. Options include "None" (no suffix), "*0x0D (CR)" (Carriage Return), and "TAB". This feature is useful for automating data entry processes, such as moving to the next field or submitting data after a scan, by scanning the relevant function barcode.
Delay Time for Same Code: To prevent accidental multiple reads of the same barcode within a short period, the scanner allows users to set a delay time. Available options are 300ms, 750ms, and 2000ms. This feature is configured by scanning the corresponding function barcode and helps ensure data integrity by preventing duplicate entries when a barcode remains in the scanning field.
Light Indicator and Buzzer Feedback:
These visual and auditory cues provide clear and immediate feedback to the user, enhancing usability and operational efficiency.
Connection Guide (USB):
Connection Guide (RS232):
Troubleshooting: The manual provides guidance for common issues:
These troubleshooting steps help users quickly diagnose and resolve common operational problems, minimizing downtime and ensuring continuous functionality of the scanner. The modular design with replaceable cables also simplifies maintenance and repair, as individual components can be swapped out if damaged.
| Scanning Technology | Laser |
|---|---|
| Scan Rate | 100 scans per second |
| Storage Temperature | -20°C to 60°C |
| Decode Capability | 1D barcodes |
| Interface | USB |
| Power Supply | 5V DC |
| Operating Humidity | 5% to 85% relative humidity, non-condensing |
| Humidity | 5% to 85% relative humidity, non-condensing |