34
MAINTENANCEMAINTENANCE
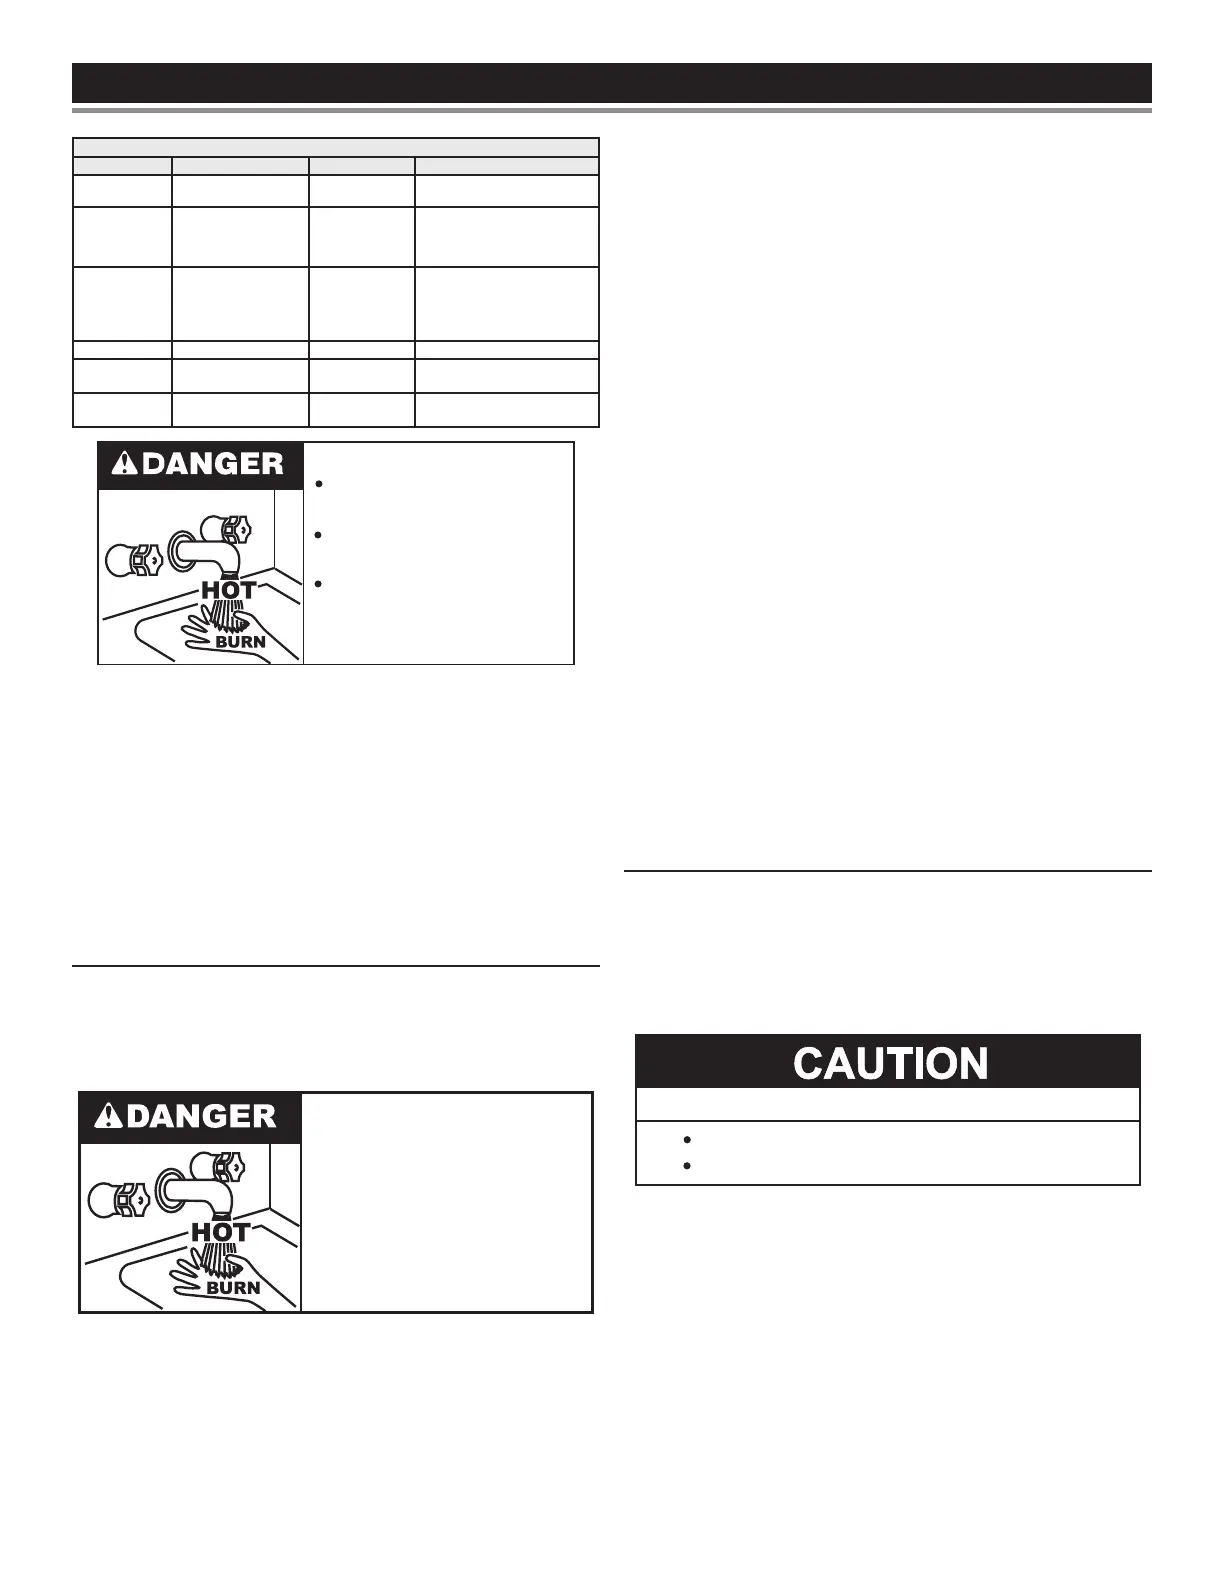
Table 17. Maintenance Schedule
Component Operation Interval Reference
Tank Drain and Flush
Every 6
Months
See
Draining and Flushing.
Tank
Lime Scale Re-
moval
(Water Less Than
25 Grains Hard)
Not Required N/A
Tank
Lime Scale Re-
moval
(Water Greater
Than 25 Grains
Hard)
Annually
See
Lime Scale Removal
(page
35).
Moving Parts Lubrication Not Required N/A
Powered
Anodes
Inspection/
Cleaning
Annually
See
Anode Maintenance
(page
34).
T&P Valve Test Operation Semi Annually
See
Temperature-Pressure Relief
Valve Test
(page 36).
Burn hazard.
Hot water discharge.
Keep clear of Temperature-
Pressure Relief Valve
discharge outlet.
Periodically the drain valve should be opened and the water allowed
to run until it ows clean. This will help to prevent sediment buildup
in the tank bottom.
Periodically check the temperature and pressure relief valve to
ensure that it is in operating condition. Lift the lever at the top of the
valve several times until the valve seats properly and operates freely.
Water heater maintenance includes periodic tank ushing and
cleaning, and removal of lime scale from the heating element.
The heater tank is equipped with an anode rod to aid in corrosion
control.
DRAINING AND FLUSHING
It is recommended that the water heater storage tank be drained and
ushed every 6 months to reduce sediment buildup. The water heater
should be drained if being shut down during freezing temperatures.
See Figure 1 (page 7) for the location of the water heater
components described below.
• Burn hazard.
• Hot water discharge.
• Keep hands clear of drain
valve discharge.
DRAINING THE WATER HEATER STORAGE TANK
1. Turn o the electrical supply to the water heater.
2. Ensure the cold water inlet valve is open.
3. Open a nearby hot water faucet and let the water run until the
water is no longer hot.
4. Close the cold water inlet valve to the water heater.
5. Connect a hose to the water heater drain valve and terminate it
to an adequate drain.
6. Open the water heater drain valve and allow all the water to drain
from the storage tank.
7. Close the water heater drain valve when all water in the storage
tank has drained.
8. Close the hot water faucet opened in Step 3.
9. If the water heater is going to be shut down for an extended
period, the drain valve should be left open.
FLUSHING THE WATER HEATER
1. Turn o the electrical supply to the water heater at the breaker
or disconnect switch.
2. Ensure the cold water inlet valve is open.
3. Open a nearby hot water faucet and let the water run until the
water is no longer hot. Then close the hot water faucet.
4. Connect a hose to the water heater drain valve and terminate it
to an adequate drain.
5. Ensure the drain hose is secured before and during the entire
ushing procedure. Flushing is performed with system water
pressure applied to the water heater.
6. Open the water heater drain valve to ush the storage tank.
7. Flush the water heater storage tank to remove sediment and
allow the water to ow until it runs clean.
8. Close the water heater drain valve when ushing is completed.
9. Remove the drain hose.
10. Fill the water heater. See
Filling the Water Heater
(page 17).
11. Turn on the electrical supply to the water heater.
12. Place the water heater back in operation. Allow the water heater to
complete several heating cycles to ensure it is operating properly.
ANODE MAINTENANCE
Each water heater contains at least one anode rod, which will slowly
deplete (due to electrolysis) prolonging the life of the water heater
by protecting the glass-lined tank from corrosion. Adverse water
quality, hotter water temperatures, high hot water usage, hydronic
heating devices, and water softening methods can increase the rate
of anode rod depletion. Once the anode rod is depleted, the tank
will start to corrode, eventually developing a leak.
Avoid damage.
Property Damage Hazard
Inspection and replacement of anode rod required.
Certain water conditions will cause a reaction between the anode
rod and the water. The most common complaint associated with
the anode rod is a “rotten egg smell” produced from the presence
of hydrogen sulde gas dissolved in the water.
Important: Do not remove this rod permanently as it will
void any warranties. A special anode rod may be
available if water odor or discoloration occurs.
Note: This rod may reduce but not eliminate water odor
problems. The water supply system may require special
ltration equipment from a water conditioning company
to successfully eliminate all water odor problems.
Articially softened water is exceedingly corrosive because the
process substitutes sodium ions for magnesium and calcium ions.
Printed on 5/6/2022 7:17 AM CT
 Loading...