41
6.4 Installation of the busbars
Busbar connections
Preparation of the material.
Clean the insulation on the busbar sections with a
soft, dry cloth, and check for any insulation damage.
Remove greasy or adhesive dirt.
Busbar connections:
The silver-plated surfaces of the connections must
be cleaned with a metal-free non-woven cleaning
cloth and thinly and evenly coated with SYN-setral-
EK 339 grease.
The non silver-plated surfaces of the connections
are either brushed with a wire brush, preserving
the grease film, or cleaned with a metal-free non-
woven cleaning cloth and evenly greased with a
thin coat of SYN-setral-EK 339.
For 17.5 kV switchgears only: apply insulating covers
1 on end panels, as per (Figure 73).
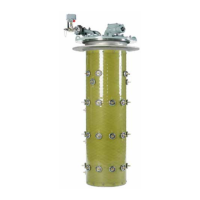
Busbar installation (Figure 74)(Figure 75)
Install the busbars panel by panel according to the
switchgear ratings - Screw on the individual busbar
elements one above the other (depending on the
system layout) and in line with the flat branch
conductor.
Note: For rated current up to 1250A the busbars have
a flat cross section, for 2000A the busbars have
double D-shaped cross section. Branch conductors
always have a flat cross section. For the tightening
torque, please (see table) in paragraph 6.2. Use two
dished washers for each screw. Use screws of tensile
class 8.8.
For 12 kV the busbars are bare (without insulation)
and without insulating covers.
For 17.5 kV the busbars are insulated and fitted with
covers only on the end set (R-phase on the left side
and T-phase on the right side) (Figure 73).
Figure 73: Left and right end panel. Installation of busbars
insulating for 12 kV (BIL 95 kV) switchgears covers (rear
view).
Figure 74: 1250 A busbars installation.
Figure 75: 2000 A busbars installation.
 Loading...