EasyManua.ls Logo

ABSCO SHEDS ABSCO PREMIER SHED User Manual

ABSCO SHEDS ABSCO PREMIER SHED
21 pages
To Next Page IconTo Next Page
Page #1 background imageLoading...
Page #1 background image
ASSEMBLY INSTRUCTION - MODEL: 30302GK-PTXABSCO INDUSTRIES PAGE
1
23/09/19
ABSCO PREMIER SHED
MODEL: 30302GK-PTX
10’ W x 10’ D x 7’ H
Australian Made
CONCRETE SLAB
PAGE 1
ABSCO INDUSTRIES ASSEMBLY INSTRUCTION - MODEL: J30302G 26/02/14
10' 2 3⁄64"
10' 2 3⁄64"
FRONT: 9' 10 7⁄64"
SIDE: 9' 10 7⁄64"
HEIGHT: 6' 10 43⁄64"
Absco Premier Garden Shed
Assembly Instructions
Model: J30302G
We thank you for choosing an Australian Made Shed. For further assistance please
visit our detailed instructional video library at
www.abscosheds.com.au/USA
At ABSCO Industries we are always looking to be number ONE, so please let us
know what you think of our instructions. Feedback makes us better.
feedback@absco.com.au
WHEN LAYING YOUR CONCRETE
SLAB, ENSURE THERE IS A REBATED
EDGE 1" DEEP AROUND THE PERIMETER
CONCRETE
SLAB
REBATED EDGE
CHANNEL
CONCRETE SLAB
3" WIDE
REBATE
THIS WILL HELP
WATER EGRESS FROM
THE BASE OF THE SHED
4”
10’ 2”
10’ 2”
AU: 1800 029 701
N Z: 0800 466 444
admin@absco.com.au
www.abscosheds.com.au
+1 (866) 788 3046
Question and Answer IconNeed help?

Do you have a question about the ABSCO SHEDS ABSCO PREMIER SHED and is the answer not in the manual?

ABSCO SHEDS ABSCO PREMIER SHED Specifications

General IconGeneral
BrandABSCO SHEDS
ModelABSCO PREMIER SHED
CategoryOutdoor Storage
LanguageEnglish

Summary

SITE PREPARATION GUIDELINES

Site Leveling and Foundation

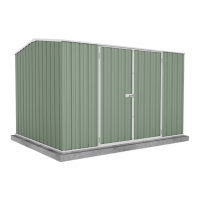
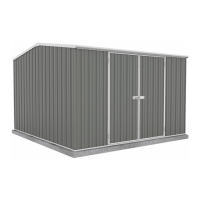
Ensure the shed site is level and recommend a 4" concrete slab for proper anchoring.

SAFETY PRECAUTIONS

Personal Protective Equipment

Wear gloves and safety glasses when handling parts; sensible shoes are highly recommended.

Erection Environment and Anchoring

Avoid windy conditions; secure shed to a solid foundation immediately after construction.

Lifting and Handling Safety

This product requires a two-person lift; use proper lifting techniques.

JOINING SPLICED CHANNELS

PRE-ASSEMBLY OF SPLICED CHANNELS

Specific Channel Joining Combinations

Details specific channel types and quantities to be joined using CSJ joiners.

PRE-ASSEMBLY OF SPLICED RIDGE BEAM

Ridge Beam Component Identification

Identify and prepare ridge beam parts (97AL, 97AR, ZARSP) for assembly.

Ridge Beam Assembly Steps

Assemble ridge beam parts using TEK SCREW DRIVER BIT and SELF DRILLING TEK SCREW.

JOINING SPLICED RIDGE BEAM

DOOR PANEL ASSEMBLY

DOOR PANEL HINGE AND HASP FITTING

Padbolt Hasp Attachment

Instructions for attaching the padbolt hasp, including drilling holes for alignment.

PANEL CONSTRUCTION AND INTERCONNECTION

Wall Panel Orientation Warning

Ensure front and rear wall panels are not installed upside down for correct assembly.

ROOF CONSTRUCTION AND FIXING

FINAL CONSTRUCTION AND ANCHORING

Shed Anchoring Procedure

Instructions for drilling holes and using anchors to secure the shed to the ground.

Related product manuals