8 9
First use
ON
OFF
Slow green icker
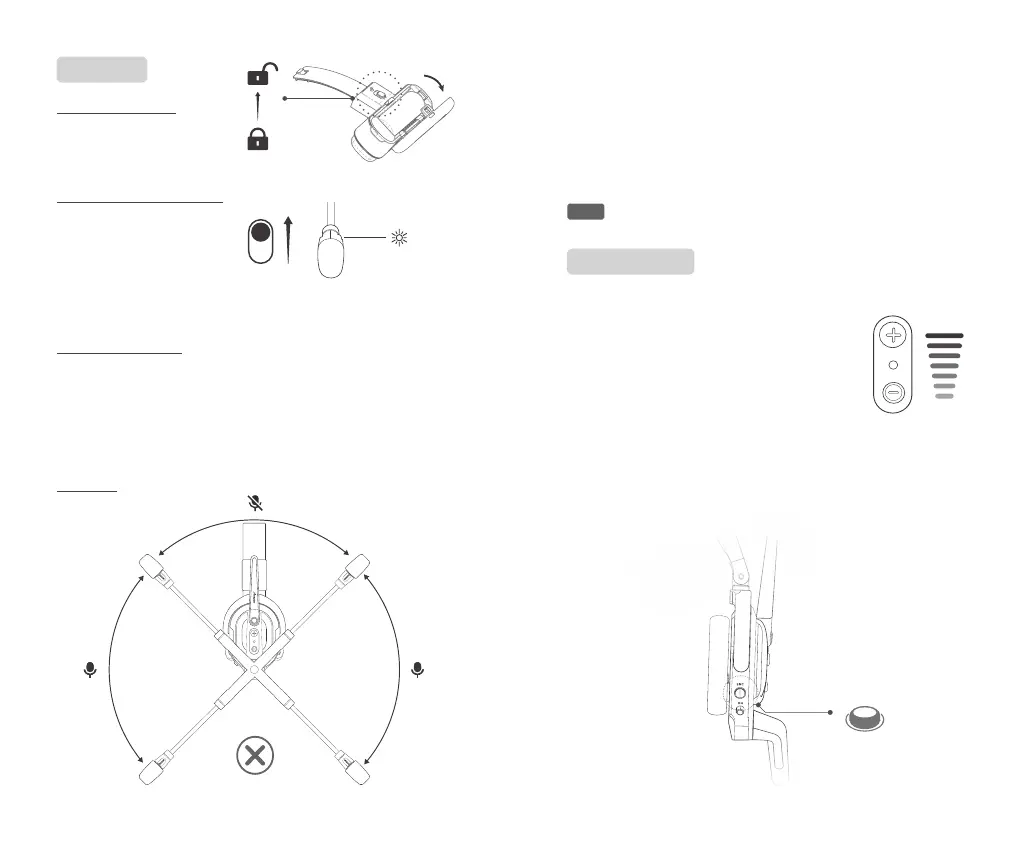
·As the picture shown, when the microphone boom is placed at 55° , the
inidicator will remain on with red light and the microphone is muted.
·To turn on the microphone, push the microphone boom forward to
55° the indicator will remain on with a green light.
·You will hear a “Toot” voice prompt, when the microphone is turned
on/o.
Note:Maximum swivel angle of the boom axle is 115° .
As the picture shown, open
the battery slot and put in
the battery.
STEP 1
Push the host and remote
headsets’ power switch to “ON”,
the headset will be powered
on and play “Power On”
voice prompt. Indicator will
show a slow green icker.
STEP 2
Headset connection
·Host and remote headsets are pre-paired in default. The headsets
will automatically start connecting when powered on.
·The remote headsets will play “Connected" voice prompt once
successfully connected to the host headset.
STEP 3
Turn on the microphone
STEP 4
Volume control
1.Push the volume “+” or “-” button on the side of
the headset to turn the volume up or down.
2.The volume “+” or “-”button on the headsets
can only be used for hearing volume control, not
the microphone volume nor the sound eect.
3.The headsets have 7-level adjustable volumes.
and is initially set to level 4. The headset can
remember the last setting of the volume level.
ENC
4.The environmental noise cancellation (ENC) is set to be ON by
default when the headset's powered on. You can manually turn o the
ENC mode by clicking the ENC switch button.
 Loading...