1. Turn the watch over and select the correct size Phillips
screwdriver (the fastening is very tight, so the screws
will strip easily if you use the wrong size or type of
screwdriver).
2. Remove all six screws from the back of the case, and
set aside so they will not get lost.
3. Gently pry the watch back
away from the case front,
using the gap near the
middle button. The electronics
module will come away with
the case back. You will have
to slide the back downwards
to free the electronics module
from the button actuator bars.
The lanyard will also come loose - set it aside.
4. Hold the case back with
electronics module face up
in one hand. Use your other
hand to gently pull the
electronics module loose
from the case back. The
green circuit board will
come away with the module.
Try to leave the gray rubber
gasket in place (see step 7).
5. Turn the electronics module over to see the battery.
Use a small flat head screwdriver to gently push
the silver battery hold-down tab out of the way (it
is held in place with spring tension). With the
battery hold-down tab out of the way, you can
shake or pry the old battery loose.
6. Install a new CR2032 battery with + terminal
facing up.
7. If the gray gasket came loose from the case back,
reinstall it now.
a. First, line up the black gasket holder on top of the
case back, with the beveled side facing up.
b. Orient the gasket correctly. The three dark gray
pads must be facing up (away from the case
back).
c. Finally, put the gasket on top of the gasket
holder, and gently push both into the case back
until they pop into place.
8. Turn the electronics module over so that the battery
is facing the inside of the case back. Gently push the
electronics module down into the gray rubber
gasket, until it seats. It will be firmly in position if
this is done correctly.
9. Slide the button set out of the front case (you’ll see
that the three buttons are joined together into one
assembly).
10. Turn the button actuator set so that the flat part of
the buttons are facing the outside of the case back.
Now, slide the button set into the top of the case
back & electronics module assembly, so that the
button actuator bars slide down into the slots
between the top of the gray rubber gasket and the
case back.
11. Now, pick up the case front, holding it so that the
outside (front of the watch) is touching your palm.
Put the lanyard back into its slot in the bottom of
the case front.
12. Flip the electronics/case back assembly over and
gently press it back into the front case of the watch,
until it seats. The buttons should now work normally.
13. Replace and tighten the six screws in the case back.
Screws must be tight for the watch to be water
resistant again.
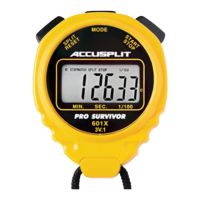
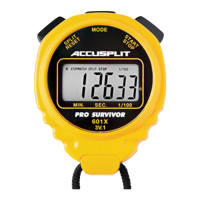
ACCUSPLIT®
A601X3V Stopwatch
Battery Changing Instructions
When the display on your watch begins to go dim, or if it goes blank, the watch needs a new battery.
The watch uses a high capacity CR2032 Lithium battery, which has an expected life of more than five
years in this watch.
To change the battery, you will need a set of large jeweler’s screwdrivers (including Phillips head).
Note: If this looks too complicated, you can always send your watch back to ACCUSPLIT for battery
changing instead. See www.ACCUSPLIT.com/support for details.
9:49
53
ACCUSPLIT, Inc. (Support/Repair) • 3090 Independence Drive, Suite 148 • Livermore, CA 94551 USA
800-935-1996 • 925-290-1900 • FAX 925-290-1930 • www.ACCUSPLIT.com • support@ACCUSPLIT.com
998-310
Electronics module
Battery
Gray rubber
gasket
Battery hold-down tab