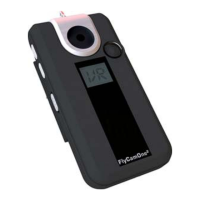
Inbetriebnahme Start your FCO
Schieben Sie den Schalter [1]
auf die Position „ON“, im
Display erscheint „RY“ für
„Ready“ (engl. – bereit).
Starten und stoppen Sie die
Aktion jeweils über die Taste [3]
oder über die FCO
2
Baseplate,
durch schließen der Verbindung
3 und 4.
Die Aufnahme wird automatisch
gestoppt, so bald die SD Karte
voll ist.
Press the button M for 5
seconds, on the display
appears “RY” for ready. Start
and stop each time by pressing
or by shutting the base 3 and 4.
The recording stops by itself
when the SD-card is full.
Auslesen der Daten Readout of datas
Verbinden Sie die FCO
2
mit
dem enthaltenen USB Kabel
und Ihrem PC. Die FCO
2
wird in
ihrem PC als eigenständiges
Laufwerk angezeigt. Bitte
beachten Sie, dass
Netzlaufwerke das FCO
2
-
Laufwerk überlagern können.
Trennen Sie die Netzlaufwerke.
Natürlich können Sie die SD-
Karte der FCO
2
direkt in ein
Kartenlesegerät einlegen.
Connect the FCO² with the
attached USB-cable and your
pc.
The FCO² will be displayed as a
single drive. Attend that network
drives can interfere the FCO²
drive. Cut the network drives.
Of course you can connect the
SD-card directly to your pc.
Aufladen der FCO
To charge the FCO
Sobald die FCO
2
mit Ihrem PC
verbunden ist, beginnt
automatisch der Ladevorgang.
Im Display angezeigt durch CH.
Voll aufgeladen zeigt das
Display FL an. Zusätzlich kann
die FCO
2
an eine externe
Stromquelle (7,4 V 300mAh)
angeschlossen werden.
The charging start on its own by
connecting the FCO² with the
pc. The display indicates CH
then. If the FCO² is fully loaded
the display indicates FL.
Furthermore the FCO² can be
connected to an external power
source (7,4V 300 mAh).
 Loading...