ADCA
VALSTEAM
ADCA
We reserve the right to change the design and material of this product without notice.
IMI RP45.02 E 07.16
Procedure:
1. All stop valves should be close.
2. Regulation spring must be relaxed. If not, release tension by turning the adjustment screw counter-clockwise.
3. Open downstream stop valve.
4. Open slowly the upstream stop valve, in order to avoid water hammer damaging, until the input pressure
reaches its limit.
5. Adjust the regulation spring by turning the adjustment screw clockwise, while observing the output pressure
gauge, until the reduced pressure is reached. (There must be some medium consumption on the outlet side
during this process).
6. When the system is stable a readjustment of the regulation spring may be needed.
7. The valve is ready.
Periodical checking:
24 hours after the start up, it is recommended to check pipe connections for leaks and retighten the connections if
necessary.
MAINTENANCE
• We recommend that the pressure reducing valves are serviced as necessary. Pressure reducing valves should
be checked periodically (at least yearly), to verify that they are operating correctly and to clean the internal parts
and screen (if any).
• When reassembling make sure that all gasket faces are clean and always use a new gasket. Tighten cover
bolts uniformly in a diagonal sequence.
• Valves in store for long periods should have their adjusting spring relaxed.
• For further information refer to the relevant RP brochure or consult our Sales Office.
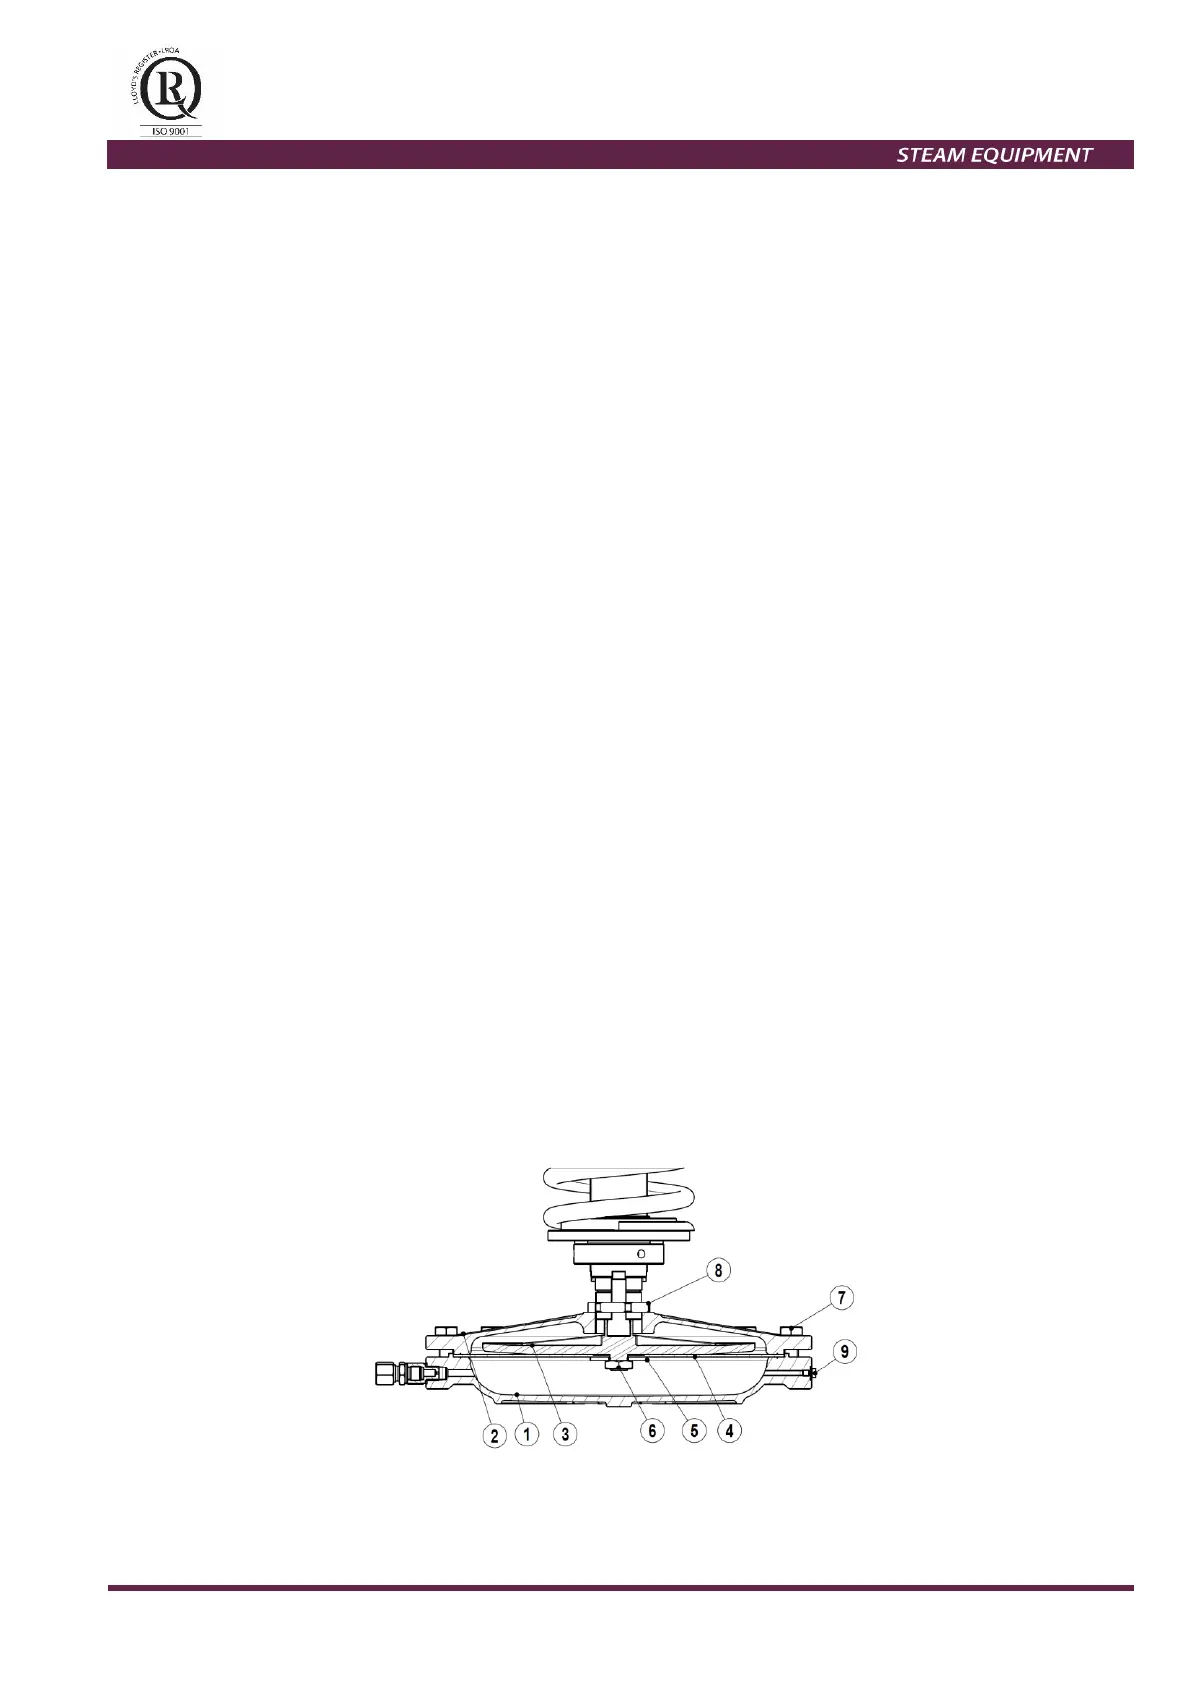
Replacement of actuator diaphragm:
In reference to the fig.1 proceed as follow:
1. Isolate the valve and make sure the system is depressurized.
2. Drain the actuator and condensate vessel through the actuator vent screw (9), if applicable.
3. Relax the valve regulation spring, turning the key anti-clockwise.
4. Remove the actuator from the valve by unscrewing the nut (8) and turning the actuator anti-clockwise.
5. Remove the screws and nuts (7).
6. Remove the bottom cover (1).
7. Untighten the nut (6), remove the washer (5) and replace the diaphragm (4).
8. Refit all the items in reverse order (tighten the actuator bolts evenly).
9. Fill the condensate vessel again as the above instructions, if applicable
Fig. 1 – Actuator
 Loading...