– 2 –
BATTERY CAPACITY CALCULATIONS (Cont’d)
2. Fill in the Total PS24 MODULE Load Worksheet, below, to deter-
mine the PS24’s total standby and alarm current loading. Then use
the BATTERY CAPACITY CALCULATION WORKSHEET to
determine the capacity required for each of the PS24’s batteries.
Select 12-volt batteries from the BATTERY SELECTION TABLE
having capacities which are greater than, or equal to, the calculated
capacities.
BATTERY CALCULATION WORKSHEETS
Total Control Panel Load Standby Alarm
Total control panel load at 12V (Note 1)
(from control panel worksheets)
Equivalent control panel load at 24V
(multiply above values by 0.62)
Total PS24 Module Load Worksheet Standby Alarm
Total OUTPUT A load (Notes 2, 3)
(total for all devices on OUTPUT A) (570 mA max) (1.7A max)
Total OUTPUT B load (Notes 2, 3)
(total for all devices on OUTPUT B) (570 mA max) (1.7A max)
CONTROL BATTERY POWER load
(equivalent control panel load at 24V
as calculated above)
PS24 PCB current 40 mA 40 mA
(these values are fixed)
Total PS24 module load (Note 3)
(add currents in columns above) (610 mA max) (4.18A max)
NOTE 1:
Input A and Input B draw 50mA from the control panel when
9.5V–14V is applied to actuate the corresponding output. Be
sure to include this in the control panel’s total load.
NOTE 2:
When configured for auxiliary power operation, enter the
continuous load in the standby column and enter the
continuous load plus any additional intermittent alarm load in
the alarm column. When configured for bell circuit operation,
enter “0” in the standby column and enter total load in the
alarm column.
NOTE 3:
The largest battery capacity supported by the PS24 is
17.2AH. Total PS24 standby current must be limited to
610mA maximum for this battery.
BATTERY CAPACITY CALCULATION WORKSHEET
Calculated
Capacity Formula Value
Standby Total standby load x 24 hours x 1.1 contingency
Capacity factor (use total PS24 standby load)
Alarm Total alarm load x alarm time in hours
Capacity i.e.: 5 minutes = 0.083 hours
15 minutes = 0.250 hours
(use total PS24 alarm load)
Total Add standby and alarm capacities
Capacity
BATTERY SELECTION TABLE
Amp Yuasa
Hours Model Number Comments
7 AH NP7-12 2 required
12 AH NP12-12 2 required
17.2 AH NPG18-12 2 required
NOTE:
Use two batteries from the same manufacturer, with the
same capacity and with approximately the same age.
Replace both batteries at the same time even if only one
battery is low.
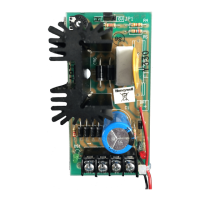
CONNECTIONS AND POWER UP PROCEDURES
A 7-wire harness, consisting of six # 22 AWG and one #16 AWG wires,
is provided for making connections between the PS24 and the control
panel. Use the #22 AWG wires to make connections to the PS24’s
INPUT A, INPUT B, LOW AC, and LOW BATTERY terminals. Use the
#16 AWG wire to make connections to the PS24’s Earth Ground
terminal.
Wire AC power and earth ground as shown in Figure 3. DO NOT
APPLY AC POWER AT THIS TIME.
• Wire INPUT A, INPUT B, OUTPUT A and OUTPUT B for the desired
auxiliary power or bell circuit operation as shown in Figure 3. Devices
powered from OUTPUT A or from OUTPUT B must be rated for 21–
30VFW (full wave rectified, unfiltered) operation.
The following UL Listed devices are compatible with outputs
configured for auxiliary power operation.
First Inertia Switch
Model FIRERAY 1401
Photoelctric beam smoke detector
ESL Model DH-1224 12/24V electromagnetic fire door holder
ESL Model DH-24120 24/120V electromagnetic fire door holder
• Use UL listed, polarized fire indication devices on outputs configured
for EOLR supervised bell circuit operation. Refer to the tables below
for examples of compatible fire indication devices and for
recommended limits on bell circuit wire run length.
• Wire the LOW AC and LOW BATTERY outputs to separate control
panel EOLR supervised zones. Program the respective control
panel's zones for 24-hour trouble response.
• Connect the PS24's CONTROL BATTERY POWER output fast-on
terminals to the control panel's battery terminals, using the battery
cables supplied with the control panel.
• Apply AC power and verify that the proper battery float charging
voltage (27.0–27.6VDC) is present across the BATT 1 (+) and BATT 2
(–) terminals. Then connect two 12V lead-acid batteries as shown in
Figure 3, using the battery cables supplied.
NOTE: The battery cable’s female Fast-on terminals should be
clipped off when making connections to the 17.2 AH batteries.
• Verify that the LOW AC and LOW BATTERY outputs are in the not-
faulted state (i.e.: shorted to ground through 220 ohms).
• Verify that OUTPUT A and OUTPUT B are in the proper state (i.e.:
24V for auxiliary power operation; not active for bell circuit operation).
 Loading...