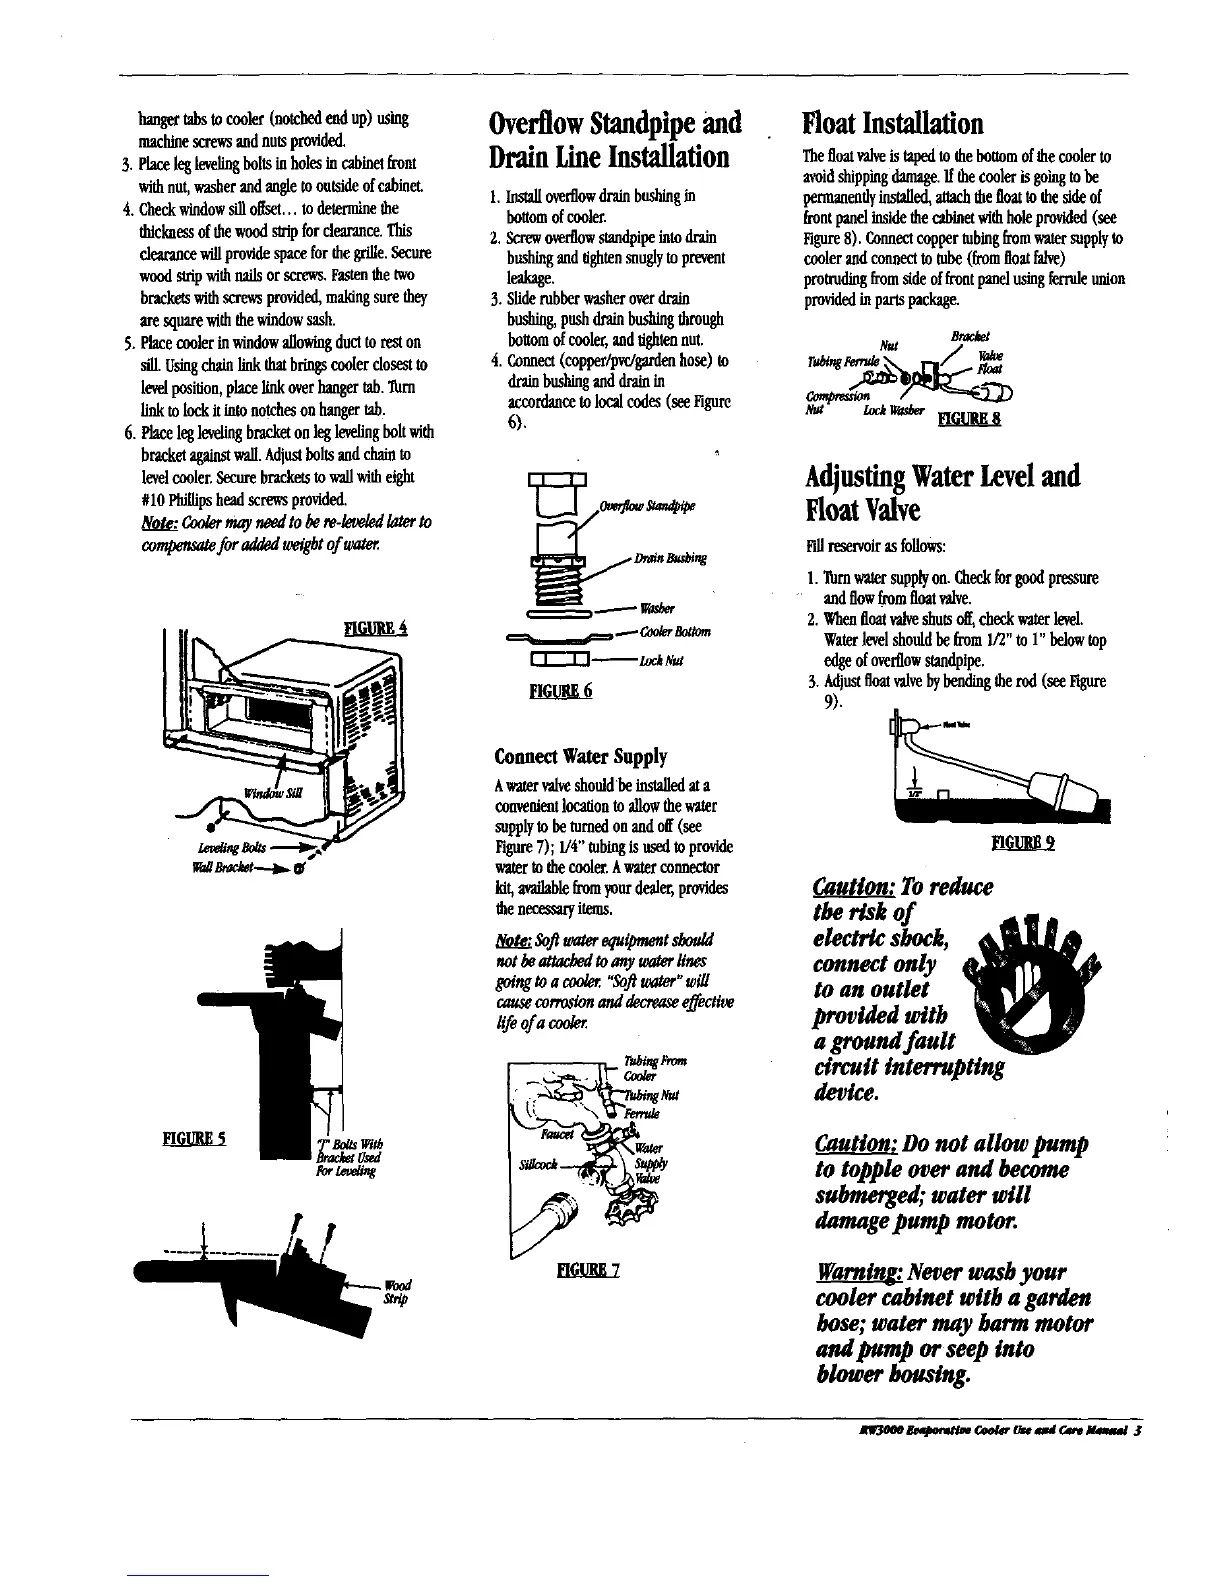
hang_tabstocoo_ (not_ endup)using
machinescrewsandnutsprovided.
3. Placeleglevelingbottsinholesincabinetfront
withnut,washerandangletooutsideofcabinet.
4. Checkwindowsilloffset..,to determinethe
thicknessofthewoodstripforclearance.This
clearancewillprovidespaceforthegrille.Secure
woodstopwithnailsorscrews.Fastenthetwo
bracketswithscrewsprovided,makingsurethey
aresquarewiththewindowsash.
5.Placecoolerinwindowallowingductto reston
sill.Usingchainlinkthatbringscoolerclosestto
levelposition,placelinkoverbangertab.'l'urn
linktolockRintonotcheson hangertab.
6. Placeleglevelingbracketon leglevelingboltwith
bracketagainstwall.Adiuslboltsandchainto
levelcooler.Securebracketstowallwitheight
#10Phillipsheadscrewsprovided.
_oU.. Coolerraayneedtob*r*-Ia_ht laUrto
compensaefor addedweigbtof water
tga,CBrac_t---._
ES
!
su_
OverflowStandpipeand
DrainLineInstallation
1. Installoverflowdrainbushingin
bottomofcooler.
2. Screwoverflowstandpipeintodrain
bushingandtightensnuglytoprevent
leakage.
3.Sliderubberwasheroverdrain
bushing,pushdrainbushingthrough
bottomofcooler,andtightennut.
4.Connect(copper/pvc/gardenhose)to
drainbushinganddrainin
accordancetolocalcodes(seeFigure
6).
I-I----I"1_/zr.t _.t
Connert Water Supply
Awaterval_eshouldbeinstalledata
convenientlocationtoa]lowthewater
supplytobeturnedon andoff(see
Figure7); 1/4"tubingis usedtoprovide
watertothecooles.Awaterconnector
kit,availablefrom_ourdealer,provides
the necessaryitems,
NaU:$oflucaerequipraentsbould
not be attachedto anywaterUnes
goingtoa cooler "Soflwater_will
causecorrosionanddecreasee_ctive
l@ofa_
FloatInstallation
Thefloatvalveistapedtothebottomofthecoolerto
avoidshippingdamage,ffthecoolerisgoingtobe
permanentlyinstalled,attachthefloattothesideof
frontpanelinsidethecabinetwithholeprovided(see
Figure8). Connectcoppertubingfromwatersupplyto
coolerandconnectto tube(fromfloatfalve)
protrudingfromsideoffrontpanelusingferruleunion
providedinpartspackage.
Bracket
_a
zoc__*" _GURE8
AdjustingWaterLeveland
FloatValve
Fillresen,oirasfollows:
1.Turnwatersupplyon.Checkforgoodpressure
andflowfromfloatvane.
2.Whenfloatvalwshutsoff,checkwaterlevel.
Waterlevelshouldbe from1/2"to 1"belowtop
edgeof overflowstandpipe.
3.Adjustfloatvalvebybendingtherod (seeFigure
9).
_r,_ To reduce
theriskof
electric shock,
connect only
to an outlet
provided with
a groundfault
circuit interrupting
device.
Cautio_£.Do not allow pump
to topple over and become
submerged; water will
damage pump motor.
Never wash your
cooler cabinet with a garden
hose; water may harm motor
and pump or seep into
blower housing.
_ _*#emtt_ eaelGr _ _ Oa'e M_aal $
 Loading...