4
Print Screen, Scroll Lock & Pause Break
These keys perform standard keyboard functions which will depend on your Operating System and the application.
Custom Layouts
The QWERTY and Dvorak layouts can be independently customized with key remapping and macros. Virtually any key can be remapped, and most single
keys or multi-key combinations (alphanumeric key plus one or more modiers) can be used to trigger macros. Each layout is saved separately to the
onboard memory so changes made to one layout never affect the other.
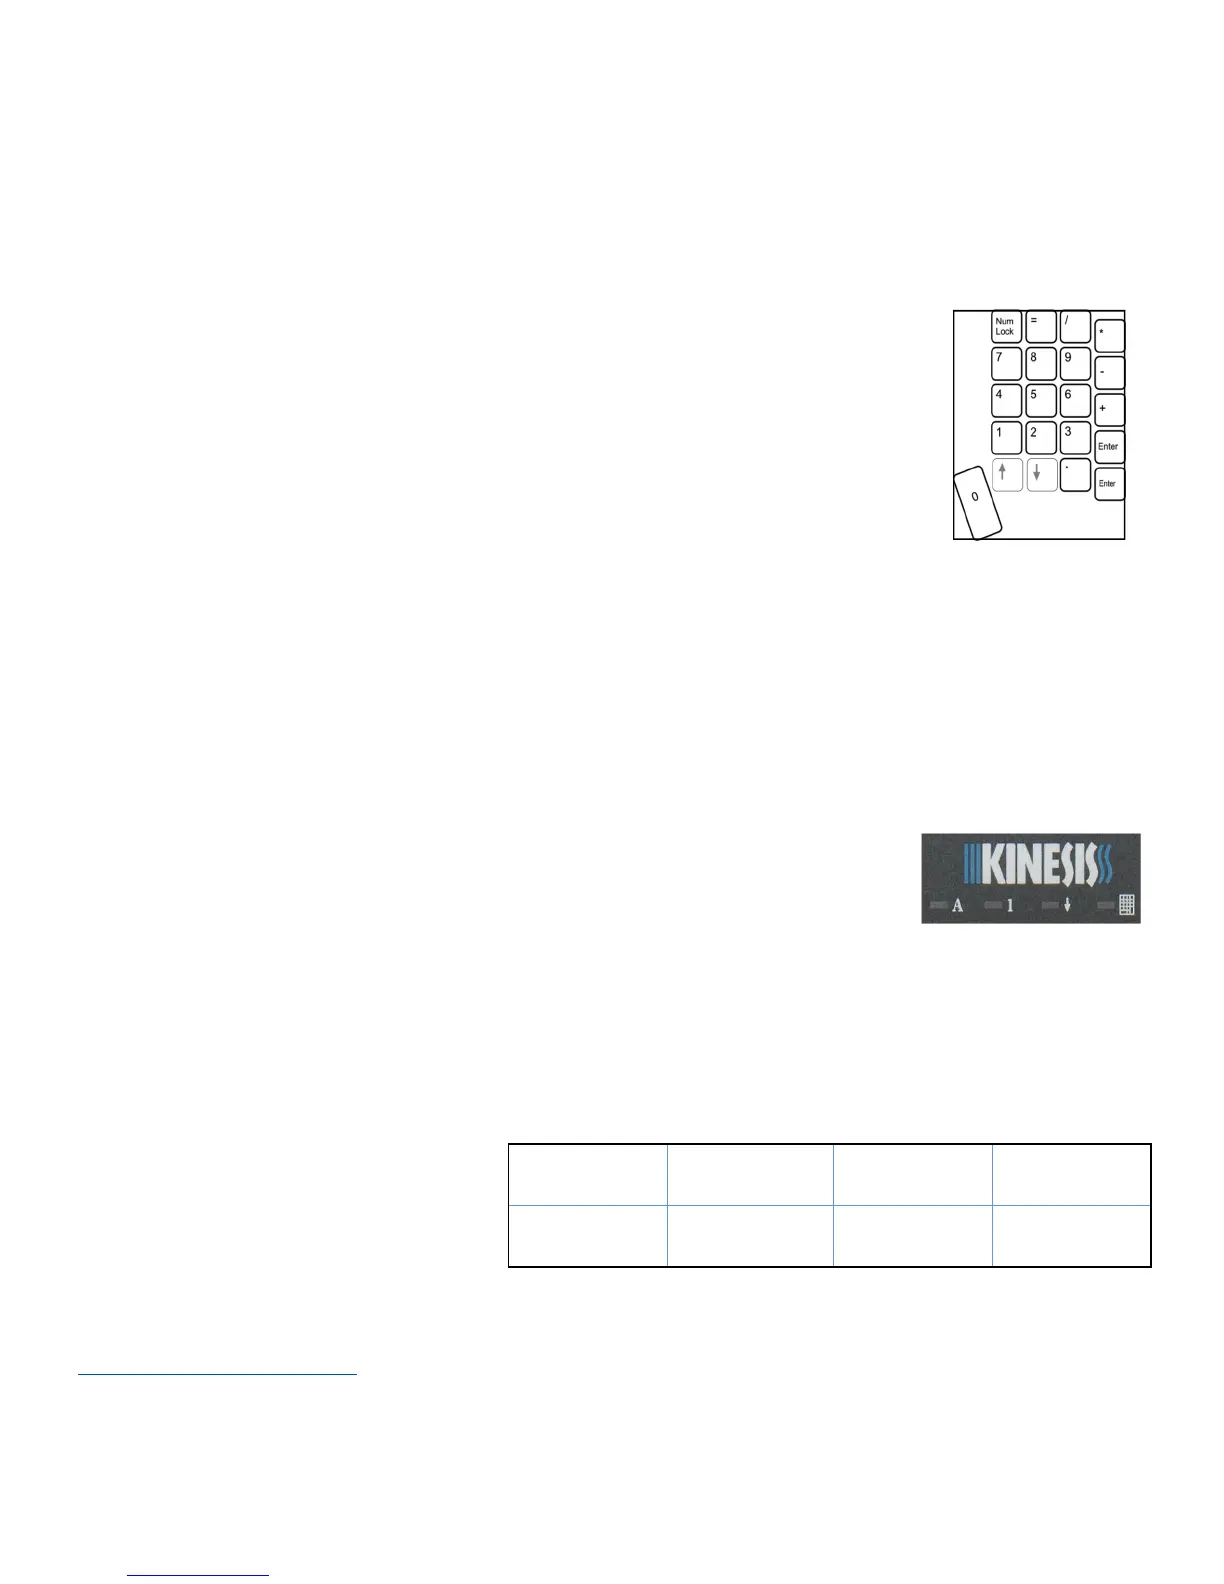
Keypad Layer
Each layout features a second virtual (embedded) keyboard layer that can be customized by remapping keys or storing
macros. The keypad layer can be easily “toggled” on or off with the Keypad Key. Most keys have the same default action in
each layer, but a numeric keypad (10-key) is located in the right key well, thus the name “keypad layer.” Numeric keypad
actions are legended on the front side of the Advantage2 keys. Note: PC use requires Num lock to be on for numeric actions.
Frequent keypad users will benet from an optional Advantage foot pedal which can be used as “keypad shift” to access the
keypad layer by pressing and holding while typing numbers, then releasing to return to normal typing.
Using advanced programming features, any other key may be remapped to perform keypad toggle or keypad shift actions (see User’s Manual).
Palm pads and integrated palm rest
The palm rests are designed to provide comfortable support for your hands while not actively typing, though many users rest their palms some of the time
while typing in order to relieve strain on the neck and shoulders. For maximum typing speed hold your palms slightly above the palm rests. Do not expect
to reach all of the keys on the keyboard without moving your hands from a stationary position on the palm rests. For maximum comfort, install the self-
adhesive palm pads. Replacement pads are available for purchase.
LED Indicator Lights
The blue LEDs located near the center of the keyboard are used to indicate that status of the keyboard. The lights will
illuminate when one of the four basic modes are active (See image at right). The LED indicator lights also ash during
SmartSet programming actions (slow or fast) to indicate the keyboard’s temporary programming status (4x when a
feature is activated, and 1x or 2x when a feature is deactivated).
Connecting an optional foot pedal
Plug the foot pedal into the telephone-style (RJ11) connector at the back of the keyboard. The single foot pedal (and middle pedal on the triple foot pedal)
“shifts” on the keypad layer and “Keypad “ LED (press to activate keypad layer, release to return to top level). It can also be custom-programmed just
like any key on the keyboard (remapping and macros). The left and right pedals of the triple foot pedal perform the Tab and Enter functions and can also
be custom programmed.
Advanced Features
For information and instructions on Advanced Features of
the Advantage2, please consult the User’s Manual.
Resources
To download the User’s Manual or the latest version of the Advantage2 rmware, please visit the Advantage2 resources page at
kinesis.com/advantage2-resources. To contact Technical Support at Kinesis, either email or call:
• Email tech@kinesis.com
• Call 800-454-6374 or 425-402-8100 (8:30-11:30am & 12:30-4:30pm Pacic Time).
Fig 8. 10-Key in Keypad Layer
Version July 18 2016
High Performance Macros Global & individual Macro
Playback Speed Adjustment
Firmware Updates Hotkey Layouts
Visualize/Share/Backup
Custom Layouts
Using tokens, HID codes to
remap keys
Power User Mode Accessing the V-Drive™
Fig 10. Advanced features
Caps lock Num lock Scroll lock Keypad
Fig 9. Keyboard LEDs
 Loading...