4. The ACRG12 has a 6 pin, 4 pin, 3 pin & 2 pin connectors extending from the front of the relay kit. These
connectors mate with the air conditioner / heat pump. When making this connection, verify that the plugs are
properly aligned and have snapped together securely.
5. Provided with the ACRG12, is a divider plate which is used to separate the warm return air from the cold supply
air. If the roof thickness is greater than 2.5”, you MUST use the additional divider provided.
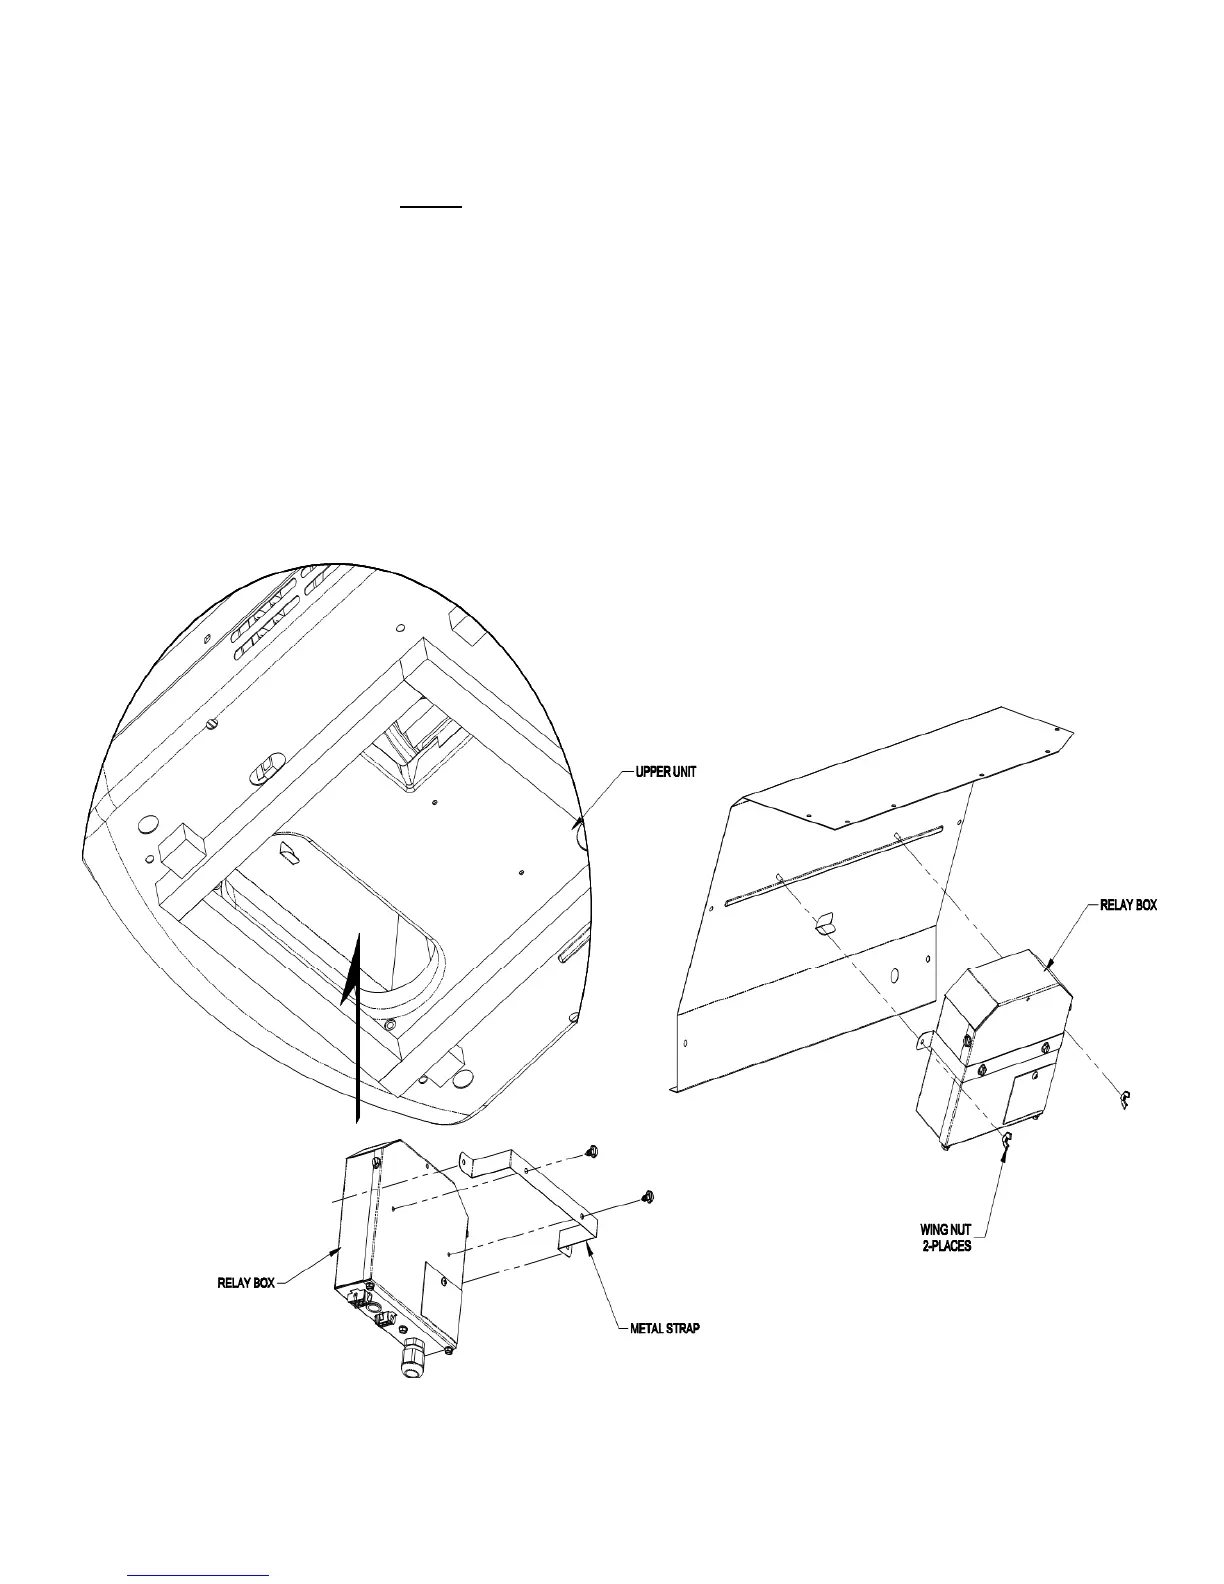
ALTERNATIVE RELAY BOX MOUNTING PROVISION
For installations that require additional space for ducting, the metal relay box can be removed from the ceiling template.
Please confirm the roof top unit supports the alternative mounting provision before starting the installation.
1. Remove the two 5/16” Hex Head Screws from the bottom of the relay box.
2. Attach the metal strap to the relay box using the two 5/16” Hex Head screws
3. Connect all wires to relay box before installing in the roof top unit
4. Locate the two wing nuts for attaching the relay box to the roof top unit evaporator cover.
5. Align the relay box & metal strap onto the studs and tighten the wing nuts into place.
6. Ensure the relay box is properly secured
7. See below illustrations for additional clarification