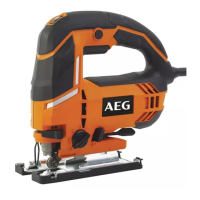
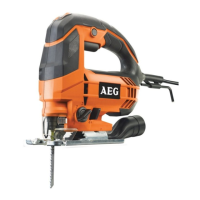
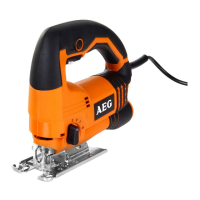
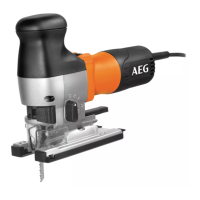
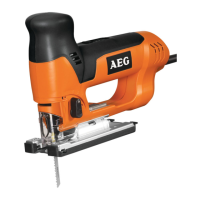
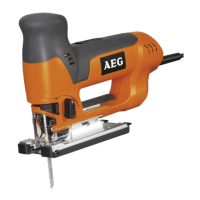
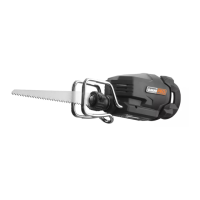
This document describes the AEG STEP100X jigsaw, a versatile power tool designed for cutting various materials.
Function Description:
The AEG STEP100X jigsaw is intended for cutting wood, plastic, and metal. It is capable of performing straight cuts, bevel cuts, curves, and internal cut-outs. The tool's design allows for precise and controlled cutting operations across a range of applications. It features a robust construction and incorporates several functionalities to enhance user experience and cutting efficiency. The saw blade can be easily inserted and locked into the Fixtec holder, ensuring secure attachment during operation. The tool also includes a dust extraction system to maintain a clean working environment and improve visibility of the cutting line. Furthermore, it offers electronic speed adjustment, allowing users to tailor the cutting speed to the specific material and application, thereby optimizing performance and finish quality. The orbital action feature, with multiple settings, further enhances cutting speed and efficiency, especially in softer materials. For flush cutting applications, the base plate can be adjusted to allow the blade to cut close to a surface.
Important Technical Specifications:
- Model: STEP100X
- Rated Power: 700 W
- Voltage: 220-240 V~50Hz
- Stroke Rate Under No-Load: 1000-3200 min⁻¹
- Length of Stroke: 20 mm
- Bevel Cuts Up To: 45°
- Cutting Depth Max. In:
- Wood: 100 mm
- Steel: 10 mm
- Aluminium: 20 mm
- Weight (according to EPTA-Procedure 01/2003): 2.3 kg
- Safety Class: Class II (double insulated)
Usage Features:
The STEP100X jigsaw is designed with several features to enhance usability and performance:
- FIXTEC Blade Change System: This system allows for quick and tool-free saw blade changes. To insert a blade, the user unlocks the holder, presses the saw blade into the Fixtec holder until it stops, and then locks it. A "TEST" function is available to ensure the blade is correctly seated.
- Dust Extraction: The tool can be connected to a dust extraction system (accessory, not included as standard) to minimize dust and debris during operation. This involves attaching the dust extraction adapter to the tool and then connecting a vacuum hose. The dust blower can be switched on or off to clear the cutting line.
- Orbital Action Adjustment: The jigsaw features an adjustable orbital action with multiple settings (0, 1, 2, 3). Setting 0 provides no orbital action, suitable for fine cuts in hard materials like metal or for precise curves. Higher settings (1, 2, 3) introduce increasing orbital motion, which speeds up cutting in softer materials like wood and plastic, but may result in a rougher cut. The optimal setting depends on the material and desired cut quality.
- Bevel Cutting: The base plate can be adjusted for bevel cuts up to 45 degrees. This involves unlocking the base plate, setting the desired angle using the integrated scale (0°, 15°, 30°, 45°), and then locking the base plate securely.
- Flush Cutting: For cutting close to an edge or surface, the base plate can be adjusted to a flush cutting position. This typically involves unlocking and sliding the base plate forward, allowing the blade to cut flush with the surface.
- Electronic Speed Adjustment: The tool incorporates electronic speed adjustment, allowing the user to select the appropriate stroke rate for different materials. This feature helps in achieving optimal cutting results and prolonging blade life. The speed can be adjusted via a dial or switch, with settings often indicated by numbers or symbols representing different material types (e.g., PLEXI for acrylic, AL for aluminum, wood symbols).
- Start/Stop Switch with Lock-on Function: The jigsaw is equipped with a start/stop switch. For continuous operation, the switch can be locked in the "ON" position. To stop the tool, the switch is pressed again.
- Anti-Splinter Guard (Accessory): An anti-splinter guard can be attached to the base plate to minimize splintering, especially when cutting wood. This accessory helps achieve cleaner cuts.
- Glide Shoe (Accessory): A glide shoe can be attached to the base plate to protect delicate surfaces from scratches during cutting.
Maintenance Features:
- Ventilation Slots: The ventilation slots of the machine must be kept clear at all times to ensure proper cooling and prevent overheating.
- Power Cord Replacement: If the supply cord is damaged, it must be replaced by a repair shop appointed by the manufacturer to avoid hazardous situations.
- Accessory and Spare Parts: Users should only use genuine AEG accessories and spare parts. For components not described in the manual, users should contact AEG service agents.
- Cleaning: Chips and splinters must not be removed while the machine is running. The tool should be cleaned regularly to remove dust and debris, especially from the ventilation slots.
Safety Instructions and Symbols:
The manual emphasizes several safety precautions:
- Read Instructions: Users must read the instructions carefully before starting the machine.
- Personal Protective Equipment: Always wear goggles, gloves, and ear protectors when using the machine. Protective clothing, such as a dust mask, sturdy non-slip footwear, and a helmet, is also recommended.
- Disconnect Power: Always disconnect the plug from the socket before carrying out any work on the machine.
- Mains Connection: Connect only to single-phase AC system voltage as indicated on the rating plate. It is recommended to supply the tool via a residual current device with a rated residual current of 30mA or less.
- Hidden Wiring: Hold the power tool by insulated gripping surfaces when performing an operation where the cutting accessory may contact hidden wiring or its own cord to prevent electric shock.
- Dust Hazard: The dust produced when using this tool may be harmful to health. Do not inhale the dust and wear a suitable dust protection mask.
- Saw Blades: Do not use cracked or distorted saw blades.
- Plunge Cuts: Plunge cuts without pre-drilling a hole are possible with soft materials (wood, light building materials). Harder materials (metals) must first be drilled with a hole corresponding to the size of the saw blade.
- Working in Walls/Ceilings/Floors: Take care to avoid electric cables and gas or water pipes.
- Disposal: Do not dispose of electric tools with household waste. Electric tools and electronic equipment that have reached the end of their life must be collected separately and returned to an environmentally compatible recycling facility.
Symbols Used in the Manual:
- Read Instructions: A symbol indicating the need to read the instructions carefully.
- Wear Goggles: A symbol advising the use of eye protection.
- Wear Gloves: A symbol advising the use of hand protection.
- Caution/Warning/Danger: A triangular exclamation mark symbol.
- Disconnect Plug: A symbol indicating the need to disconnect the plug from the socket.
- Accessory: A symbol indicating an item that is not included as standard equipment but is available as an accessory.
- Do Not Dispose with Household Waste: A symbol indicating that the product should not be disposed of with general household waste.
- Class II Tool: A square within a square symbol indicating double insulation.
- Regulatory Compliance Mark (RCM): A symbol indicating compliance with regulatory requirements.
- PLEXI: A symbol representing synthetic material like Perspex® (Plexiglas®).
- AL: A symbol representing aluminum.
- Wood: A symbol representing wood material.
- Metal: A symbol representing metal materials (sheets, pipes, corrugated sheet).