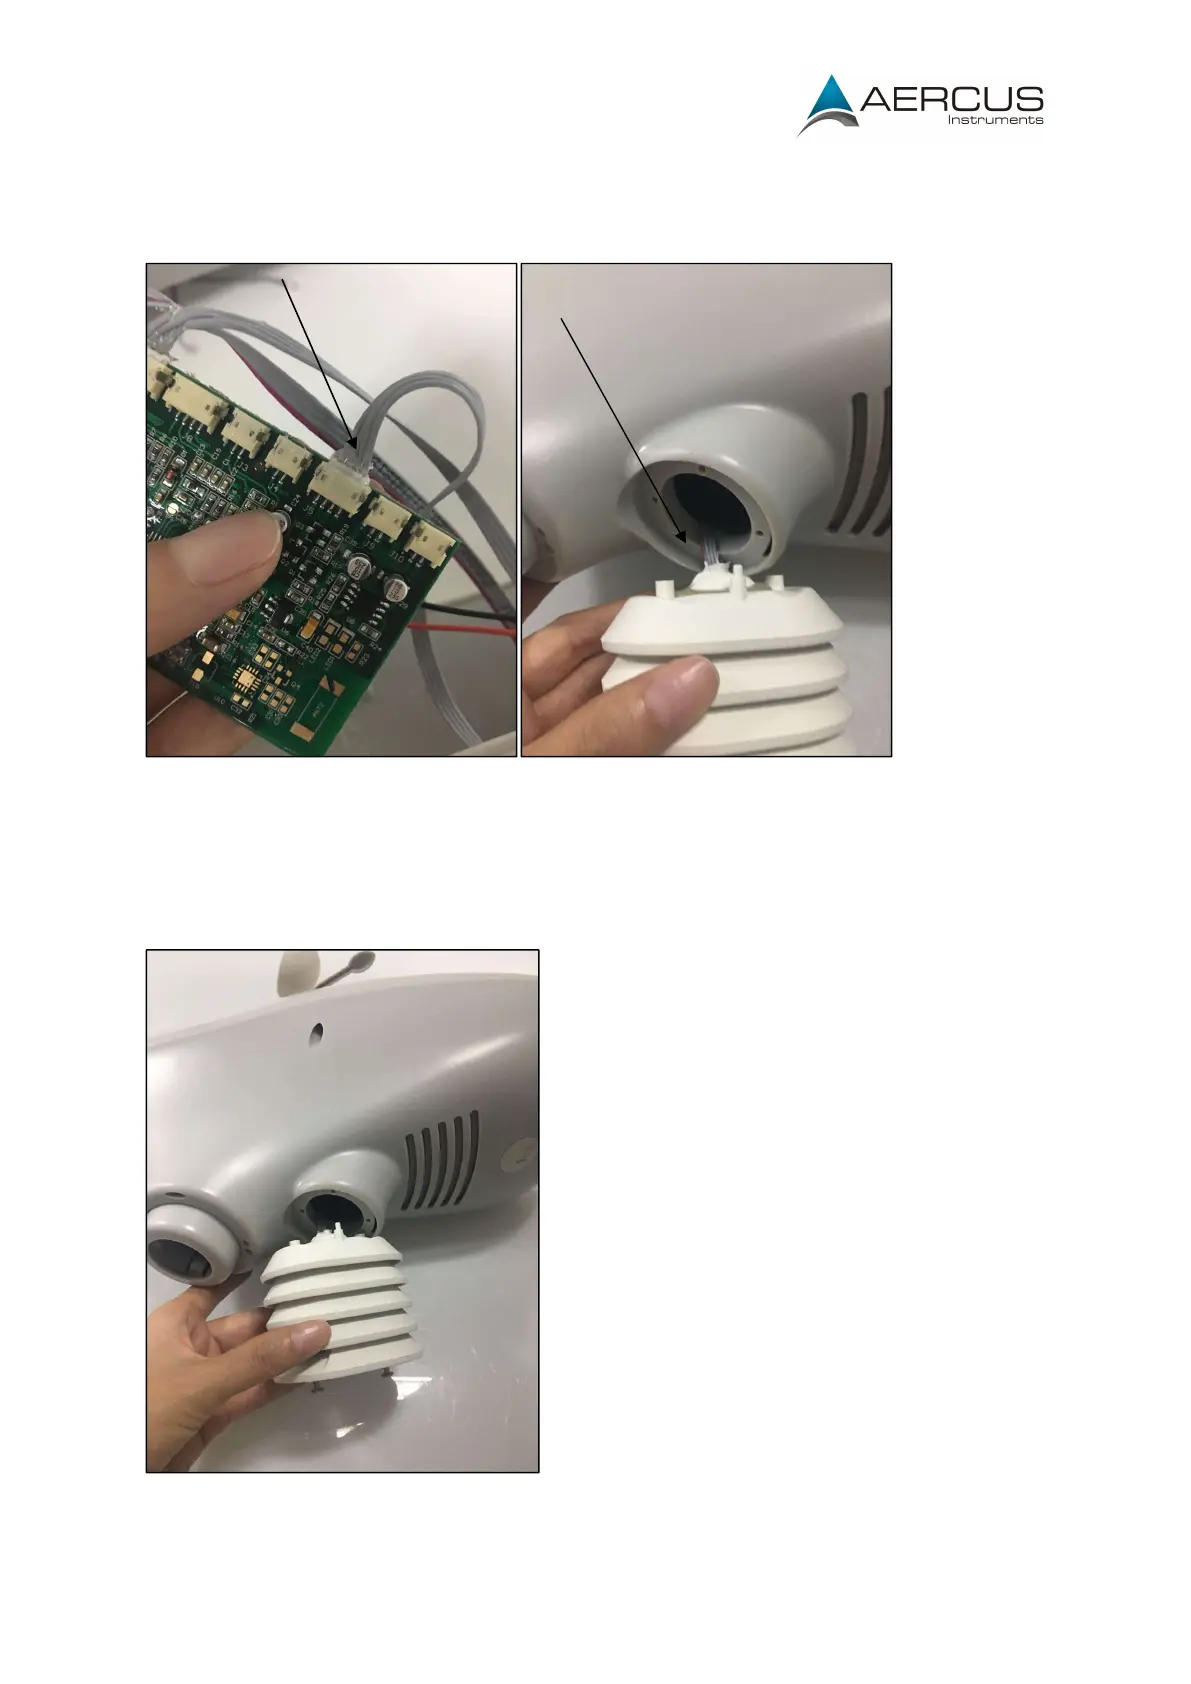
Step 5: Disconnect the cable (marked J5) from the PCB (circuit board) as shown in Figure 3. If
you trace this cable from the hole leading to the solar shield, to confirm you are disconnecting
the correct cable
Figure 3: Removing the signal cable from the PCB
Step 6: Gently pull out the whole Thermo/Hygro sensor, taking care to feed the cable through
and cable routing or ties.
Step 7: Install the new Thermo/Hygro sensor and reverse the disassembly process.
Figure 4: Installing a new sensor
 Loading...