6
Figure 2:
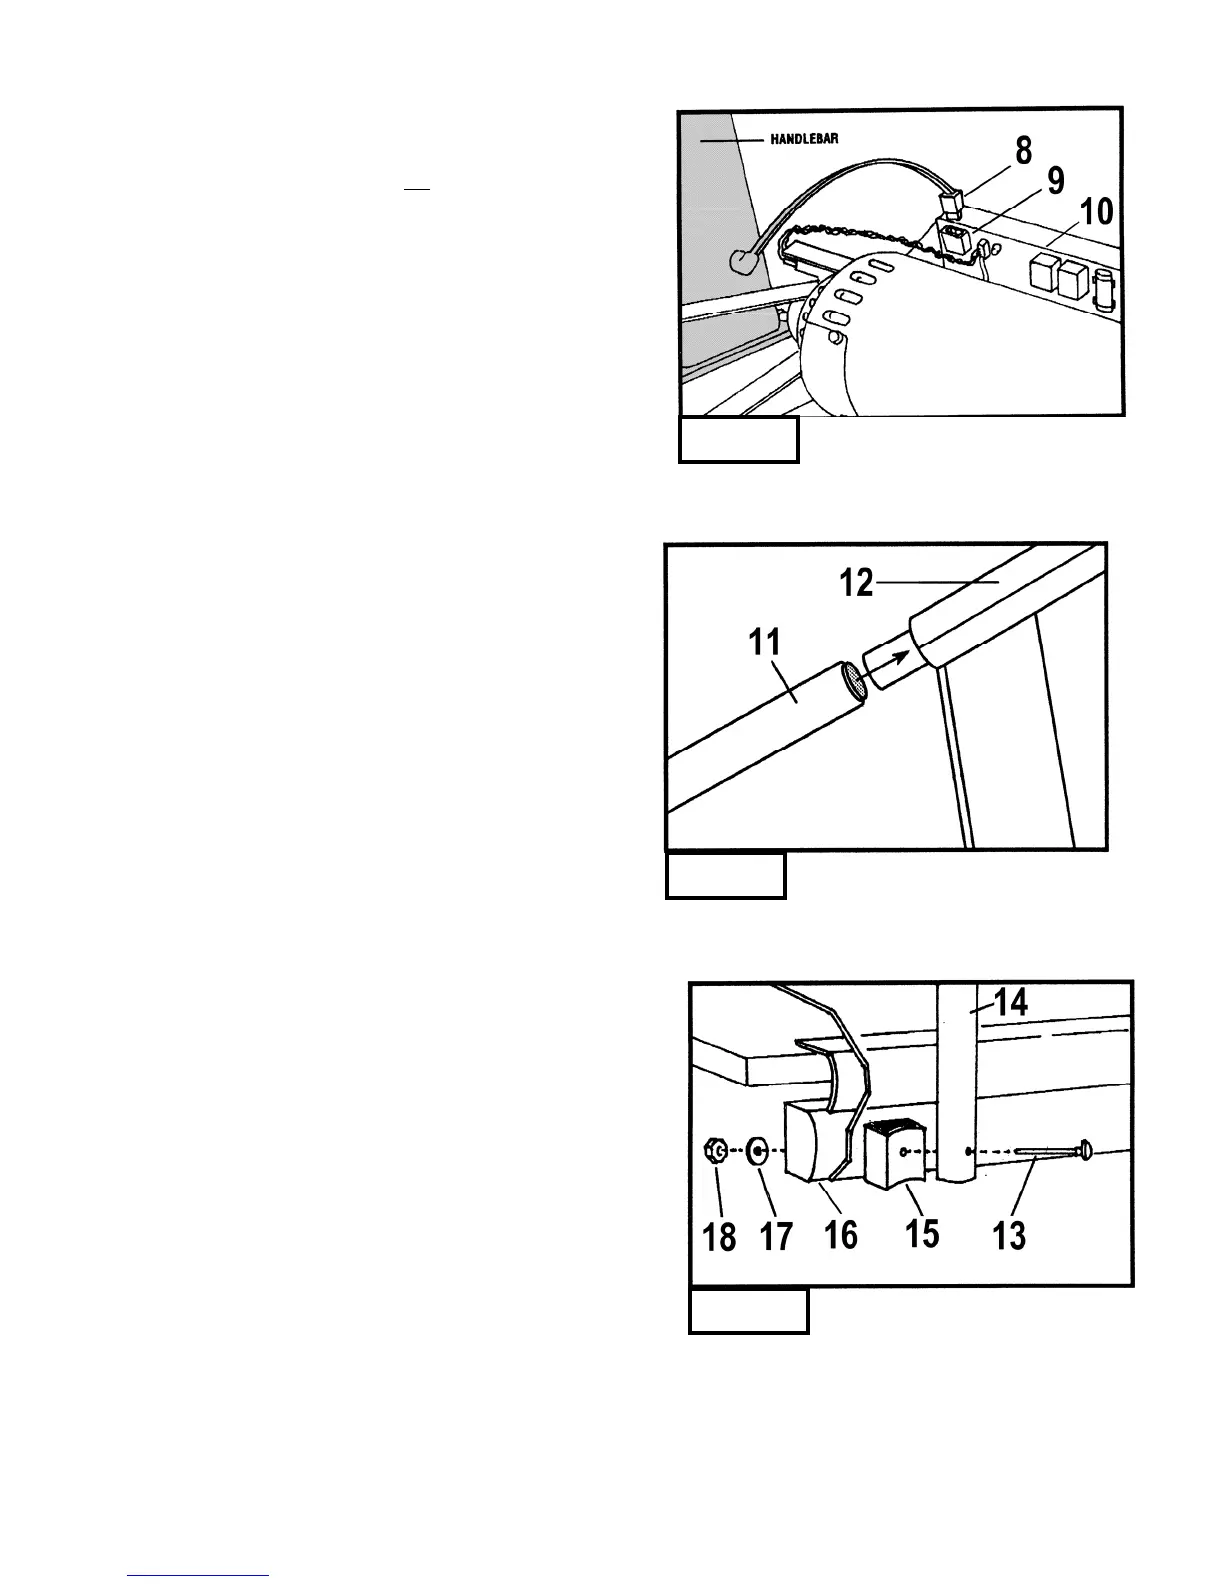
With the handlebar in place, plug the wire harness (8) into the socket (9)
on the power supply board (10).
CAUTION: Make sure the treadmill is not plugged into the electrical
outlet until assembly is competed.
Figure 3:
Take one of the side rails (11) and slide the end with the grip
over the end of the steel tube protruding from the control
panel (12). Make sure the side rail grip touches the control panel.
Figure 4:
Insert one of the 4” carriage bolts (13) through the side rail (14), the side
rail bracket (15) (the foam on the bracket should be at the top, facing
the frame) and finally through the frame (16) . Install a 1” fender washer (17)
and a ¼-20 kep nut (18) to the bolt and hand tighten. Install the other side rail
following the same procedure. Tighten both side rails with a wrench.
Figure 2
Figure 3
Figure 4
 Loading...