INSTALLATION
Read these instructions thoroughly before installation. Also, be sure to check for your
vehicle specific notes in appendix A at the end of this manual. There could be important
information there concerning your gauge and its installation.
1. Make sure the car’s ignition is turned off.
2. Run included 5’, or optional 9’ main cable, and three wire mini cable, from
the OBD2 connector (do not plug in yet) to the location of the Interceptor(s).
The Interceptor will fit in any 2 1/16” or 52mm gauge pod, or can be mounted in
a custom fashion anywhere within 5 feet of the OBD2 connector. The OBD2
connector is located under the dash on either side of the steering column.
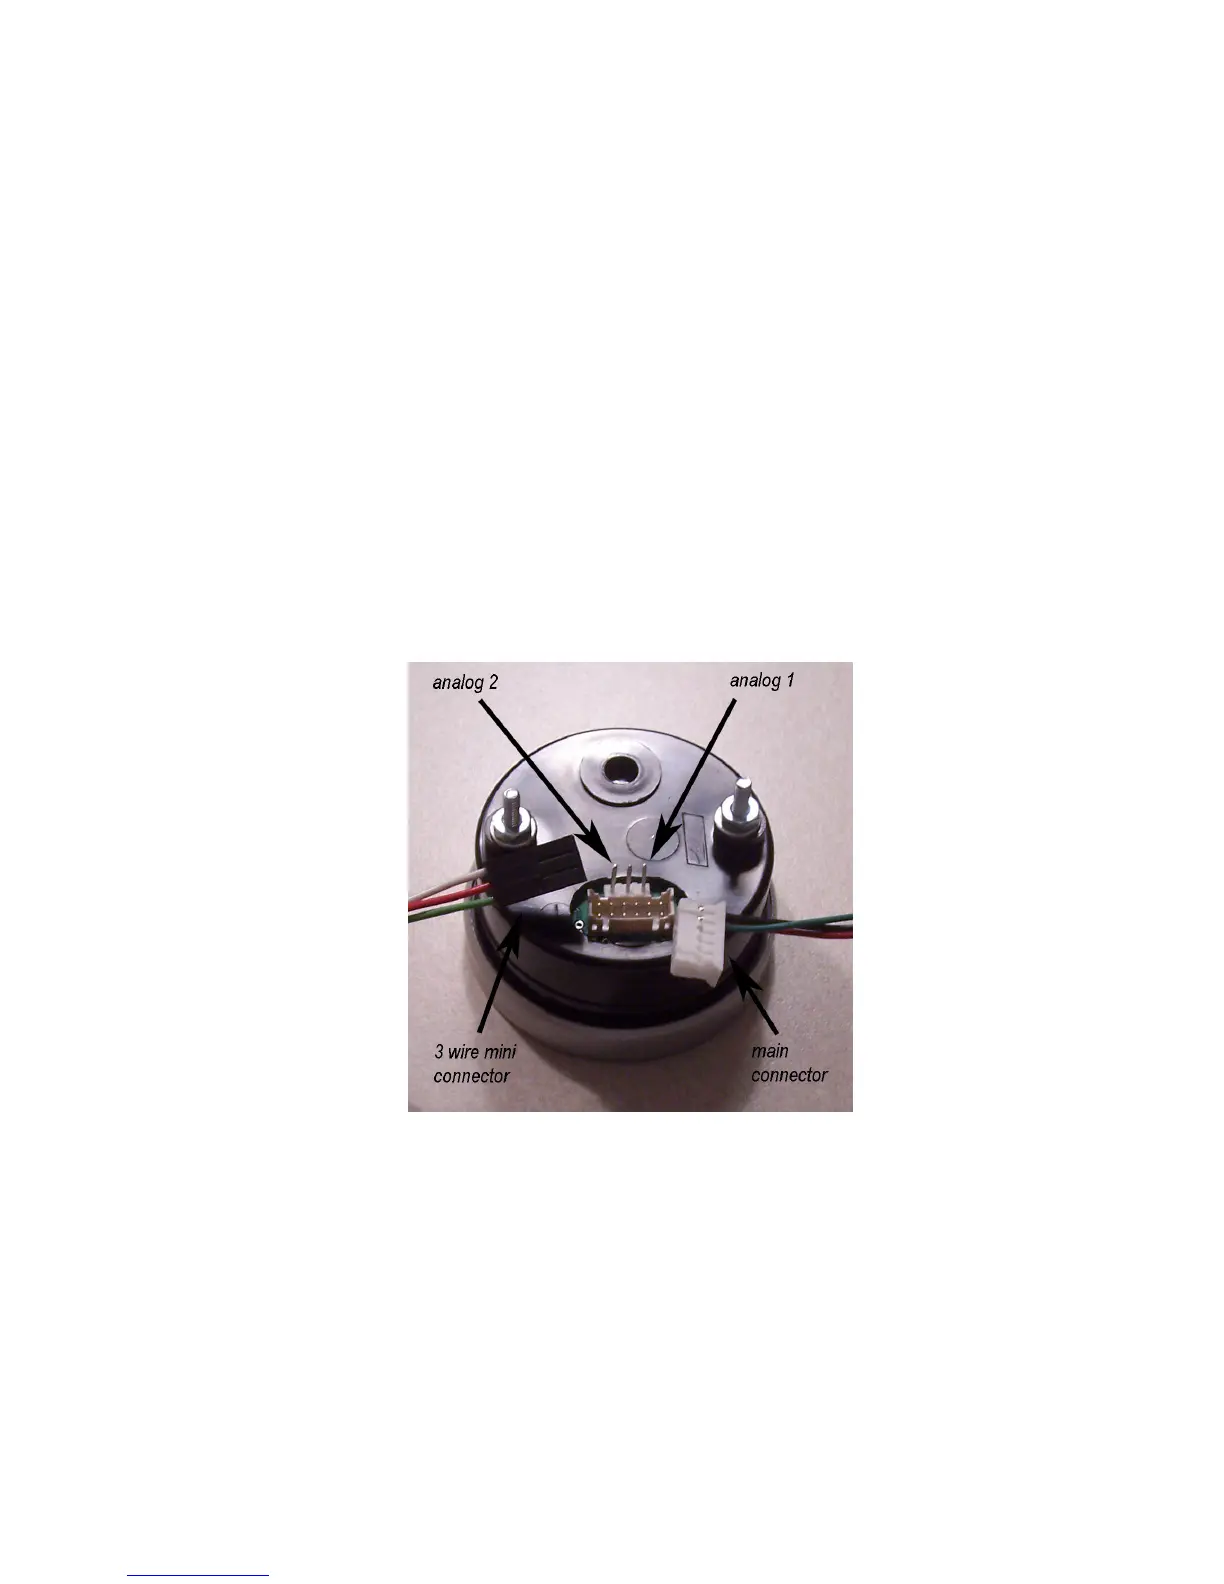
3. Plug both cables into the back of the Interceptor. See figure 1. Press the
Interceptor(s) into the gauge pod or mounting hardware.
Figure 1
4. Plug the main cable connector into the OBD2 connector. See figure 2. The
data, ground, and power on most vehicles come from this connector.