3
3
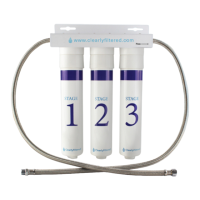
Turn on your faucet so a steady stream of cold water
ows into the sink.
Locate the cold water valve. It is typically the valve
on the right and can sometimes be identied by a
blue handle.
Use a ashlight or headlamp to locate the 2 water
valves under your sink.
Shut o the cold water supply by turning the valve’s
handle or knob clockwise until tight.
Place a bucket or towel below the valves.
After you’ve shut o the cold water supply, turn o
your faucet.
13
3
Disconnect the cold water line from the water valve
by twisting with your hand or a wrench.
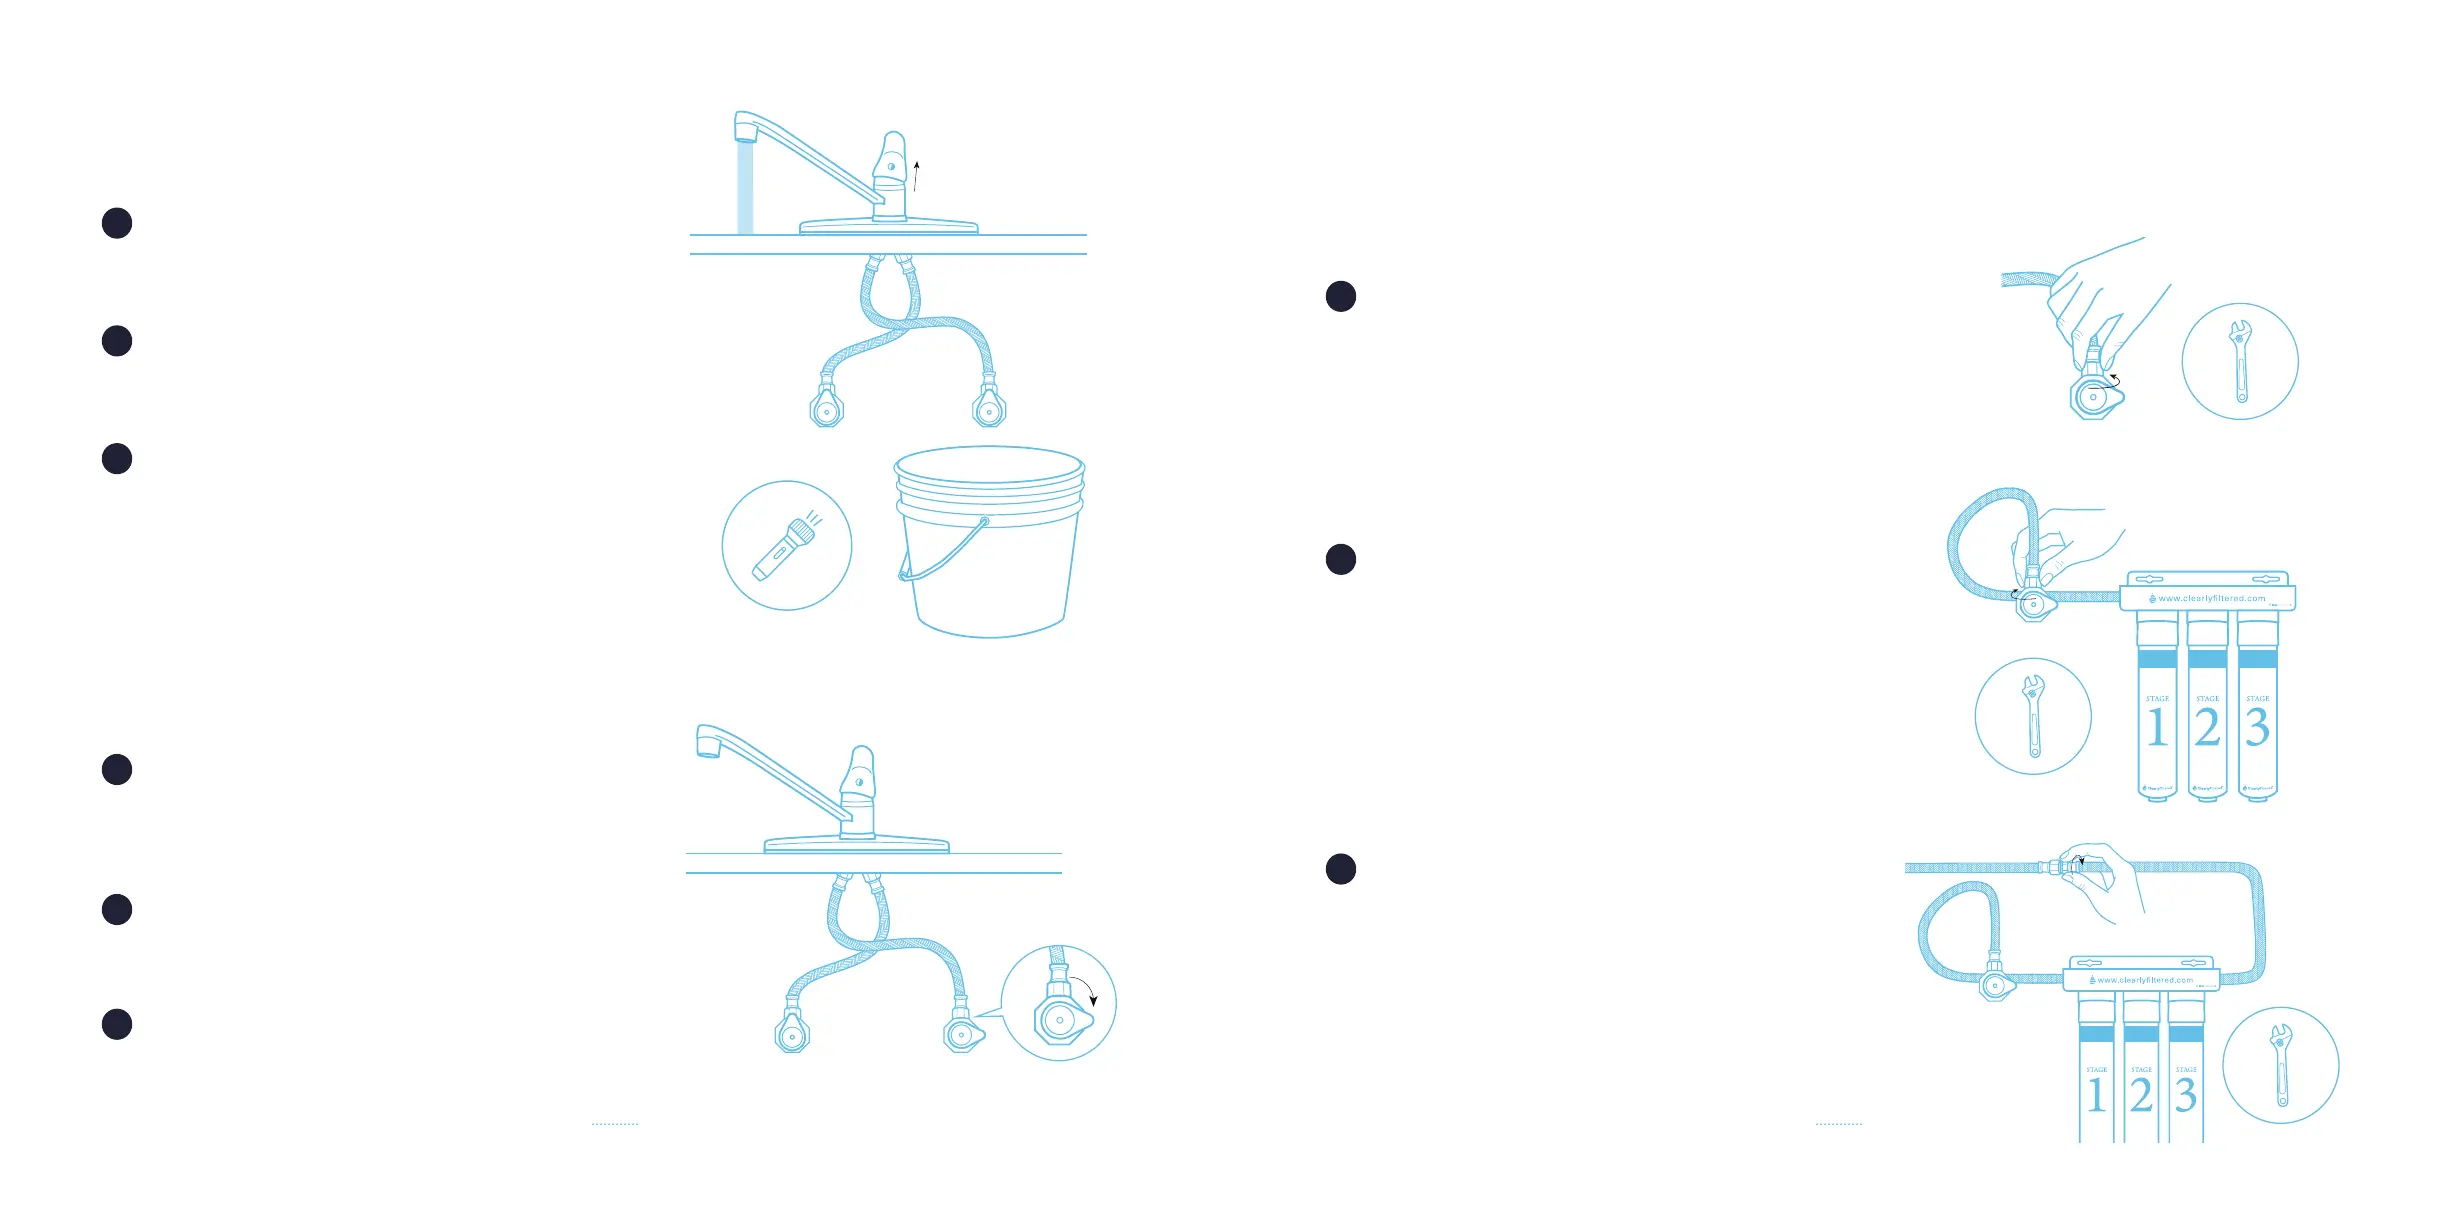
Refer to the diagram on the front of the bracket to guide you during the following steps.
Connect the stainless-steel hose attached to the
lter’s ‘inlet’ end near lter cartridge 1 (female
tting) to the water valve (male tting). Tighten with a
wrench to create a seal.
Connect the stainless-steel hose attached to the
lter’s ‘outlet’ end near lter cartridge 3 (male tting)
to the water line (female tting). Tighten with a
wrench to create a seal.
14
 Loading...