DM9 RECOMMENDED BIT Ø
Speed 1: n
0
550/min, n 345/min 152-250mm (6"-10")
Speed 2: n
0
1000/min, n 630/min 102-152mm (4"- 6")
Speed 3: n
0
1600/min, n 1000/min 40-102mm (1-1/4"- 4")
DM10 RECOMMENDED BIT Ø
Speed 1: n
0
450/min, n 280min 180-300mm (7"-12")
Speed 2: n
0
810/min, n 485/min 122-180mm (5"-7")
Speed 3: n
0
1300/min, n 780/min 40-122mm (1-1/2" - 5")
DM12 RECOMMENDED BIT Ø
Speed 1: n
0
350/min, n 220/min 280-350mm (11"-14")
Speed 2: n
0
600/min, n 370/min 180-280mm (7"-11")
Speed 3: n
0
1000/min, n 620/min 60-180mm (2"-7")
DM14 RECOMMENDED BIT Ø
Speed 1: AD n
0
385/min, n 225/min 300-400mm (12"-16")
Speed 2: AC n
0
530/min, n 300/min 180-300mm (7"-12")
Speed 3: BD n
0
975/min, n 565/min 122-180mm (5"-7")
Speed 4: BC n
0
1340/min, n 780/min 40-122mm 1-1/2"-5")
( Recommended bit size based on average hardness concrete. Speeds will
vary with different material hardnesses.
For reinforced concrete, speeds will be signifigantly slower.)
4)MOUNTING TO A DRILLING STAND (NOT INCLUDED)
Warning: Do not attempt to mount to a rig that does not have a perfectly fitting mounting system.
The motor has a standard four bolt pattern for attaching a mounting spacer. Use a mounting spacer suitable for
the stand you are using to mount your drill motor to your stand. Tighten the four bolts evenly to 12Nm.
To mount to the stand, loosen the cradle lock bolt and place the mounting spacer squarely in the cradle. Then
tighten the cradle lock bolt firmly to 17Nm.
The rig may be anchored to the work piece in one of three ways, with a mechanical anchor, with a vacuum
base, or with a jack screw. (Follow the instructions provided with the rig.)
TO INSTALL THE DRILL STAND
1. Measure the distance from the center of the intended cut to the location of the mounting slot in the
base. Follow the concrete anchor manufacturer’s instructions to install. Using an appropriate tool such
as a rotary hammer, drill a correct sized hole to fit the anchor. Then drive in the anchor to below flush.
2. Move the base into position and screw in the anchor bolt, washer and nut, leaving it finger tight for the
moment.
3. Using the bubble level, adjust the four leveling bolts to achieve a good level positioning, then fully
tighten the center anchor bolt. The entire rig must be mounted solidly.
WARNING: Never attempt to drill unless the stand is fixed securely beyond any doubt.
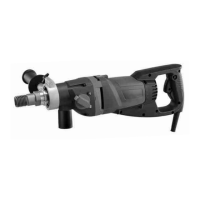
Gear Selectors
3 SPEED MODELS
Gear Selector
 Loading...