4.1. Take the two uprights, the two remaining spacers and two moisture seals.
4.2. Place an upright in each hole, end plug down. Check that the tops of the uprights are level.
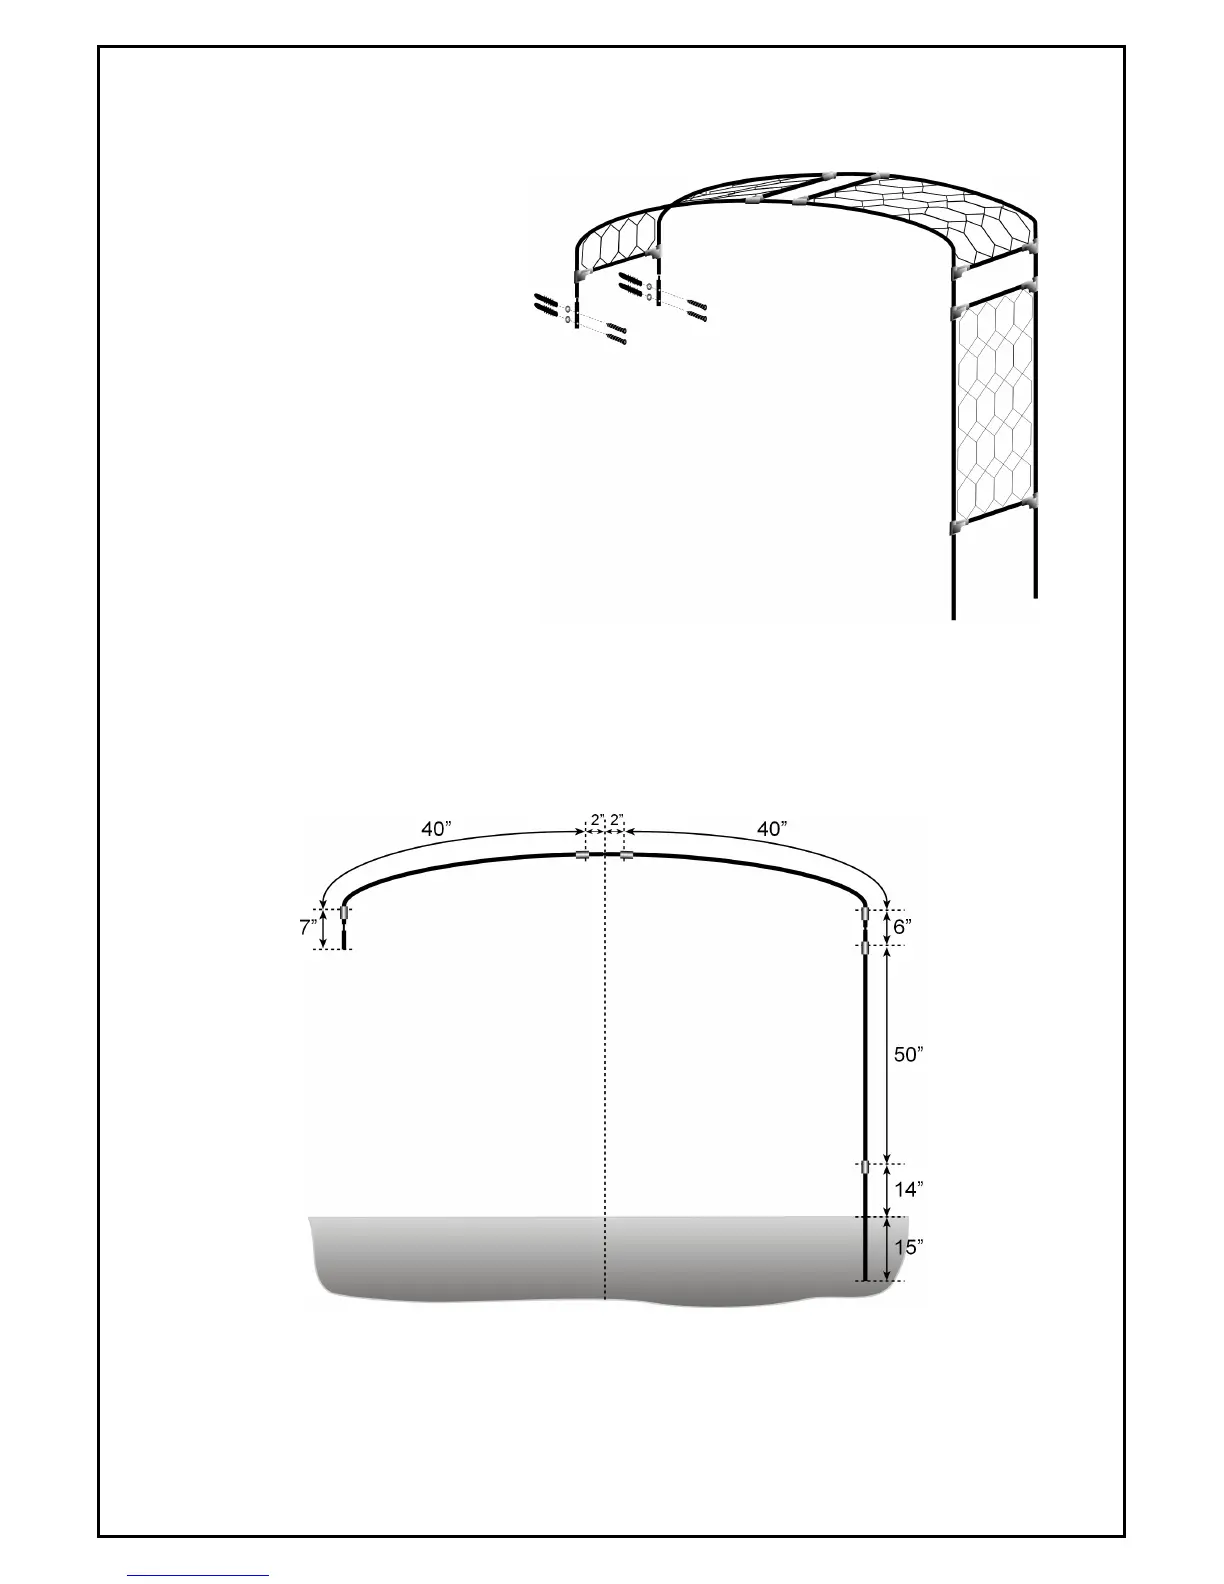
4.3. Attach the two spacers to the uprights at the heights shown in the diagram below.
4.4. Slide a moisture seal onto the top
of each upright and lift the roof
section onto the uprights. Ensure
that the moisture seals cover the
tube joins.
4.5. Take the two 6.5” tubes from the
wall fixing kit and connect them
into the roof. Mark the positions
of the fixing screws on the wall.
Remove the two 6.5” tubes and
drill the holes. Place a rawl plug
in each hole.
4.6. Slide a moisture seal onto the
reduced ends of the 6.5” tubes
and tap an end plug into the
bottom of each. Connect them to
the roof again ensuring that the
holes are aligned with the drilled
holes in the wall. Slide the
moisture seals up to cover the
joins and then attach the arch to
the wall using the screws and
washers provided. Note that the washers fit between the 6.5” tubes and the wall.
4.7. Place a third screw in each T joint and fully tighten the screws in all the joints.
4.8. If you purchased the lattice infill, refer to the diagram and attach it using the ties provided.
PACKING REFERENCE: