16
6. INITIAL COMMISSIONING
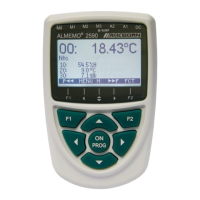
Sensor connection Connect the sensor to any socket M0 to M3 (1); see Ch 8.
Power supply via batteries or mains adapter to DC (3) ; see 7.1, 7.2
To switch ON press the ON / PROG key (6) ; see 7.5
Automatic display of last measuring menu see Ch 11.
To call up menu selection
press key(s) : <MENU>
To activate / deactivate display illumination : <*ON>
To select measuring menu
Sensor display
; see 9.1
press key(s) : <F> : ▲ / ▼ ...
To call up the menu press key(s) : ► or PROG
To select a measuring point (see 11.1.1)
press key(s) : <M> : ▲ / ▼ ...
All channels on the connector or those functions needed
for measured value calculation are displayed.
To call up the functions menu list : < FCT >
To select the functions menu (see 9.4)
press key(s) : <F> : ▲ / ▼ ...
To call up the menu press key(s) : ► or PROG
e.g. Functions menu
Data logger functions
:
(only possible if storage medium available)
Once-only saving : see 12.5.4 < MANU >
Cyclic saving : see 12.5.5
To select
cycle timer
press key(s) : PROG , ▲ / ▼ ...
Entering the cycle (hh:mm:ss) PROG , ▲ , PROG ..
To set the output format : < FORM> ...
To terminate programming mode : < ESC>
To start a measuring operation <START>
To stop a measuring operation <STOP>
Memory output via interface to computer :
- Connect peripheral device via data cable to socket A1 (2); see Manual, Section 5.2
To select
free memory
press key(s) : PROG , ...
Output memory ; see 12.5.7 < PMEM> or command ´P04´ from the computer
Clear the memory ; see 12.5.7 < CMEM > or command ´C04´ from the computer
Important keys : To return as far back as menu selection,
press key(s) : ◄ ..., To go to the measuring menu : < M◄◄ >
 Loading...