Introduction
Contents
1. Introduction 6
1.1 Using this Manual 7
1.2 Model Identification 9
1.3 Acronyms and Abbreviations 10
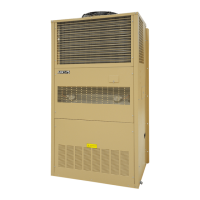
2. Product Overview 11
2.1 Free Cooling System 13
2.2 Adaptive Free Cooling 13
2.3 Mechanical Cooling System 13
2.4 Soft Start 13
2.5 The Control System (ASMUC.6 Controller) 14
2.6 Ease of Control and Configuration 14
2.7 Synchronized Cooling 14
2.8 Standalone Mode 14
2.9 Heat Load Matching 14
2.10 Turbo Boost 15
2.11 Quiet Mode 15
3. Installation 16
3.1 Installation Preparation 17
3.1.1 Delivery 17
3.1.2 Warranty 18
3.1.3 Moving the Unit 18
3.1.4 General Safety Rules 18
3.2 Required Materials 19
3.2.1 AIRSYS Supplied Materials 19
3.2.2 Materials Supplied by Installer 20
3.2.3 Summary Electrical Ratings (Wire Sizing) 22
3.3 Physical Installation 23
3.3.1 Select the Wall for Installing the Unit 23
3.3.2 Clearances 23
3.3.3 Pouring the Concrete Pad (B5 Cabinet Only) 24
3.3.4 Make Openings in the Wall 24
3.3.5 Install Weather Stripping 25
3.3.6 Position the Unit 26
3.3.7 Remove Wooden Pallet from WPU 27
3.3.8 Install the Support Stand (B5 Cabinet Only) 27
3.3.9 Seal the Joints between WPUs and Wall 27
3.3.10 Attach the Supply Air Grill and the Return Air Grill to the Wall 28
3.3.11 Remove the Compressor Brackets 28
3.4 Controller Box Installation 30
3.4.1 Install Outdoor Temperature Sensor 31
3.4.2 Position the Humidity Sensor 32
3.4.3 Position Indoor Temperature Sensor 33
 Loading...