Installation
4. Thread the outdoor temperature sensor through a port at the bottom of the controller box.
5. Thread the outdoor temperature sensor from the controller box through the hole in the bottom of the box.
6. Secure the sensor to the bottom of the box with a nylon zip-tie.
7. Secure the box to the outside wall. Snap the sensor box cover in place and use sealant along the seam
between the box and the wall.
Note: punching out the holes on the sides and the bottom of the sensor box is critical to allow proper airflow
and drainage from rain and dew.
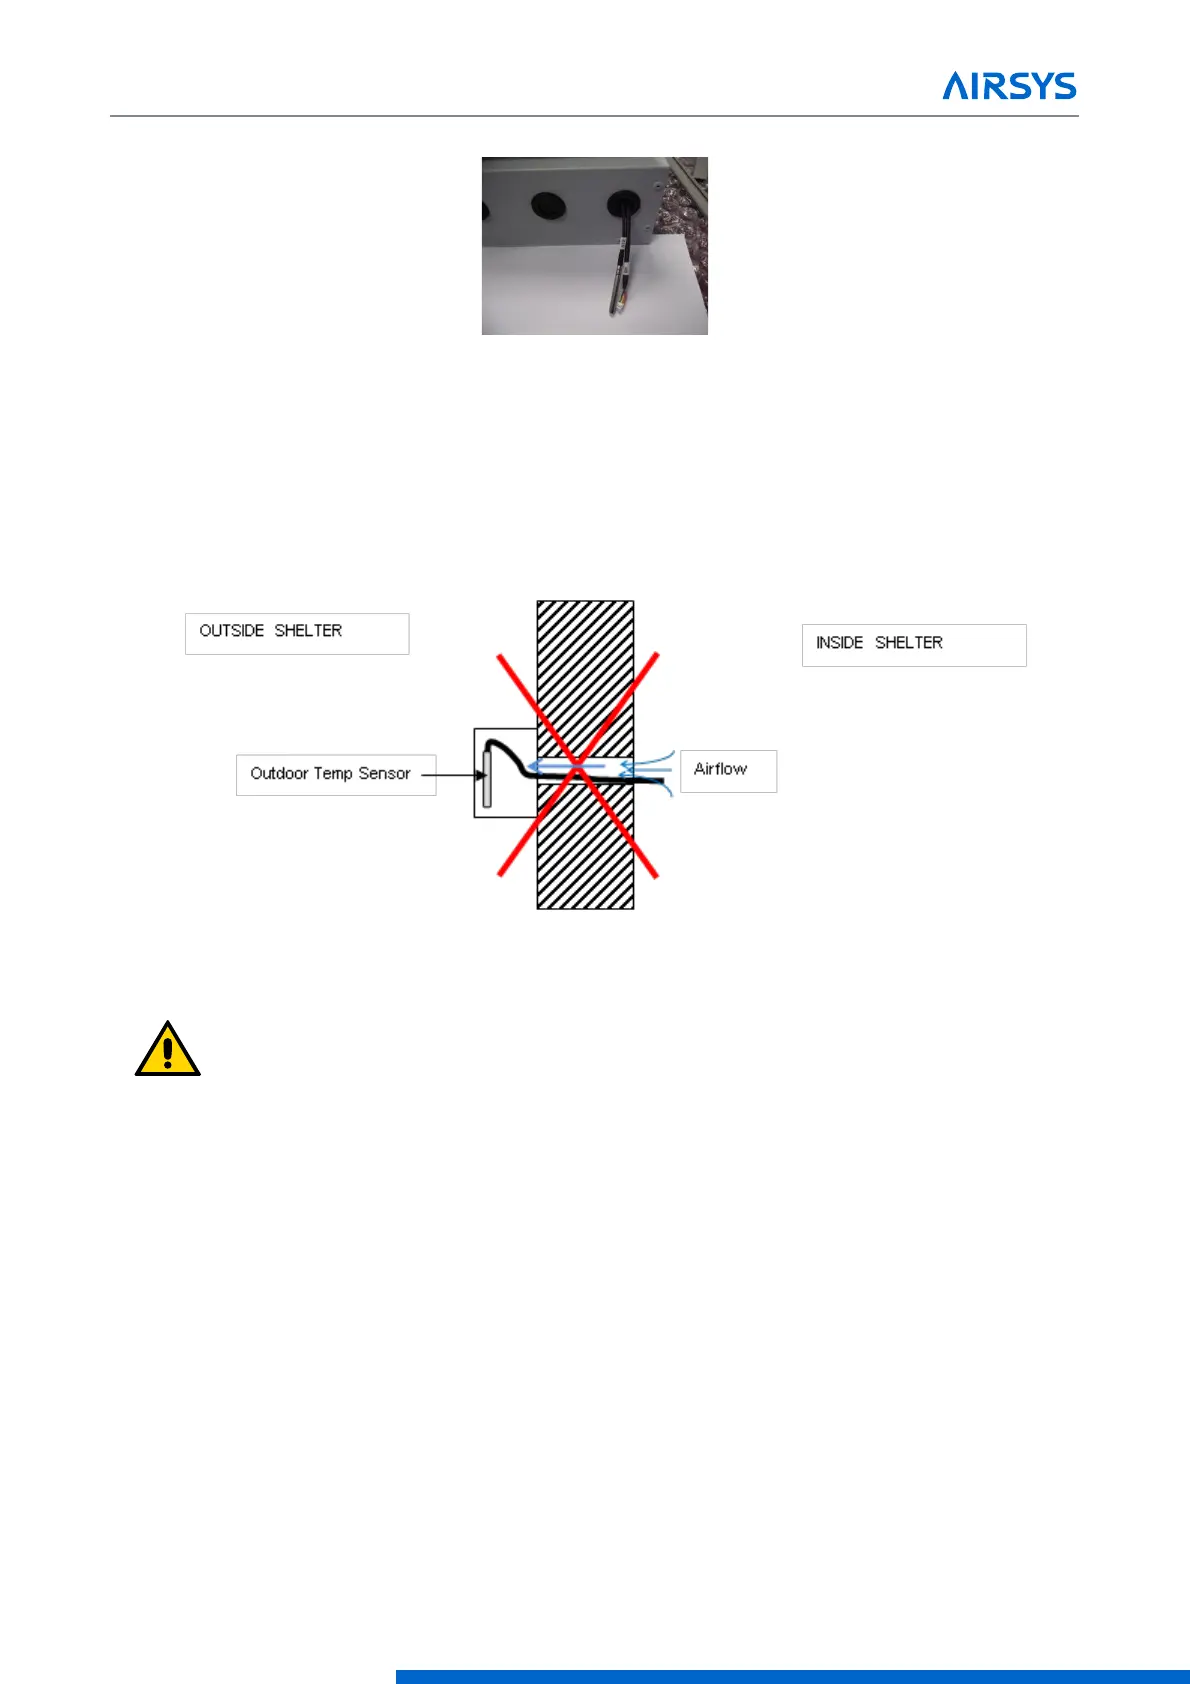
Figure 3-9 Ensure No Leakage
Important. Ensure no air leakage exists from inside the shelter to the box housing the outdoor
temperature sensor. Any path whereby air could exit the shelter and arrive in the sensor box will
adversely affect the outdoor temperature sensor reading.
3.4.2 Position the Humidity Sensor
Follow these steps to install the humidity sensor that is connected to the controller box:
1. Open the controller box assembly and locate the humidity sensor (SH) assembly.
2. Remove the cover of the humidity sensor, and then unfasten the harness from the sensor.
3. Thread the harness through the hole at the bottom or top of the controller box and reattach the sensor
and then the cover.
Note: If building is not yet in its final, permanent location after mounting the controller, secure the humidity
sensor under the controller box with tape to protect the sensor from vibration.
 Loading...