EasyManua.ls Logo

Airxcel Maxxair 44000 Series User Manual

Airxcel Maxxair 44000 Series
88 pages
To Next Page IconTo Next Page
Page #1 background imageLoading...
Page #1 background image
1
INSTALLATION, OPERATION AND
MAINTENANCE INSTRUCTIONS FOR
230/240 VAC, 1ø, 50Hz 44000 SERIES
RV ROOF TOP AIR CONDITIONER / HEAT
PUMP, REMOTE CONTROLLER AND
BLUETOOTH
TABLE OF CONTENTS
I.
General Information
2
II.
Heat Pump Sizing
2
III.
Selecting an Installation
Location
3
IV.
Installing the Roof Top Unit
3
V.
Securing the Heat Pump to
the Roof
4
VI.
Electrical Wiring
5
VII.
Installing the Ceiling
Assembly
6
VIII.
Operation and Maintenance
7
i.
Model & Serial Number
7
ii.
Operating Guidelines
7
iii.
Adjusting the Air Flow
8
iv.
Hand Held Controller
8
v.
Selecting the Mode of
Operation
10
vi.
Ceiling Assembly Control
Pad
10
vii.
Routine Maintenance
11
IX.
Warranty
12
X.
Bluetooth
12
XI.
Dis-Assembly Instructions
87
XII.
System Wiring Diagram
88
1980A096 10-15-19

Table of Contents

Question and Answer IconNeed help?

Do you have a question about the Airxcel Maxxair 44000 Series and is the answer not in the manual?

Airxcel Maxxair 44000 Series Specifications

General IconGeneral
BrandAirxcel
ModelMaxxair 44000 Series
CategoryAutomobile Accessories
LanguageEnglish

Summary

General Information

Heat Pump Sizing

Selecting an Installation Location

Installing the Rooftop Unit

Securing the Heat Pump to the Roof

Electrical Wiring Routing 230/240 VAC Wiring

High Voltage Wiring Specifications

Refer to the most recent local and national codes for Wiring Rules.

Installing the Ceiling Assembly

Operation and Maintenance

Model & Serial Number

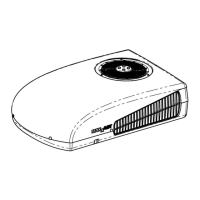
Your heat pump has been designed for years of safe, dependable operation. These instructions contain a general description on the operation of the unit, how to setup and operate the controller, and a list of routine maintenance items.

Operating Guidelines

The air conditioner is designed to provide cooling and dehumidification. A heat pump reverses the refrigerant cycle to provide heating in cool weather.

Adjusting the Air Flow

The conditioned air is distributed through the ceiling assembly. Slides on the front and rear of the ceiling assembly can be moved to throttle the air flow to the front and rear.

Hand Held Controller

The remote controller controls the operation of the heat pump with an infrared signal to a sensor on the ceiling assembly. For the best reception, the remote should be pointing at the ceiling assembly when changing the set points and configuring the heat pump.

Selecting the Mode of Operation

The heat pump has four modes of operation Cooling, Heating, Auto-Changeover, and Fan. To select the desired operation, press the MODE button.

Ceiling Assembly Control Pad

The ceiling assembly has a two-color LED to indicate if the unit is in Cooling or Heating mode and a manual override button which can be used if the remote controller is lost or malfunctions.

Routine Maintenance

Warranty

Bluetooth

System Wiring Diagram