Do you have a question about the Aiwa NSX-AJ203 and is the answer not in the manual?
This document serves as the operating instructions for the Aiwa Compact Disc Stereo System, models NSX-AJ200, NSX-AJ203, and NSX-AJ205. It provides comprehensive guidance on installation, operation, and maintenance of the unit.
Before operating the unit, it is crucial to read and follow all precautions outlined in the manual and on the device itself. The unit should not be exposed to rain or moisture to prevent fire or electric shock. It should be placed on a flat, even surface, away from heat sources like heating vents, stoves, or other heat-generating appliances. The operating temperature range is between 5°C (41°F) and 35°C (95°F). Adequate ventilation is essential, with 10 cm (4 in.) clearance from the rear and top, and 5 cm (2 in.) from each side. Avoid placing the unit on soft surfaces like beds or rugs that might block ventilation, or in enclosed spaces like bookcases or cabinets. Care should be taken to prevent objects or liquids from entering the unit through ventilation openings. If the unit is placed on a stand or cart, move it carefully to prevent overturning.
Condensation may occur when the unit is moved from a cold to a warm environment, when the heating system is turned on, in a humid room, or when cooled by an air conditioner. If condensation occurs, the unit may not function normally; allow several hours for it to dry before attempting operation. The unit should not be wall or ceiling mounted unless explicitly stated in the instructions.
Connect the unit only to power sources specified in the operating instructions. Some units feature polarized AC power plugs for safety; if the plug doesn't insert easily, try turning it over. Do not force it. When disconnecting the AC power cord, always pull the plug, not the cord itself. Avoid handling the AC power plug with wet hands. Ensure power cords are secured to prevent bending, pinching, or being walked upon. Do not overload AC outlets or extension cords. If using an extension cord with a polarized plug, ensure it is fully inserted. Unplug the AC power cord if the unit will not be used for several months or more, as a small amount of current still flows even when off.
For outdoor antennas, ensure they are located away from power lines and properly grounded to protect against voltage surges or static electricity. The manual provides details on grounding according to the National Electrical Code.
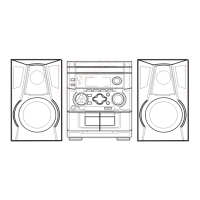
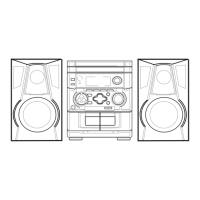
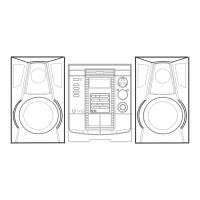
The NSX-AJ200 includes the CX-NAJ200 receiver and SX-NAJ202 front speakers. The NSX-AJ203 includes the CX-NAJ203 receiver and SX-NAJ205 front speakers. The NSX-AJ205 includes the CX-NAJ205 receiver, SX-NAJ205 front speakers, and SX-R145 surround speakers. All models come with a remote control, FM antenna, and AM antenna.
The remote control requires two R6 (size AA) batteries. Replace them when the operational distance decreases. Remove batteries if the unit will not be used for an extended period. The remote control may not function properly under intense sunlight or if its line of sight is obstructed.
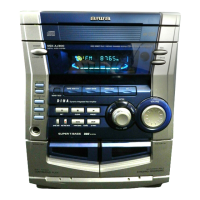
The main unit features a POWER STANDBY/ON button to switch the unit on and off. The DEMO/ECO button switches DEMO on/off when the unit is off, and enters ECO or dimmer setting mode when on. DISC DIRECT PLAY 1-3 selects a CD tray. A PHONES jack allows headphone connection, canceling speaker output. DISC CHANGE rotates the CD trays, and OPEN/CLOSE opens/closes the disc compartment. TAPE DECK 1/2 selects the Tape function and deck. TUNER/BAND selects Radio function and band. VIDEO/AUX selects external equipment input. CD selects CD function. ELECTRONIC GRAPHIC EQUALIZER selects sound equalization curves. VOLUME adjusts volume. T-BASS emphasizes low frequencies. REC/REC MUTE starts recording. SYNC DUB starts dubbing a whole tape. The IISET button pauses tape playback/recording (deck 2 only) or CD playback, stores radio stations to preset, and determines ECO, dimmer, clock, and timer settings. PRESET plays back CD/Tape or tunes into a preset radio station. The /DOWN, /UP TUNING buttons skip CD tracks, search CD tracks, fast forward/rewind tape, or manually tune radio stations. CLEAR stops CD/Tape playback or clears a radio station preset.
Power: Press POWER STANDBY/ON (or POWER on the remote) to turn the unit on. Pressing TAPE, TUNER/BAND, VIDEO/AUX, or CD will also turn on the unit and start playback if a disc or tape is inserted. Press POWER STANDBY/ON again to turn the unit off into standby.
DEMO: If the clock is not set, "DEMO" appears when the unit is off, offering "Illumination demo" and "Game demo." Press DEMO/ECO when off to activate/deactivate DEMO. Hold DEMO/ECO and press POWER to switch between demo types. To play the "Game demo," press so that three numbers run, then press three times to stop them. Matching numbers earn points. The winning probability can be adjusted by pressing or to change the CD tray number indicator between 1 (lowest) and 3 (highest).
ECO mode: Reduces power consumption. In ECO ON mode, the display blacks out when off (if clock is set), and illumination brightens for 10 seconds only when operating the unit. If the unit turns on via timer recording, dimmer is set to dimmest and volume to minimum. In ECO AUTO mode, the unit also turns off automatically if not operated for 10 minutes or if the sound source is mute for 10 minutes. To activate ECO mode, press DEMO/ECO once when on, then within 4 seconds press II. Press or to select an ECO mode, then press II. To cancel, select "ECO OFF."
Dimmer: Adjusts display brightness. Press DEMO/ECO twice when on, then within 4 seconds press II. Press or to select one of three dimmer modes or "DIM-OFF." "DIM-OFF" is brightest, "DIMMER 3" is dimmest. To cancel, select "DIM-OFF."
Setting the clock: Press SHIFT+CLOCK on the remote. Press or to set the time in 1-minute steps (10-minute steps when held down). Press IISET. To display the time, press SHIFT+CLOCK. To switch between 12-hour and 24-hour standards, display the time and press within 4 seconds. If the clock display flashes when off, there was a power interruption; reset the clock.
Volume: Turn VOLUME (or press VOL on the remote) to adjust from 0 (minimum) to 30 and MAX. Volume setting is retained during power-off standby. If set to 17 or more when turned off, it automatically resets to 16 when turned on again.
Super T-BASS: Emphasizes low frequencies. Press T-BASS (or SHIFT+T-BASS on the remote) repeatedly to select one of three emphasis levels or off. Cancel if sound becomes distorted.
Graphic equalizer: Selects sound equalization curves. Press ELECTRONIC GRAPHIC EQUALIZER (or SHIFT+GEQ on the remote) repeatedly to select "ROCK" (treble and bass emphasis), "POP" (vocals and midrange presence), or "CLASSIC" (heavy bass and fine treble). To display the current mode, press once. To cancel, select "GEQ OFF."
The unit plays finalized CD-R/RW discs and audio CDs. Playback: Press CD and OPEN/CLOSE to load one or two discs (labeled side up). Press DISC CHANGE to rotate trays for a third disc. Close with OPEN/CLOSE. For 8-cm discs, place them on the inner circle of the tray. Press to play all discs. Press DISC DIRECT PLAY 1-3 to play a desired disc. Press to stop. Press II to pause, press again to resume. Replacing discs during playback: While one disc plays, press DISC CHANGE to open the compartment, replace discs, and press DISC CHANGE to close. Skipping tracks: Press or to skip to the beginning of the current/preceding/succeeding track. Searching tracks: Hold down or to search in fast forward/reverse, release at desired point. Selecting tracks with remote: Press DISC DIRECT PLAY 1-3, then numbered buttons (e.g., +10, +10, 5 for track 25). Displaying remaining playback time: Press SHIFT+CD EDIT/CHECK on the remote. Press again for elapsed time. Not available during random or programmed playback. Random/Repeat playback: Press SHIFT+RANDOM/REPEAT repeatedly on the remote to select "RANDOM" (random playback), "" (repeat playback), or "RANDOM" and "" (random and repeat). Press DISC DIRECT PLAY 1-3 for one disc, or for all discs. To cancel, press SHIFT+RANDOM/REPEAT until both indicators disappear. To repeat a selected set of tracks, use programmed playback, then select repeat playback. Random order for selected tracks is not possible. Programmed playback: Plays up to 30 selected tracks in programmed order. Press SHIFT+PRGM on the remote during stop. "PRGM" lights up. Press DISC DIRECT PLAY 1-3 to select a disc. Use numbered buttons to program tracks. Repeat for other tracks. Press to start. During programmed playback, disc/track selection with numbered buttons is disabled. If total playback time exceeds 99:59 or track number exceeds 30, "- -:- -" is displayed. "FULL" is displayed if more than 30 tracks are programmed. Checking program: Press or repeatedly during stop to display disc, track, and program numbers. Clearing program: Press CLEAR during stop. "PRGM" disappears. Adding tracks: Repeat steps 2 and 3 before playback. Changing tracks: Clear the program, then reselect tracks. CD notes: Do not place more than one disc per tray, or tilt the unit with discs loaded. The unit may not play all CD-R/RW discs. Do not attach adhesive labels to discs. Do not load unrecorded CD-R/RW discs. Avoid irregular-shaped CDs.
Manual tuning: Press TUNER/BAND (or SHIFT+BAND on the remote) repeatedly to select FM or AM. Press DOWN or UP to tune. "TUNE" is displayed when a station is tuned, "((1))" for FM stereo. Auto search: Hold DOWN or UP to search. Press DOWN or UP to stop. May not stop on weak signals. Presetting stations: Press TUNER/BAND to select band. Press DOWN or UP to tune. Press IISET to store. Repeat for other stations. Max 32 presets. "FULL" is displayed if full. Tuning in to preset stations: On unit: Press TUNER/BAND, then PRESET repeatedly. On remote: Press SHIFT+BAND, then numbered buttons (e.g., +10, +10, 0 for preset 20). Clearing preset station: Tune to station, press CLEAR, then IISET within 4 seconds. Antennas: Keep away from metallic objects, electrical equipment, and cords. Extend FM antenna fully in T-shape. Connect optional outdoor antenna to FM 75 Ω terminal if reception is poor. Rotate AM antenna for best reception. Monaural FM reception: Press SHIFT+MONO TUNER on remote to switch between "MONO" and "STEREO." Monaural reduces noise in poor stereo reception. AM tuning interval: Hold TUNER/BAND and press POWER to alternate between 9 kHz/step and 10 kHz/step. Default is 10 kHz/step. Switching clears all preset stations.
Playback: Use type I (normal) tapes. Press TAPE, then PUSH EJECT to open cassette holder. Insert tape exposed side down, playback side facing out. Close holder. Press to play. Stopping playback: Press . Pausing playback (DECK 2 only): Press II. Press again to resume. Fast forward/rewind: Press or . Selecting deck: Press TAPE in stop mode when tapes are loaded in both decks. "TP1" or "TP2" is displayed. Resetting tape counter: Press CLEAR in stop mode to reset to "0000." Opening/closing cassette holder also resets it. Continuous playback (DECK 1 to DECK 2): Load tapes in both decks, start playback on DECK 1. DECK 2 starts after DECK 1 finishes. Cassette notes: 120-minute or longer tapes are not recommended due to thinness. Take up any slack before use. Basic recording: Use type I (normal) tapes. DECK 2 is the recording deck. Only one side can be recorded at a time. Insert recording tape in DECK 2. Prepare source (CD, radio, tape from DECK 1, or external equipment via VIDEO/AUX). Press REC/REC MUTE to start recording. Playback starts automatically for CD/tape. Manually start playback for external input. Close disc compartment when recording CD. Volume/tone adjustments do not affect recording. "CAN'T REC" displayed if tape tab is broken. Stopping recording: Press . Pausing recording (Tuner/VIDEO/AUX only): Press II. Press again to resume. Recording selected CD tracks: Program desired tracks (see "Programmed playback"), then press REC/REC MUTE. Recording 4-second blank space (Tuner/VIDEO/AUX only): Press REC/REC MUTE during recording or pause. "REC" flashes for 4 seconds (blank space made), then unit enters pause. Press REC/REC MUTE again while "REC" flashes for shorter blanks. Press REC/REC MUTE after pause mode for longer blanks. Press II to resume. Erasing tape: Insert tape in DECK 2. Set to desired point. Press TAPE to select "TP2." Press REC/REC MUTE. Whole tape dubbing: Press TAPE. Insert original tape in DECK 1, recording tape in DECK 2. Press SYNC DUB. Tapes rewind, then record. Cannot start halfway. Only one side. Press to stop. Edited CD recording (AI Edit Recording): Takes tape length into account, rearranges track order to avoid cutting short. Insert recording tape in DECK 2. Press CD, load disc. Press SHIFT+CD EDIT/CHECK once on remote. "EDIT" lights up, "AI C-OO" appears. Press DISC DIRECT PLAY 1-3 to select disc. Use numbered buttons to enter tape length (10-99 minutes). Unit determines tracks for each side. Recording time left for side A appears. Press REC/REC MUTE to start recording side A. After side A finishes, press SHIFT+CD EDIT/CHECK. Recording time left for side B appears. Turn tape over, press REC/REC MUTE to start recording side B. Cannot program more than 30 tracks ("TR OVER" displayed). Cannot start halfway. Press to stop. Checking AI Edit program: Before recording, press SHIFT+CD EDIT/CHECK to select side A or B. Press or repeatedly to display track/program numbers. Changing AI Edit program: Press SHIFT+CD EDIT/CHECK to select side A or B, then press CLEAR to clear program, then reselect tracks. Clearing AI Edit program: Press CLEAR twice until "EDIT" disappears. Preventing accidental erasure: Break off the plastic tab on the cassette tape. To record again, cover the detection slot with adhesive tape.
Sleep timer: Turns off unit automatically after specified time. Press SHIFT+SLEEP on remote. "SLEEP" appears. Press or repeatedly to set duration (5-240 minutes in 5-minute steps). Setting is entered if no button input for 4 seconds. Display dims when active. To check remaining time, press SHIFT+SLEEP. To cancel, press SHIFT+SLEEP twice until "SLEEP OFF" appears. Timer playback: Turns on unit at specified time for specified duration. Clock must be set. Press function button to select source. Press SHIFT+TIMER on remote. "" lights up, "PLAY" appears. Timer-on time and source name alternate. Press or to set timer-on time, then IISET. If no input for 4 seconds, previous setting is entered. Press or to set duration (5-240 minutes in 5-minute steps), then IISET. Adjust volume/tone. If volume is 17+, it resets to 16. Prepare source (load CD, tune radio, insert tape). For external equipment, set its own timer. Press POWER STANDBY/ON to turn unit off. "" remains to indicate standby. Unit turns on at timer-on time, plays source, then turns off. Timer playback won't start if unit is on. External equipment cannot be controlled by this unit's timer. Source can be changed before completing step 3. Timer recording: Available for TUNER and VIDEO/AUX (with external timer). Press TUNER/BAND or VIDEO/AUX. Press SHIFT+TIMER repeatedly until "REC" appears. Follow steps 3-5 of "Timer playback." Prepare source (tune radio, set external timer for external equipment). Insert recording tape in DECK 2, then turn unit off. Displaying timer setting: Press SHIFT+TIMER. Timer-on time, source, duration displayed for 6 seconds. Can enter setting mode by pressing II within 6 seconds after SHIFT+TIMER. Changing timer setting: Re-set timer. Canceling timer: Press SHIFT+TIMER repeatedly until "OFF" appears. "" disappears. Timer setting is retained even if canceled.
Care of cabinet: Use a soft, dry cloth. For dirty surfaces, a soft cloth lightly moistened with mild detergent. Avoid strong solvents. Care of tape heads: Clean every 10 hours with a head cleaning cassette. Demagnetizing tape heads: Use a demagnetizing cassette every 20-30 hours. Care of CDs: Wipe from center out with a cleaning cloth. Store in cases. Avoid hot or humid places. Care of tapes: Store in cases. Avoid magnets, motors, TVs, direct sunlight, or hot cars.
Troubleshooting:
Resetting the unit: If unusual display/cassette deck conditions occur: Press POWER to turn off. If power won't turn off, disconnect/reconnect AC power. Hold and press POWER. All stored memory is cleared.
| CD Player | 3-disc changer |
|---|---|
| Cassette Deck | Dual cassette deck |
| Speakers | 2-way speakers |
| Remote Control | Yes |
| Type | Mini Hi-Fi System |
| Tuner | AM/FM |
| Functions | CD, Radio |