5
Lowes.com/allenandroth
SURFACE-MOUNT INSTALLATION INSTRUCTIONS
Hardware Used
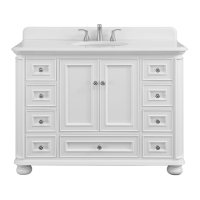
1. Using bottom bracket (F) as a guide, mark screw
locations with a pencil (not included) a minimum of 3
inches above your existing faucet/vanity. Use long screws
(GG) and hardware best suited for wall type to secure
the bottom bracket (F) to the wall. Refer to MOUNTING
OPTIONS on page 4.
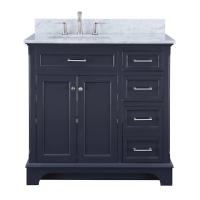
2. Carefully position the cabinet (C) onto the bottom
bracket (F) and hold in place.
1
2
Long Screw
x 2
GG
F
GG
GG
F
C
F
C
Side View
GG
Hardware Used
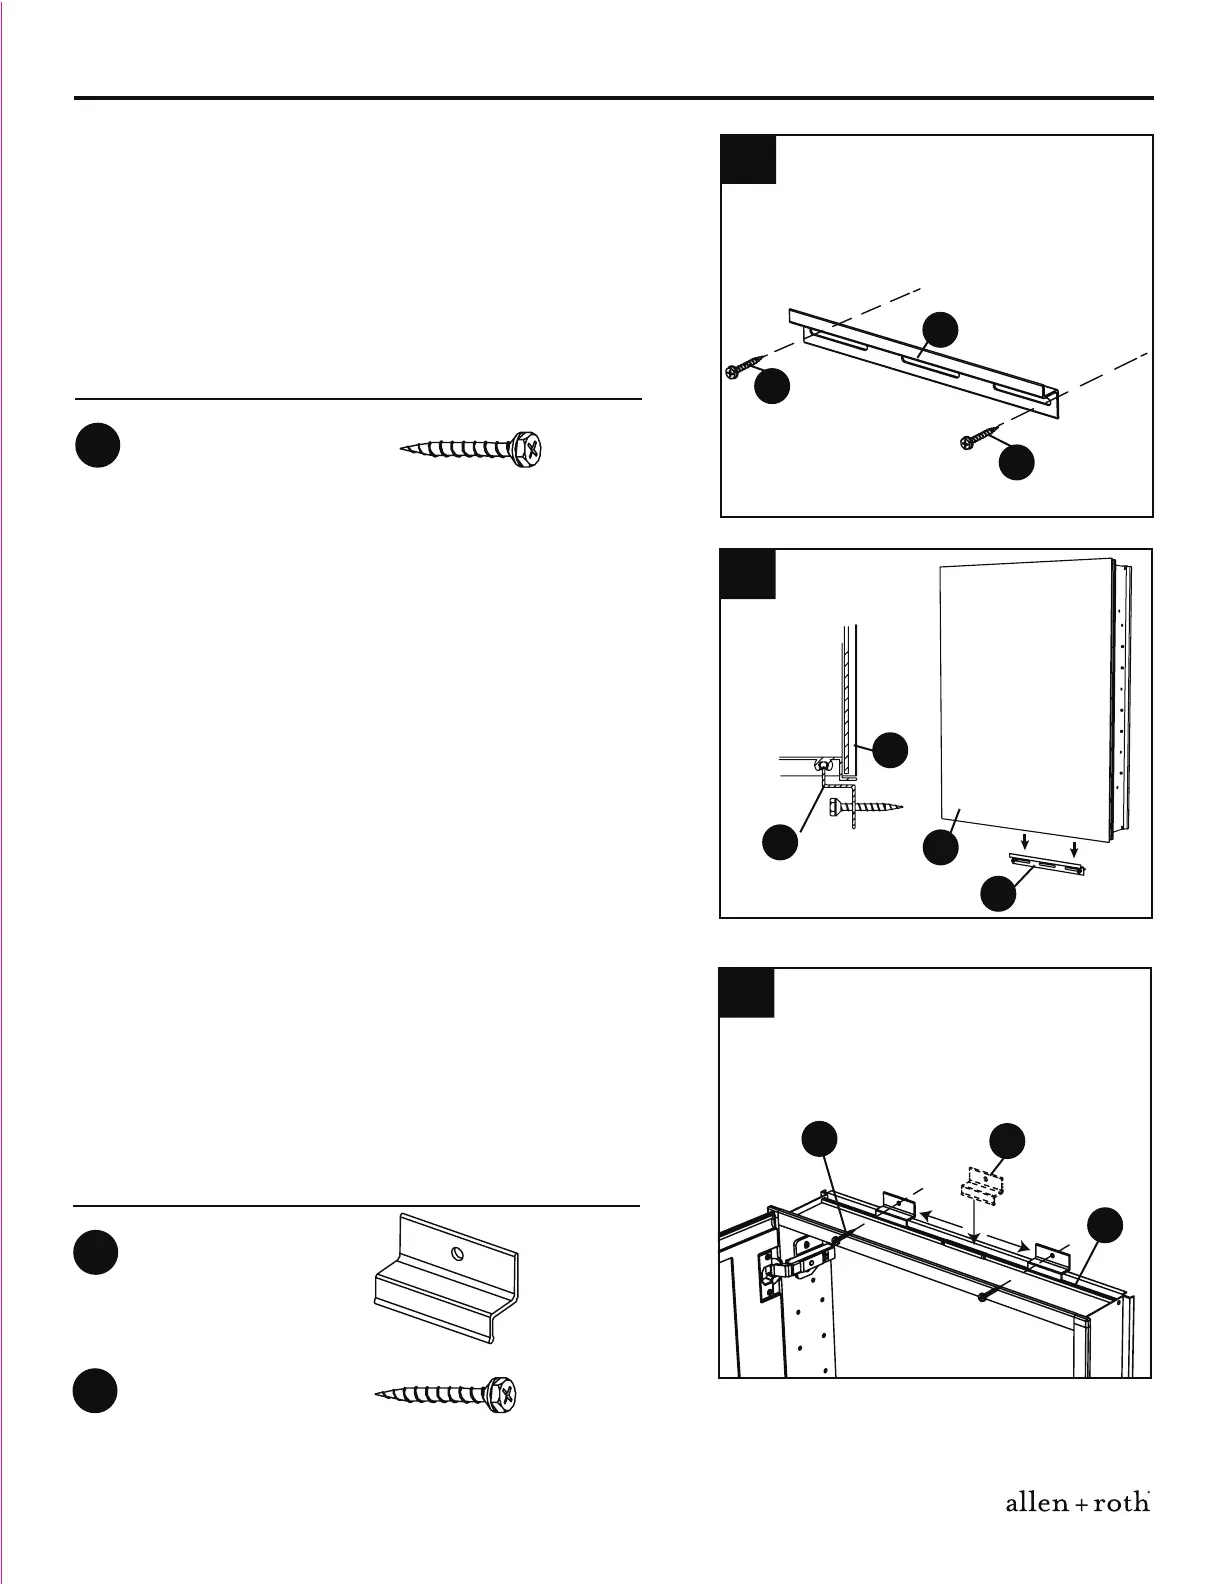
3. With the assistance of another person, install the
top clips (II) by inserting the rounded ends into the
rear top slot of cabinet (C). Slide one top clip (II) to the
left and one to the right, then use long screws (GG)
and hardware best suited for wall type to secure the
top clips (II). Refer to MOUNTING OPTIONS on page
4.
3
Top Clip
Long Screw
x 2
x 2
II
GG
II
C