Allora 2
24
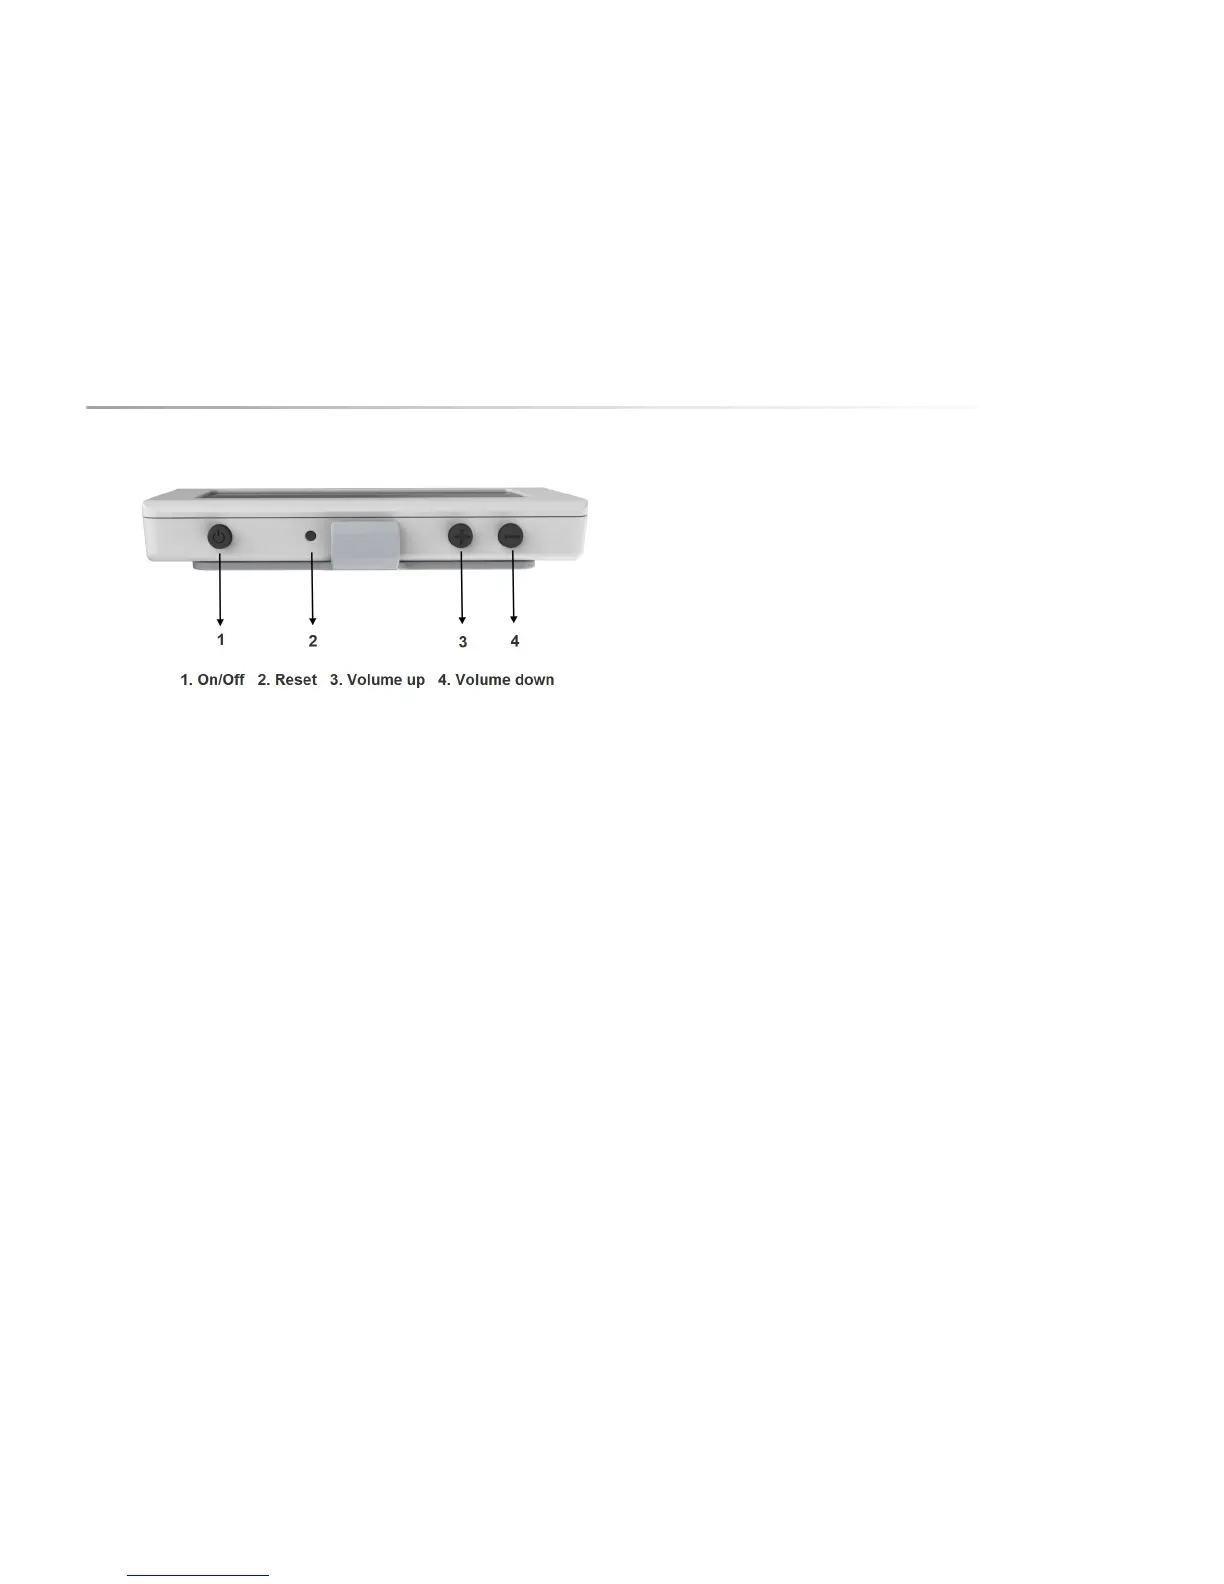
The 2nd display has a number of control buttons. These control buttons only
become active when the 2nd display is detached from the main device.
6.4.1 On/off
Press the on/off button to switch on the 2nd display (or switch off when it is
active). You only need to do this when the 2nd display is detached from the
Allora. As soon as the 2nd display is switched on, a wireless connection
between the Allora and the 2nd display will be established. This can take a few
moments. You will hear a beep as soon as the connection is established. Also,
on the 2nd display a symbol will appear shortly to acknowledge the connection.
6.4.2 Reset
In the event that the 2nd display becomes unresponsive, push the reset button
to force the display to shut down. The reset button is activated by pressing with
a pointed utensil, such as a ball point pen. Press the button gently until a ‘click’
is heard, then press the on/off button to turn the display back on again.
6.4.3 Volume up
This button is used to increase the volume of the 2nd display. This will also
change the volume setting on the Allora. The volume level is shown on the
screen.
6.4.4 Volume down
This button is used to decrease the volume of the 2nd display. This will also
change the volume setting on the Allora. The volume level is shown on the
screen.
The connector on the side of the 2nd display is only used for service purposes.
Press the 'Volume down' button and the on/off button simultaneously to show
the status parameters of the 2nd display: these are the serial number, Mac
address (this is the identifying address for the wireless connection), the software
version and the status of the battery.
 Loading...