Ally trapper and standard Ally trapper
15’ 16,5’ 18’ 15,5’ 17’ 18,5’
Stem (bow & stern) 1602 1602 1602 185700 185700 185800
Keel rod 1503 1603 1803 185501 185701 185801
Inner chine rod 1506 1606 1806 185502 185702 185802
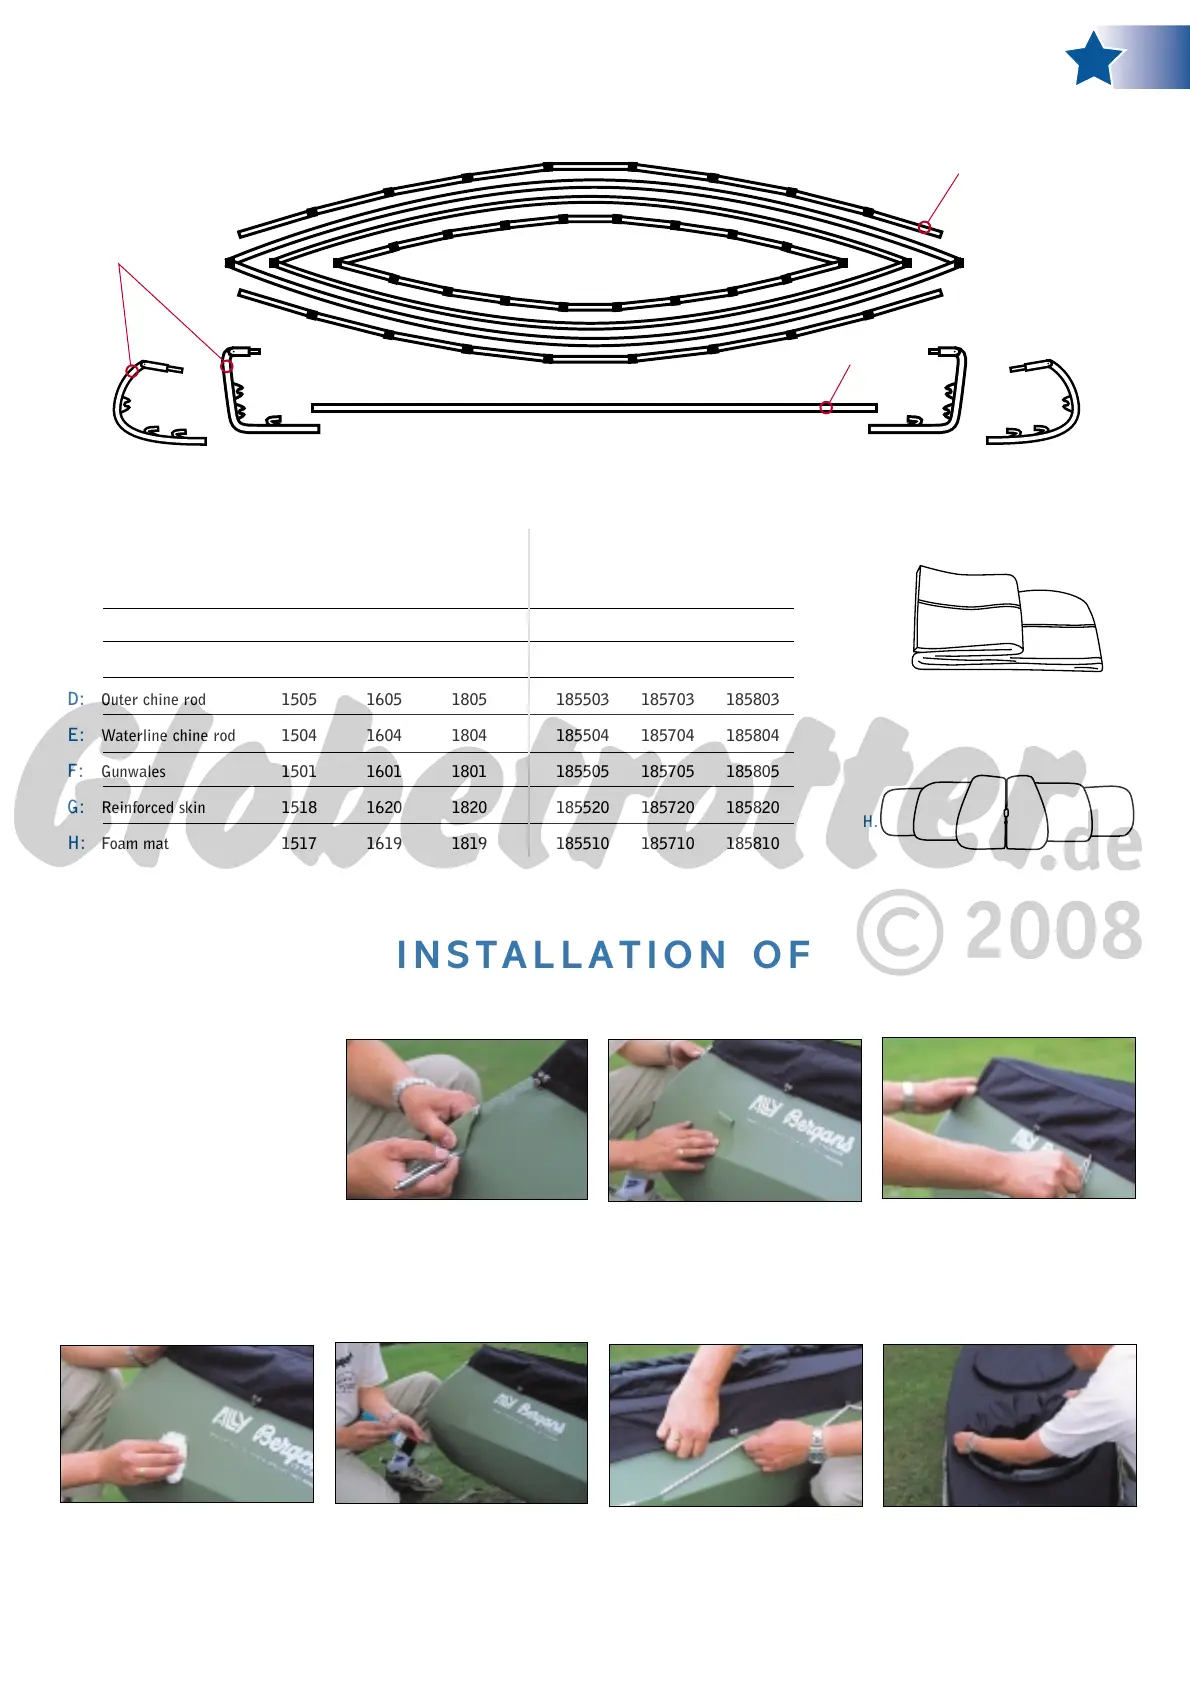
Outer chine rod 1505 1605 1805 185503 185703 185803
Waterline chine rod 1504 1604 1804 185504 185704 185804
Gunwales 1501 1601 1801 185505 185705 185805
Reinforced skin 1518 1620 1820 185520 185720 185820
Foam mat 1517 1619 1819 185510 185710 185810
A:
B:
C:
D:
E:
F:
G:
H:
G.
H.
B.
E.
C
.
D.
F.
F.
Art. no.
Art. no.
Art. no.
ALLY FOLDING CANOES - PARTS LIST
INSTALLATION OF
ALLY SPRAYCOVER
The spraycover kit consists
of the following parts:
Spraycover
Skirts
Lid
Attach-loops
Bungee cord
Resin
Your Ally canoe with spraycover is now ready. We hope you have many memorable trips!
1. Pull the spraycover over your Ally canoe.
Start at the bow and with a pen mark off the
area where you want to bond on the first
attach-loop, approximately 15 cm (6") below
the rim.
2. Mark off the bonding area for the next attach
loop, approximately 19 cm (7.5") below the rim
and midway between hooks 1 and 2 on the
spraycover.
3.The remainder of the attach-loops should all be
positioned midway between successive hooks. However,
make sure that the attach-loops, where you will later
thread the bungee cord through, all are located just
above the waterline.Work your way around and finish
like you started on the other side.
4.To enhance the bond, wash both the marked
canoe skin bond area and the attach-loop bond
area with acetone. A simple cotton cloth may be
used.
5. Ally resin should be applied with a brush to
both bonding areas. Concentrate on one attach-
loop and its mating skin bond area at a time.
Bond on each attach-loop when the applied resin
starts to take on a lighter color shade.
6.Thread the bungee cord through the attach loops
and secure the two ends by tying them together. You
can now hook the spraycover on to the bunge cord
all the way around.
7.The cap and skirt is installed through the
spraycover channel.Reference the completely
installed spraycover on page 16, bottom right
picture.
A.
A.
A.
A.
 Loading...