14750 East Nelson Ave #B
City of Industry, CA 91744
909-598-1077
www.alslighting.us
© 2021 Advantage Lighting Solutions
All Rights Reserved
Specications and dimensions
subject to change without notice
Rev:01/20/21
Page 2 of 2
INSTALLATION AND TECHNICAL INFORMATION BL SERIES BOLLARD
Important Safety Instructions
Installation Instructions
Wire Connection
Emergency Wire Connection
Tools Required
• Make sure power is turned OFF before
installing.
• Inspect fixture for any damages.
If damaged, DO NOT install fixtureand
contact local ALS distributor immediately.
• Make sure power is turned OFF before
installing.
• Inspect fixture for any damages.
If damaged, DO NOT install fixtureand
contact local ALS distributor immediately.
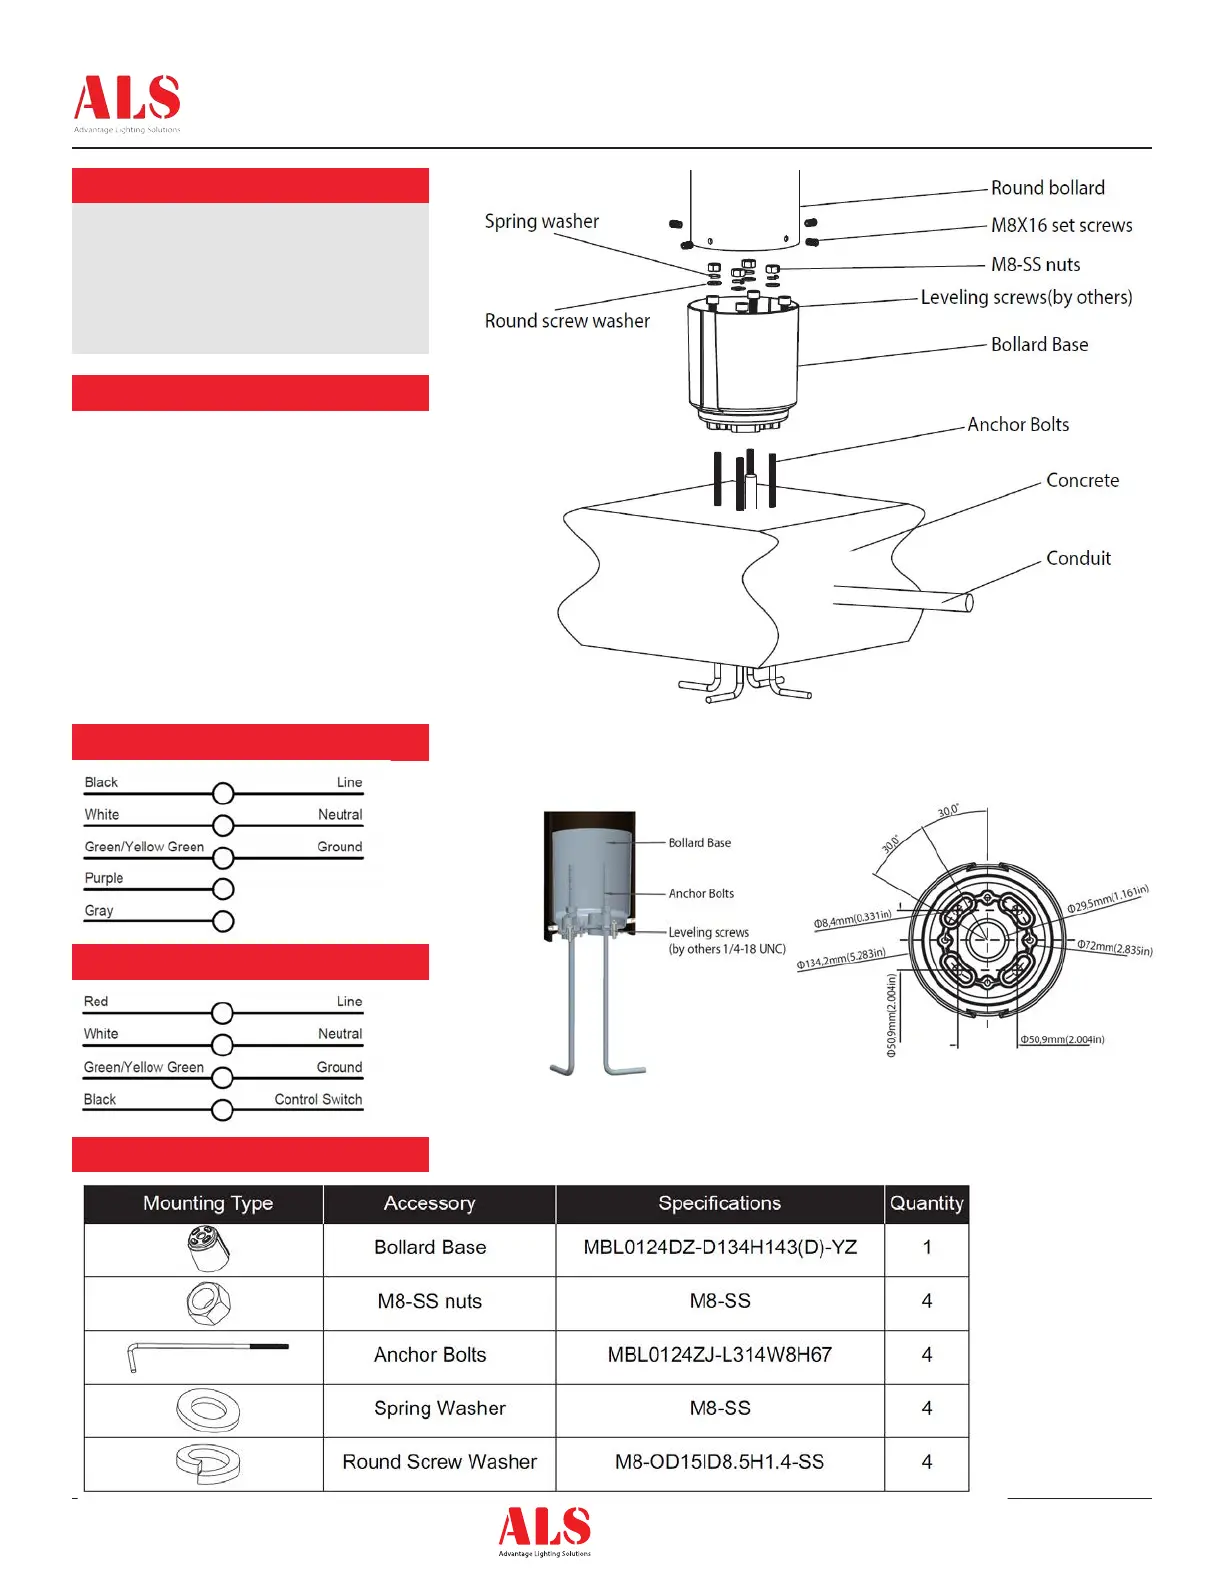
1. Place the bollard base over anchor bolts.
See Fig (A).
2. Loosely tighten the washer and nuts
provided. Tighten all nuts and screws.
3. Be sure supply leas extend far enough to
make xture connections. Wiring connections
can bemade now.
4. Slide the bollard over on bollard base line
up with the grooves. Be sure to check the
LED position on the bollard.
5. Use the four set screws to secure the bollard
to the bollard base.
Fig (A)
Anchor Bolt Template for Bled Bollard
 Loading...