14750 East Nelson Ave #B
City of Industry, CA 91744
909-598-1077
www.alslighting.us
© 2021 Advantage Lighting Solutions
All Rights Reserved
Specications and dimensions
subject to change without notice
Rev:01/26/21
Page 2 of 2
INSTALLATION AND TECHNICAL INFORMATION DL SERIES DOWNLIGHT
Installation Instructions
Junction Box
1. Loosen two set screws and remove metal
template.
2. Install EVA gasket on the back of the metal
template ( Note the direction of the arrow ).
3. Pull house supply wires through hole in
housing back and secure housing to junction
box with two mounting screws ( by others ).
4. Thread 1/2’’ conduit into the 1/2’’ hole.
5. Connect Black for Line, White for Neutral and
Bare Wire for Ground to complete the wiring.
6. Secure the xture on the metal template with
set screws.
1. Install mounting bracket to the junction box.
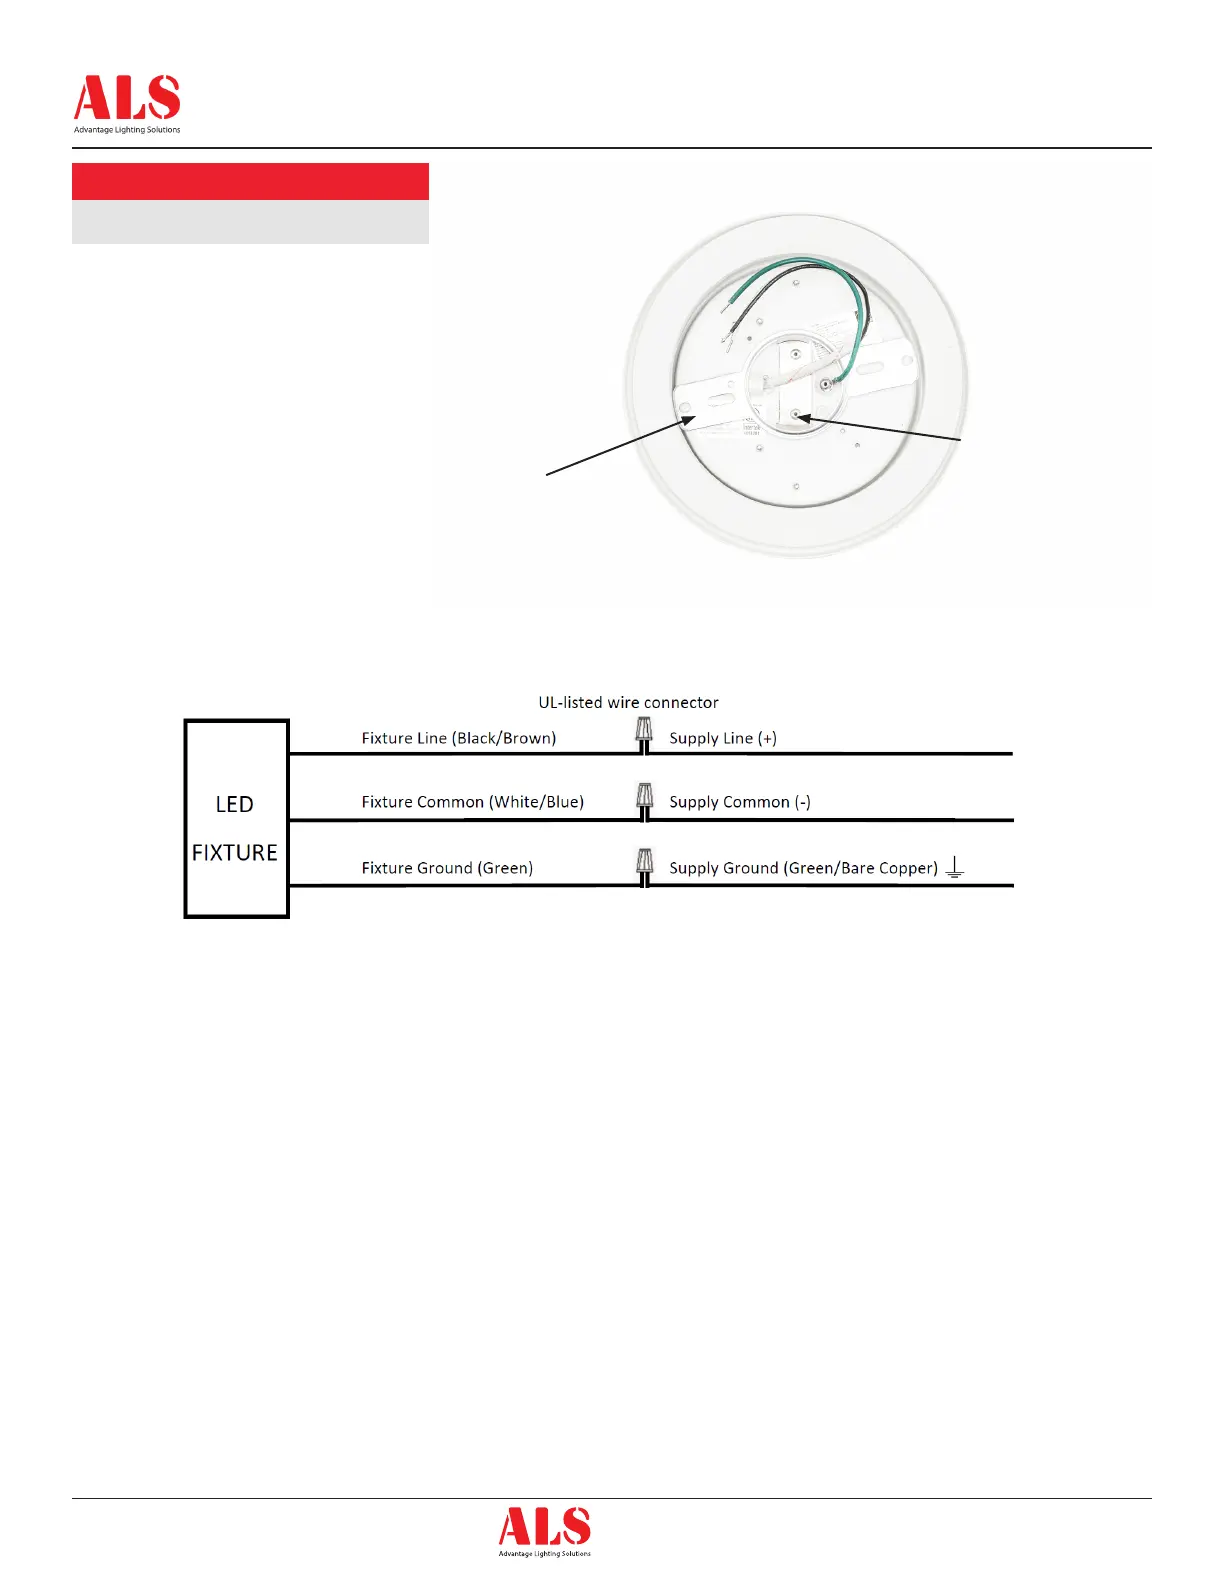
2. Connect Fixture to Power. Using UL listed
connectors, connect building power supply
wire (line) to black lead on xture and connect
building common wire to white lead on
xture. Connect the ground wire from
junction box to ground screw on mounting
bracket.
3. Install xture by aligning the spring clips with
center hole in the mounting bracket and push
until xture snaps into place. If the unit does
not snap into place, make sure junction box is
ush with the ceiling.
4. To remove xture, pull down to overcome
spring pressure.
This Bracket
Mounts to 4”
Junction Box
Spring Clips
Note: Prior to installation, junction box must be properly installed and ush with ceiling.
 Loading...