14750 East Nelson Ave #B
City of Industry, CA 91744
909-598-1077
www.alslighting.us
© 2021 Advantage Lighting Solutions
All Rights Reserved
Specications and dimensions
subject to change without notice
Rev:01/25/21
Page 2 of 2
INSTALLATION AND TECHNICAL INFORMATION PT SERIES AREA LIGHT
Installation Instructions
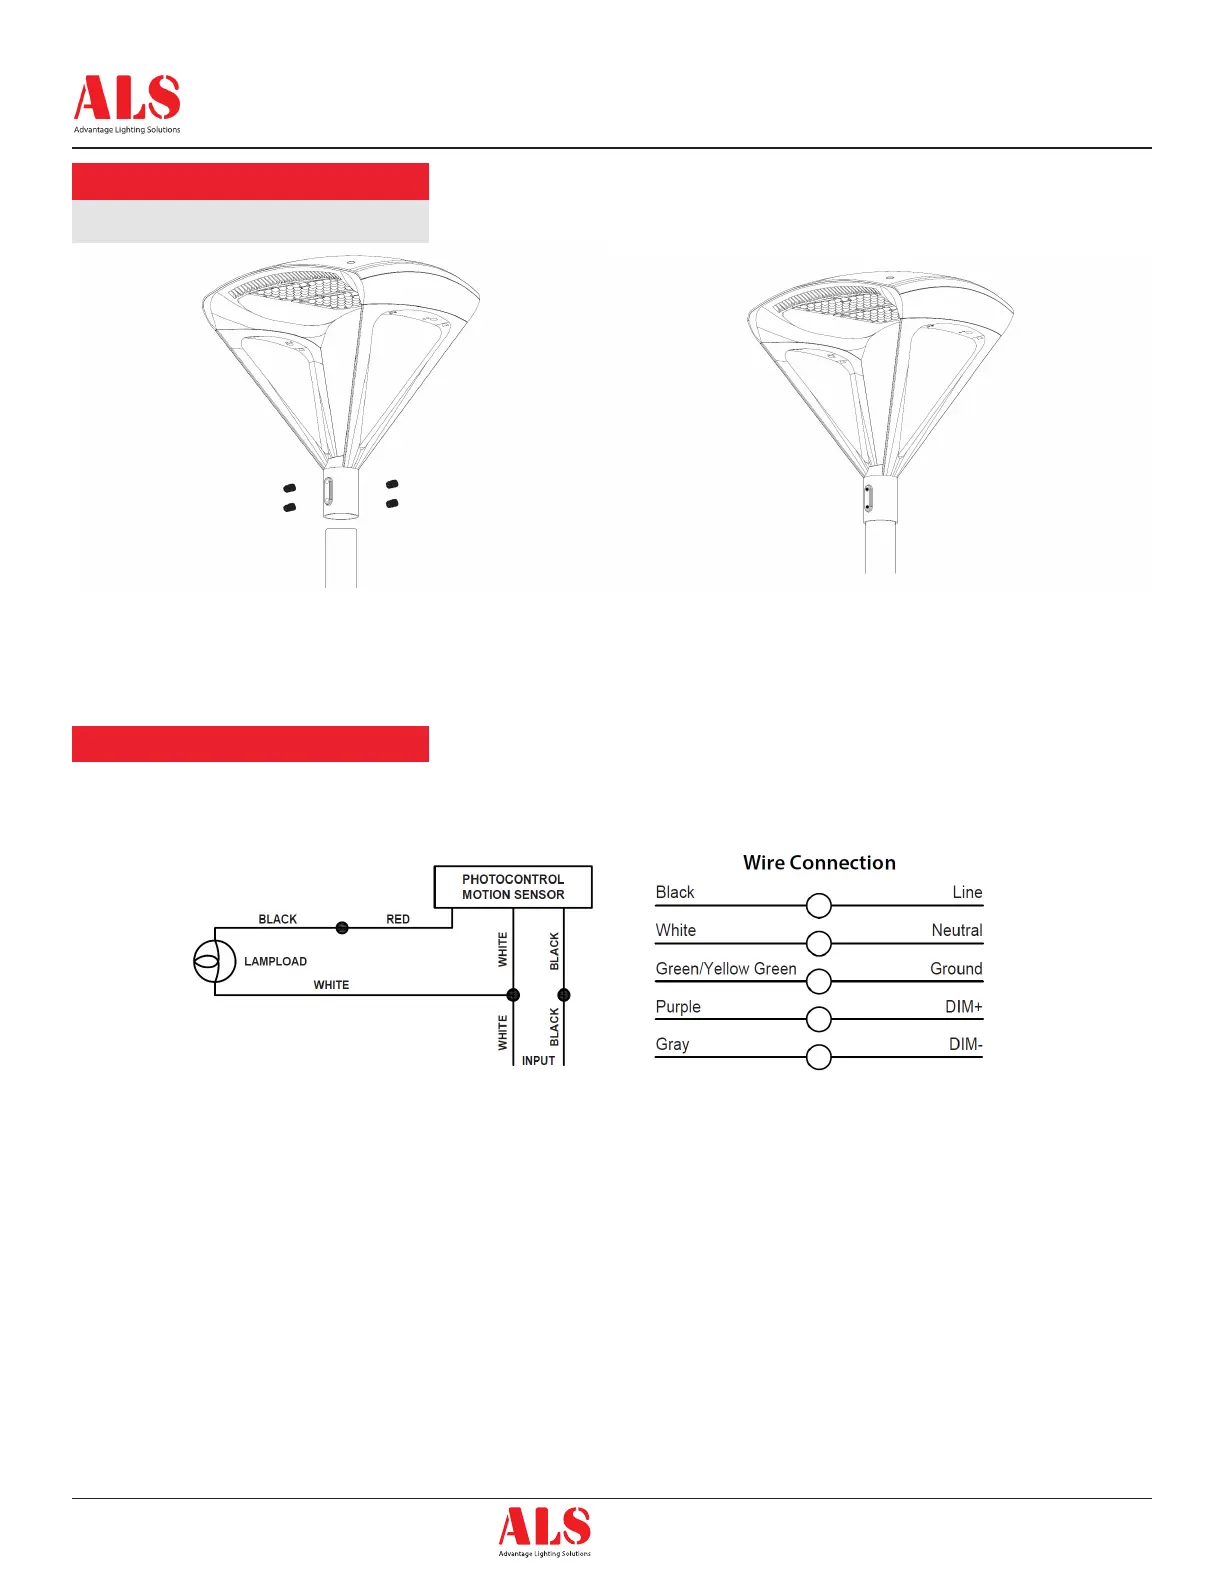
Wiring Diagram
Slipfitter Mount
1. Loosen two set screws and remove metal
template.
2. Install EVA gasket on the back of the metal
template ( Note the direction of the arrow ).
3. Pull house supply wires through hole in
housing back and secure housing to junction
box with two mounting screws ( by others ).
4. Thread 1/2’’ conduit into the 1/2’’ hole.
5. Connect Black for Line, White for Neutral and
Bare Wire for Ground to complete the wiring.
6. Secure the xture on the metal template with
set screws.
1. Upon completing the wiring procedure, loosen setscrews as shown in
Fig. (A). Insert pipe into sliptter.Tighten set screws to secure mounting.
2. Loosen screw as shown in Fig. (B) to adjust xture todesired angle.
Tighten screw back into locking position.
 Loading...