6
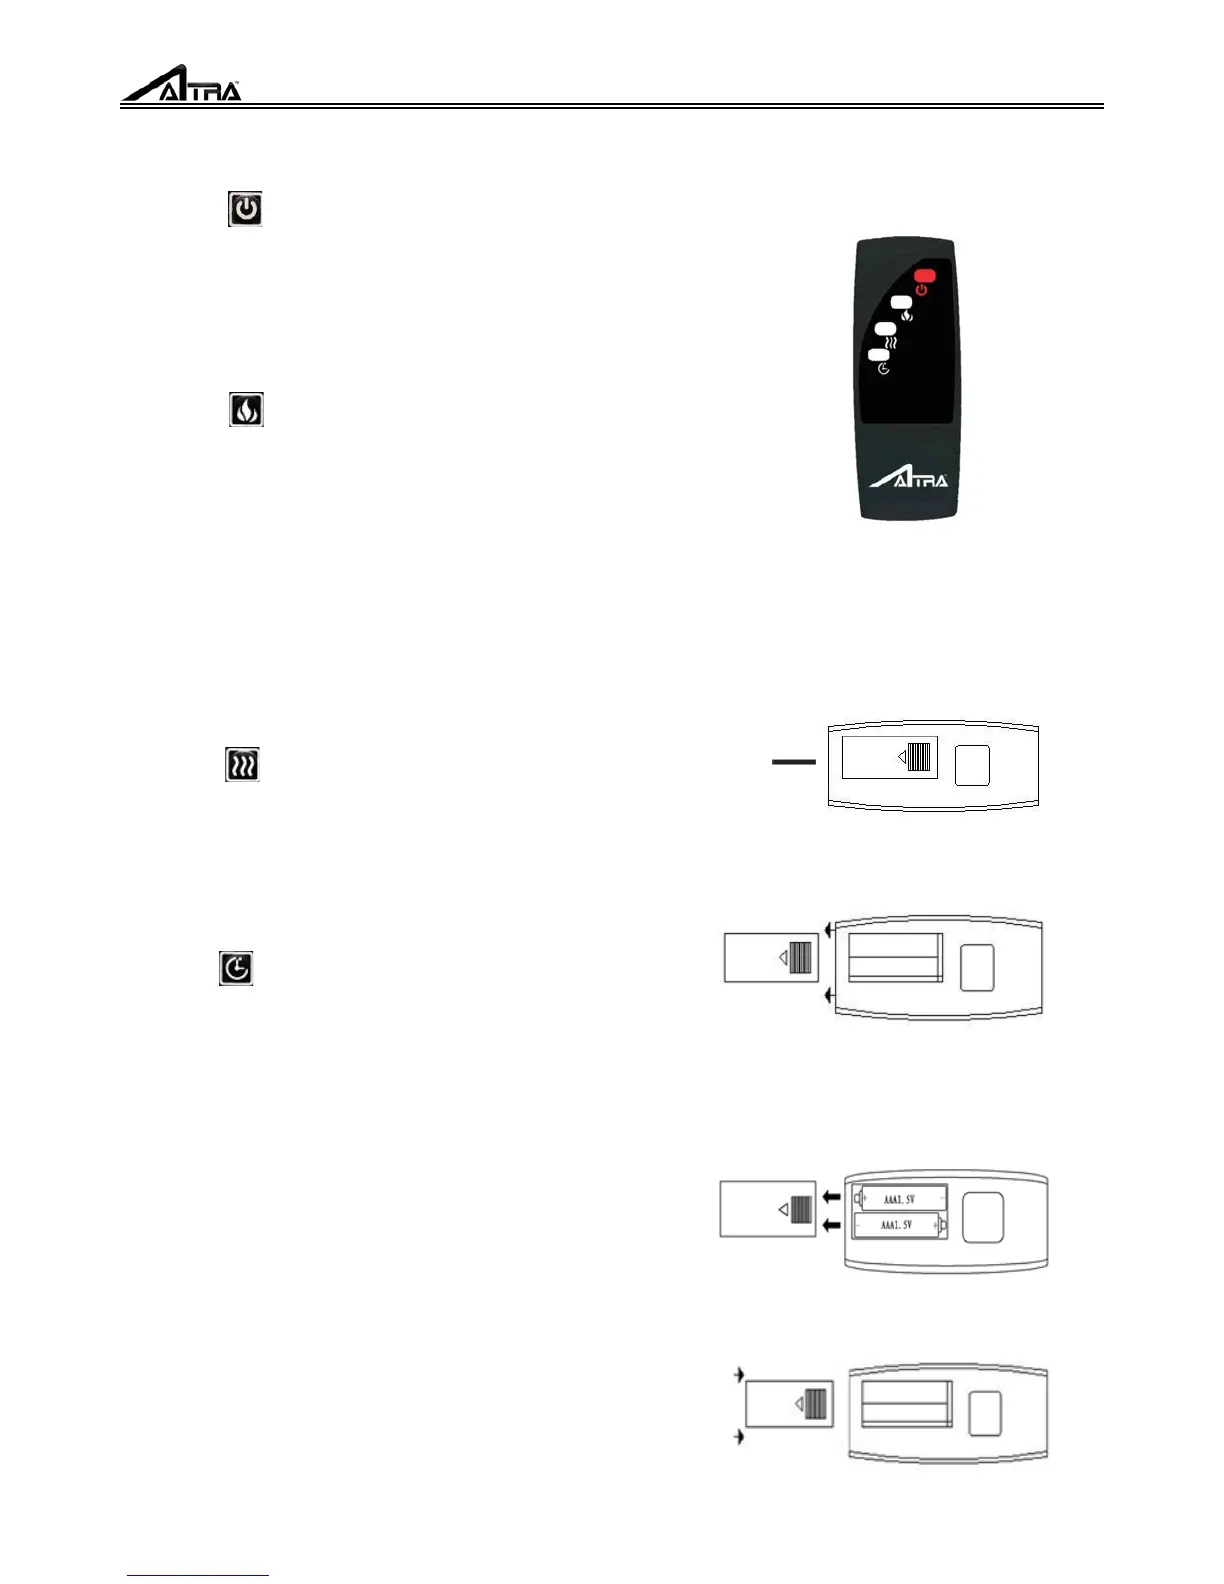
OPERATING INSTRUCTION WITH REMOTE
POWER
FLAME
HEATER
TIMER
NOTE: Do not use old and new batteries together !
NOTE: The remote control is intended only for the
functional operation to the product, It can not lock/
unlock the heating function or adjusting the
temperature setting or lock/unlock flame function!
The POWER icon turns the appliance on and off. It
has a memory function, press the power button
once turns power on. Pressing the power button
again will turn the power off.
The FLAME button manages the flame brightness.
Each time the flame button is pressed the intensity
of the flame brightness. There are four brightness
levels you can cycle through including the OFF
setting.
When adjusting the flame button a number will
appear on the digital display indicating brightness
of the flame. The FLAME button does not have a
locking or unlocking flame function.
The HEATER button turns on the heater on and off.
When pressing HEATER button on the remote, the
default setting temperature is 82
℉
(22
℃
). The
HEATER button does not have locking or
unlockin
heater function.
The TIMER button on the remote has the same
function as the TIMER button on the control panel.
It can adjust timer range from
30mins-1h-2h-3h-4h-5h-6h. The timer setting will
be visible on the digital display.on the remote has
thesamefunctionastheTIMERbuttononthe
control panel. It can adjust timer range from
30mins-1h-2h-3h-4h-5h-6h. The timer setting will
be visible on the digital display.
BATTERIES REPLACEMENT
1. Turn the remote control over, and locate the
battery cover.
Battery Cover
2. Remove the battery cover by sliding it towards the
bottom end of the remote control.
3. Insert two AA batteries into the battery socket, the
battery has two poles(positive and negative), the flat
side is negative pole, make sure the batteries are
firmly seated into the remote control.
4. Reinstall the battery cover, making sure it clicks
into position.