Bismarck
6
013
016
014
017
015
018
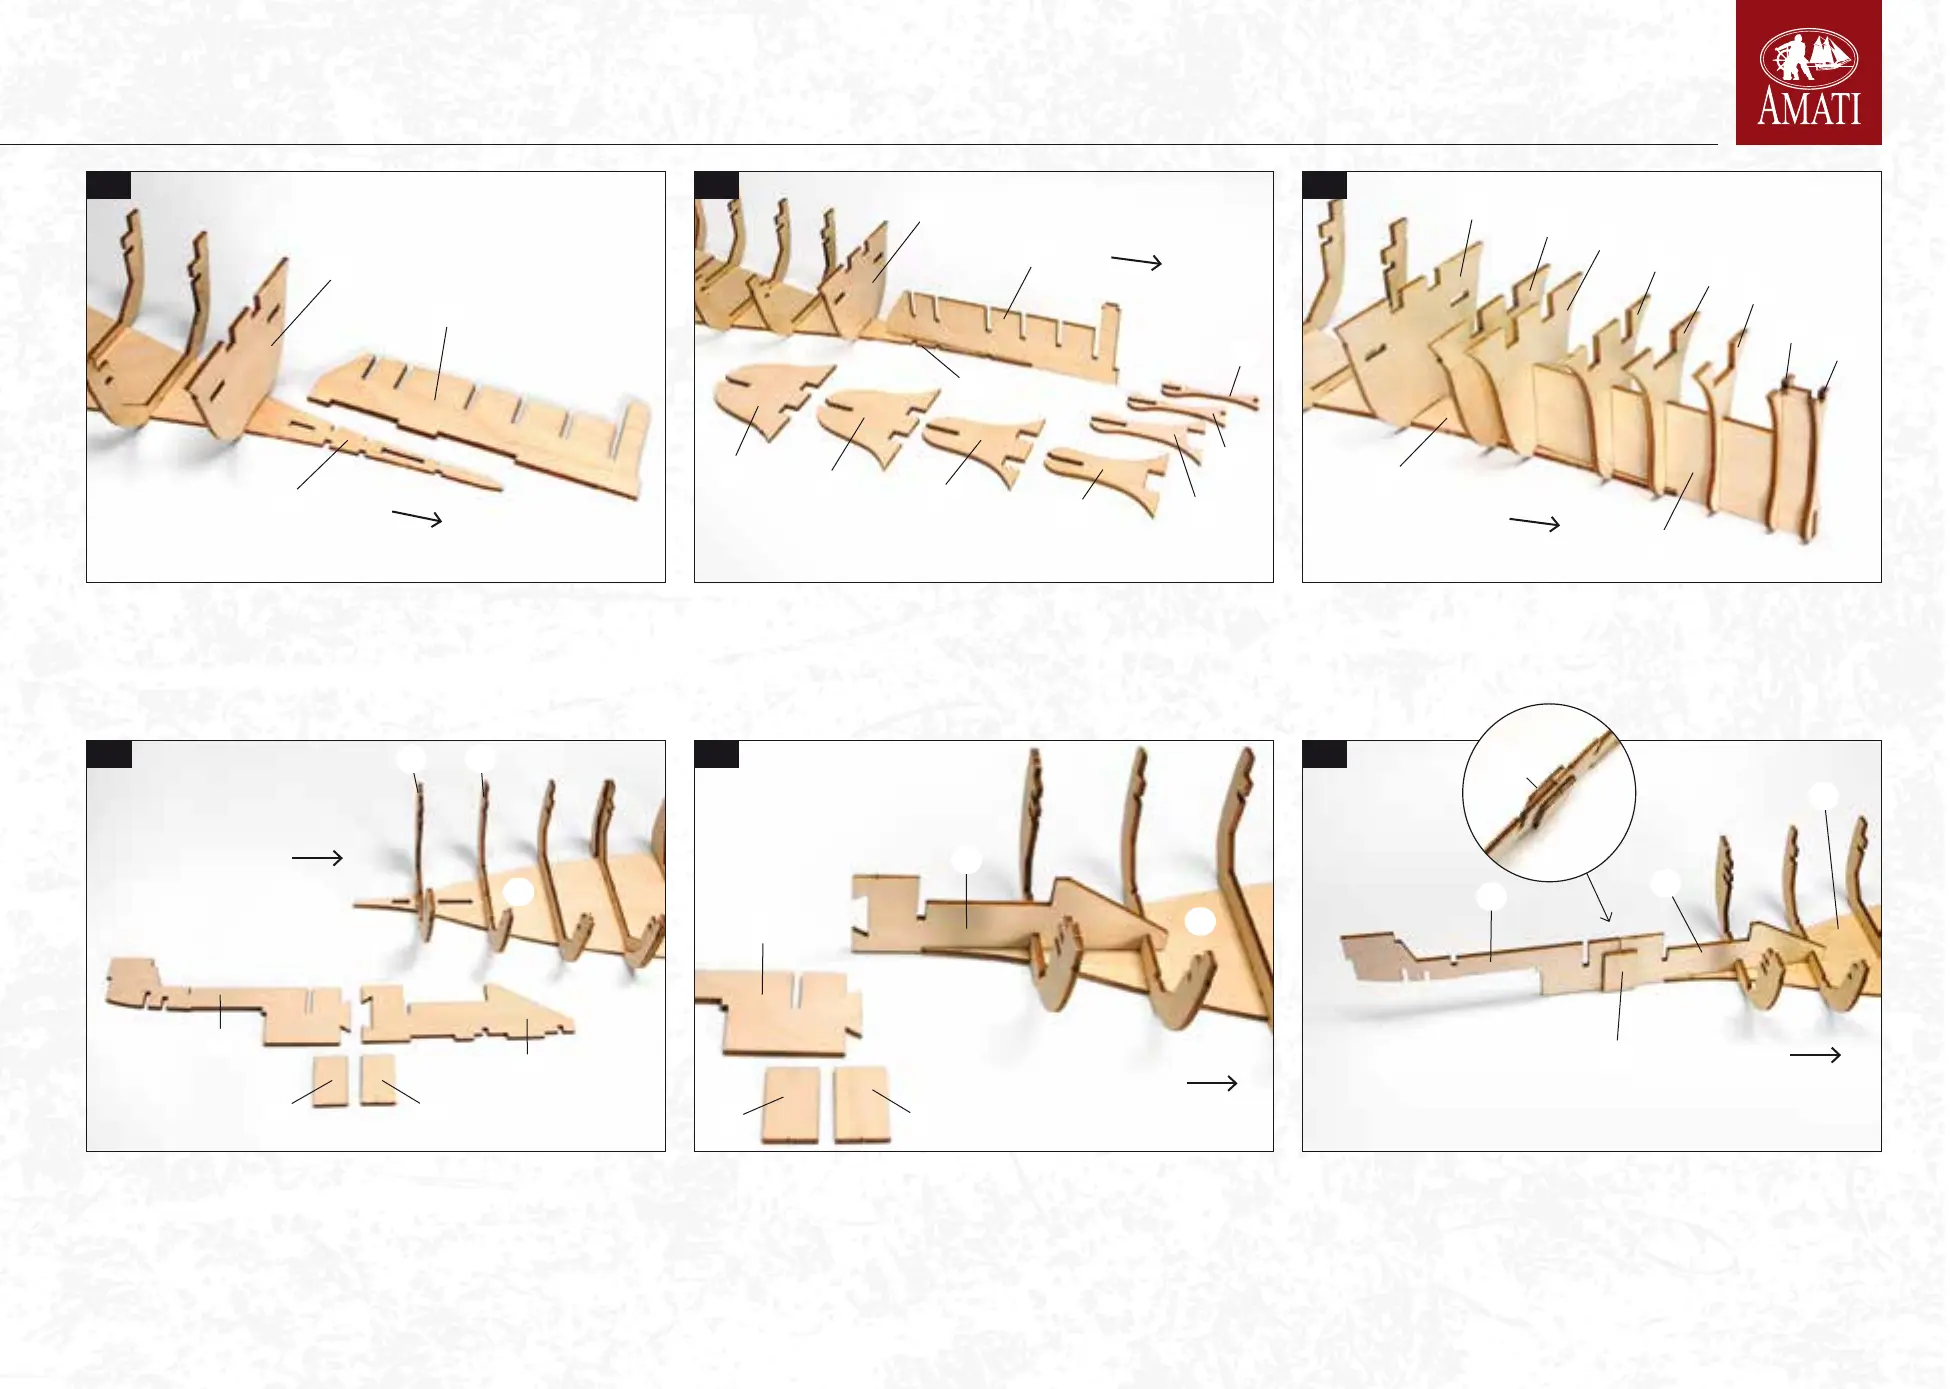
014 Place keel 3 in the joints of keel 2; check that they are perpendicular to each
other; then glue with wood glue. Remove bulkheads 14, 13, 12, 11, 10, 9, 8 from laser
sheets 3552 and 3551, smooth any imperfection and lay them on your worktop in the
order shown in the picture.
013 Move to the bow joints of the model and lay keel 3, which you can nd on laser
sheet 3552. Position it on your worktop as shown in the picture above.
26
25
016 Move to the stern of the model and lay on your worktop keel 5, 4 and two sup-
ports 6 (x2) which you can nd on laser sheets 3552 and 3551. The lower joints of keel
4 must be glued in the stern joints of keel 1 and of shells 25 and 26.
018 Glue the dovetail joint of the two elements 5-4 and the two supports 6 at the
joint. Check that the pieces are perfectly in line with each other and that the lower
part of the keel is on the same level of the worktop.
017 Try positioning keel 4 without glue oriented as shown in the picture above. Apply
wood glue in the joints and x it perpendicular to keel 1.
015 Insert the bulkheads in the upper joints of keel 3. Check that they are perpendic
-
ular to the keel and parallel to each other; then glue.
15
2
3
BOW
15
14
13
12
11
10
3
2
9
8
3
15
14
13
12
11
10
9
8
5
5
5
4
4
4
6
6
6
6
6
6
BOW
BOW
BOW
BOW
BOW
1
1
1
2
 Loading...