Repair, maintenance and servicing
53
AMATRON II-A DB 599 09.01
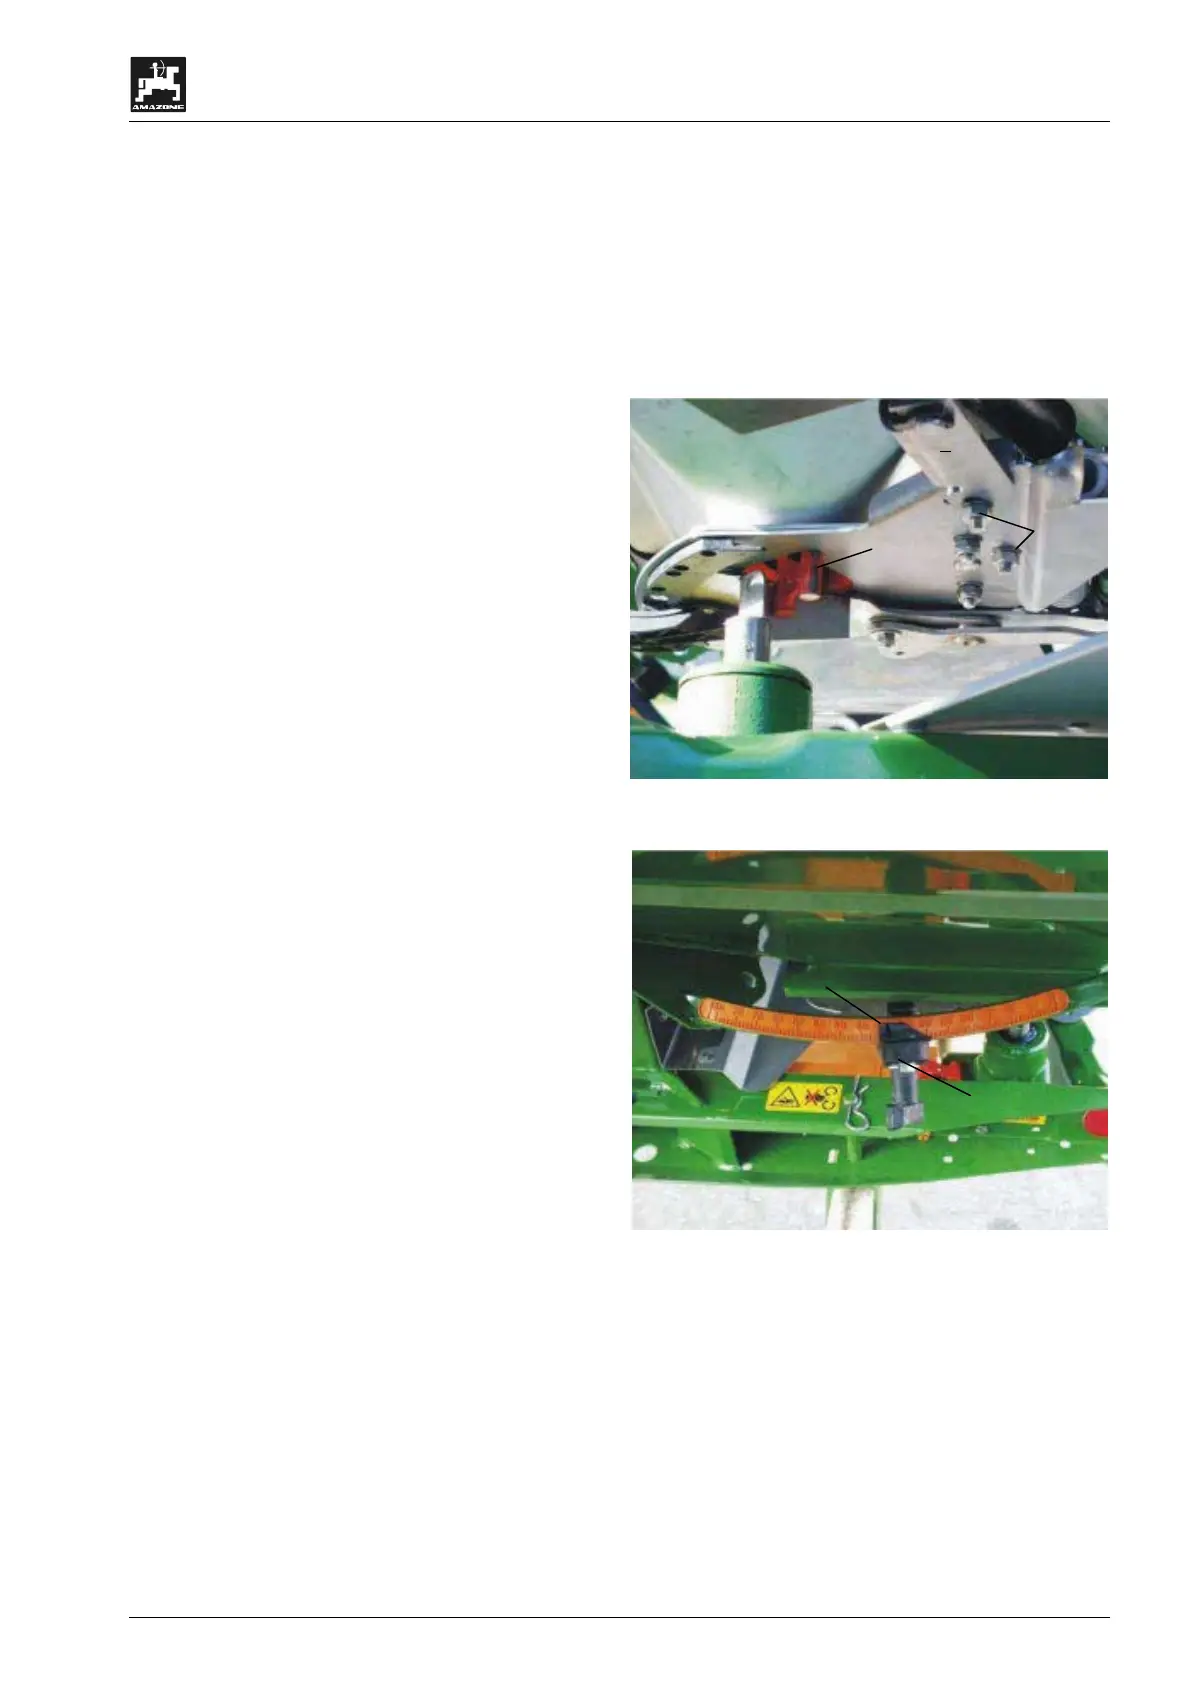
2. Checking the dimension of the opened dis-
charge outlet
- The setting gauge (Fig. 101/1) must easily fit
through the now released discharge opening di-
ameter. (Special option, Order No.: 915018).
Should this not be the case (opened discharge
outlet diameter too small or too big) readjust the
fixing of the setting motor bracket with the linkage
for the shutter slide as follows:
- Slacken the fixing bolts (Fig. 101/2) of the setting
motor console (Fig. 101/3).
- Insert the setting gauge (Fig. 101/1) into the dis-
charge outlet opening.
- Swivel the setting motor console (Fig. 101/3) to-
wards the setting gauge and retighten the fixing
bolts.
Check whether the shutter position 41 for the metering
shutter slides is shown on the spread rate setting
scale. If necessary, slacken the pointer fixing (Fig.
102/1) and align the pointer read off edge (Fig. 102/2)
on top the scale figure 41.
Fig. 101
Fig. 102
a
When actuating the shutter slides, do
not reach into the discharge opening.
Danger of squeezing.
I
If the values for the read off shutter
slide positions of the two shutters are
far beyond the indicated maximum va-
lues, a fault in the control system or on
the setting motor can be assumed. In
this case check the impulse value of the
setting motors.
1
2
3
1
2
 Loading...