Quick
Start Guide
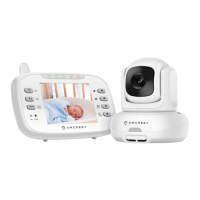
Connection & Installation
This section provides information about
pairing the handset with the camera.
Once powered on, a battery icon with a lightning bolt
will display on the upper right-hand of the screen. This
indicates the handset is charging. When the handset is
completely charged, the battery indicator shown on
the screen will be full and you may disconnect it from
the charging cable as desired.
Powering on the Camera
❶
Connect the included power
adapter to a wall outlet.
❷Connect the camera to the
power adapter.
❸Slide the ON/OFF switch to
the ON position.
Powering on the Handset
❶
Connect the included
power adapter to a wall outlet.
❷Connect the handset to
the power adapter.
❸Press and hold the power
button until the handset
powers on.
On/O
Press and Hold to Speak
Configuration Settings
Tilt Camera Up
Tilt Camera Down
Pan Camera Right
Pan Camera Left
Indicates if the device is
powered on or o.
Indicates the status of the
connected cameras. When lit
indicates there is no link.
Display
Push to Talk
Menu
Tilt Up
Tilt Down
Pan Right
Pan Left
Power
Link
Icon Description Options
Handset Button Menu
Pairing your Handset & Camera
By default, the camera and the handset comes paired
and should be ready to use, However, If for any
reason pairing needs to be reestablished between the
handset and the camera, please Follow these
instructions:
❶
Within the handset menu please navigate to the
setting icon
❷Next, navigate to "Add" and press the button
located between the standby and buttons
on the handset face.
❸Now, select a channel and press to start the
pairing process.
❹Located under the camera, press and hold the
button while the camera is powered on. If the pairing
process was completed within the allotted time, you
should see an image captured by the camera unit.
Please note that the handset will only pair
within 15 seconds. If the camera does not pair
within this time you will need to begin the
process again.
!