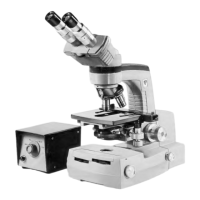
The American Optical AO Series 20 Microscope is a versatile instrument designed for advanced microscopy, including brightfield, phase contrast, and photomicrography applications. This manual, priced at $1.00, provides comprehensive instructions for its operation, maintenance, and the use of its various accessories.
Function Description
The AO Series 20 Microscope is primarily used for observing microscopic specimens. It supports both brightfield and phase contrast microscopy, allowing for the visualization of transparent or unstained specimens that would otherwise be difficult to see. The instrument is also adaptable for photomicrography, enabling users to capture images of their observations. Its modular design allows for the integration of various components and accessories to suit different research and educational needs.
Important Technical Specifications
The microscope features a robust design with a focus on optical performance and user-friendliness.
Optical System:
- Illumination: The microscope utilizes a high-intensity, halogen (quartz-iodine) lamp, providing uniform intensity throughout its life at a consistent reproducible color temperature of 3200°K.
- Filter Turrets: The instrument incorporates two built-in filter turrets: an upper turret and a lower turret. These turrets can accommodate various filters for different applications.
- Upper Turret Filters:
- No. 2061: Green
- No. 2040: Blue Compensated Filter (EK 80A/CC10R, 2.5 mm thickness)
- No. 619: Blue Filter (4 mm thick)
- No. 310-601: Neutral Density Filter, 50% transmission
- No. 310-602: Neutral Density Filter, 25% transmission
- No. 310-603: Neutral Density Filter, 5% transmission
- Lower Turret Filters:
- No. 406: Blue Filter (1.5 mm thick)
- No. 2062: Didymium Filter Blue/Pink (2 mm thick)
- Condenser System: The microscope is equipped with an auxiliary swing-in condenser and an aperture diaphragm lever, allowing for precise control over illumination. The phase turret condenser, specifically the No. 1240 Phase Turret Condenser, is designed for universal use with both AO Series 20 and Series 10 microscopes. It features five positions for different phase contrast objectives and a brightfield open aperture.
- Objectives: The manual references various objectives, including 4X, 10X, 20X, 40X/45X, and 100X, for different magnifications.
- Eyepieces: The system is designed to accommodate various eyepieces, including wide field eyepieces.
Mechanical Specifications:
- Focusing: The microscope features coarse and fine focusing knobs for precise adjustment.
- Stage: A mechanical stage with X-Y movement allows for accurate positioning of specimens.
- Lamp Housing: The lamp housing is designed for easy lamp replacement and includes components like baffles and diffusers for optimal light distribution.
- Power: The transformer for photomicrography is set at 12 volts. The standard transformer operates at 115V, 60 cycle outlet.
Usage Features
The AO Series 20 Microscope is designed for ease of use, with clear procedures for setup, operation, and adjustment.
Preliminary Procedure:
- Unpacking: Carefully unpack all components and verify against the packing list.
- Assembly: Assemble the microscope according to the provided instructions, ensuring all parts are securely in place.
- Lamp Installation: Install the lamp into the lamp holder, ensuring it is properly seated.
- Power Connection: Connect the microscope to a 115V, 60 cycle outlet.
Filter Placement:
- Upper Turret: Filters are placed into the upper turret by rotating it to the "A" position and inserting the filter.
- Lower Turret: Filters are placed into the lower turret by rotating it to the "C" position and inserting the filter.
- Cleaning: Filters should be cleaned with a soft brush, lint-free cloth, or cotton swab if required.
Lamp Installation and Lamp Holder:
- Installation: Unwrap the lamp and install it into the lamp holder, ensuring fingers and stains are removed with cleaning tissue and alcohol.
- Locking Screw: The lamp holder locking screw should be checked to ensure it is turned out sufficiently to insert the lamp holder into the microscope base.
- Centration: The lamp holder is centered by moving the lamp holder into the receptacle on the back of the transformer.
Centration of the Lamp to the Optical Path of the Microscope:
- Turn on the transformer to the 9 volt setting.
- Position both filter turrets at "O" (open aperture).
- Place a piece of white paper or ground glass over the light well in the microscope base.
- Partially close the field diaphragm by moving the field diaphragm lever to the left until the lever is approximately 1/2" from the end of its excursion.
- Loosen the lamp holder locking screw with one hand and simultaneously hold the lamp holder with the other hand.
- Move the lamp holder in or out of the microscope base and rotate it until the light directed to the paper is centered in the light well opening.
- Carefully center the lamp holder in the correct position for light centration, then tighten the locking screw.
Procedure for Brightfield Microscopy:
- Turn on the transformer to the 9 volt setting.
- Make certain the lamp is centered following the "Centration of the Lamp" procedure.
- Rotate the upper turret to the "A" setting to position the No. 406 Blue Filter in the light path.
- Rotate the lower turret to "O" for use of the 5% Transmission Filter. Add Filter #310-603, 25% Transmission, if light level is too intense for your purpose.
- Fully open both the field diaphragm of the illuminator and the aperture diaphragm of the condenser by moving the levers to the extreme right.
- Turn the condenser focusing knob, on the side of the microscope base, until the image of the condenser is in focus.
- Place a specimen slide on the stage.
- Rotate the microscope objective nosepiece to move the 10X objective into working position.
- Check to see that the auxiliary swing-in condenser is out of the light path.
- Raise the microscope condenser by means of the condenser rack and pinion knob.
- Turn the top of the condenser approximately the thickness of a piece of paper beneath the slide.
Procedure for Phase Contrast Microscopy:
- Condenser Setup: The No. 1240 Phase Turret Condenser and the No. 1246 Single Annulus Phase Condenser are designed for universal use.
- Annular Diaphragm Centering: Use the two annular diaphragm centering wrenches to rotate the phase turret condenser to the open aperture. The annular diaphragm settings are color-coded to the phase objectives.
- Observation: View through the microscope, partially close the field diaphragm of the illuminator, and adjust the field diaphragm until the leaves disappear from view.
Photomicrography:
- Models: The manual describes models 1052A, 1053A, and 1055A for photomicrography.
- Exposure Tables: Detailed exposure tables are provided for EK Kodachrome II Film (ASA 25), EK Panatomic X (ASA 40), Polacolor Types #108, 58 (ASA 75), and Black & White Type #107 (ASA 3000) for various objectives and shutter speeds.
- Viewing Screen: The No. 1050 Viewing Screen is used with a Series 20 Microscope. A Neutral Density Filter is not required. Resultant magnification on the screen plane is 7.5 times the initial magnification of the objective, and the field of view is the same as through 10X wide field eyepieces.
Maintenance Features
The manual emphasizes proper care and cleaning for the longevity and optimal performance of the microscope.
Care and Cleaning:
- Refer to the section entitled "Care of the Microscope" in Reference Manual 10-101 for a comprehensive description of cleaning procedures.
- Refer to the "Filter Placement" under PRELIMINARY PROCEDURE in this Manual for filter cleaning.
Lamp Replacement:
- Make certain that the lamp previously in use has cooled sufficiently to handle.
- Insert the new lamp in the manner described in "Installation of Lamp etc." under PRELIMINARY PROCEDURE.
- Refer to the Parts List on page 20 for ordering replacement lamps.
Service:
- Complete repair facilities are available at many of AO's authorized dealers, the American Optical Corporation, Scientific Instrument Division plant, Buffalo, N.Y., and AO Technical Service Centers in Chicago, Ill., Glendale, Calif., Springfield, N.J., and Dallas, Texas.
- For complete assembly instead of overhauling or rebuilding with detail parts, complete assemblies are available.
- Parts or assemblies should be ordered directly from AO's Instrument Division plant at Buffalo, N.Y., or from any of AO's authorized dealers. When ordering parts, be sure to include a complete description, part number, and correct quantity.
Parts List:
The manual includes a detailed parts list with exploded diagrams for the Series 20 Microscope Stand & Lamp Housing, Base Assembly, and Lamp Housing, providing part numbers, descriptions, and quantities for easy identification and ordering of replacement components. This facilitates self-maintenance and repair by users or authorized service personnel.