Do you have a question about the American Standard EverClean 6060LCE and is the answer not in the manual?
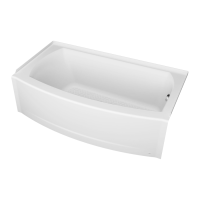
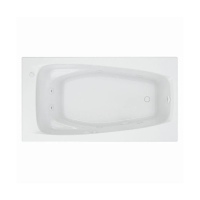
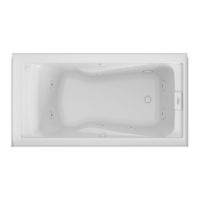
This document describes the installation and operation of EverClean® / Evolution® whirlpools and bathtubs, including models 2422L/V, 6060LC/VC/LCE, 2771L/V, 2645L/V, 7236L/V, 2425L/V-LHO, 2425L/V-RHO, 2908L (Reminiscence®), 2711L (Ellisse®), 2773L (Cadet® 6' x 36"), 2774L (Cadet® 6' x 42"), 2775L (Cadet® Corner), and 2732L (5' x 32"). It also includes instructions for the E-Z-Install™ Heater and the Lifetime Universal Drain.
The whirlpools are designed to provide a relaxing hydromassage experience. The whirlpool version comes pre-assembled with a pump, motor, and system piping, simplifying installation. The E-Z-Install™ heater, if equipped, is designed to maintain the water temperature in the bath for extended periods.
Before operating the unit, it is crucial to read and follow all safety instructions to prevent fire, electric shock, or injury. Children should not use the unit without adult supervision. The unit must not be operated without the guard over the suction fitting. Electrical appliances such as hair dryers, telephones, or radios should be kept at least 60 inches (1524mm) away from the unit to prevent electric shock.
Users with medications or adverse medical histories should consult a physician before using the product due to the risk of hyperthermia and possible drowning. The tub should not be overfilled before entering; filling more than two-thirds can cause overflow and slippery conditions. Caution should be exercised when entering and exiting. It is not recommended to use the bathtub immediately after meals, and alcohol consumption should be avoided before or during bathing, as it can cause drowsiness or hyperthermia, leading to loss of consciousness or drowning. Pregnant individuals should consult their physician before using the bathtub.
Never drop or insert any object into any opening. The unit should only be used for its intended purpose as described in the manual, and no attachments not recommended by American Standard should be used.
The unit must be connected to a supply circuit protected by a ground-fault circuit-interrupter (GFCI), which should be provided by the installer and tested routinely. To test the GFCI, push the test button; it should interrupt power. Pushing the reset button should restore power. If the GFCI fails to operate correctly or interrupts power without the test button being pushed, it indicates a defect or ground current, posing an electric shock risk. In such cases, the hydromassage bathtub should not be used, and the problem must be corrected by a licensed electrician.
A pressure wire connector is provided on the motor unit's exterior for connecting a no. 8 AWG solid copper bonding conductor between the unit and all other electrical equipment and exposed metal nearby, as required by local codes. This connection helps reduce the risk of electric shock by connecting to the grounding terminal of the electric service or supply panel with a conductor equivalent in size to the circuit conductors supplying the unit.
The installation process requires careful attention to detail. Upon receipt, the bath should be uncrated and inspected for shipping damage, which must be reported to the vendor immediately. During installation, the bath must be protected from construction damage. Before enclosing the bath with wallboard or tile, it must be filled with water and operated to check for leaks resulting from shipping or mishandling. Modifications to the whirlpool system or removal of the pump from factory mounting are prohibited, as they can adversely affect safety, performance, and void the warranty. The whirlpool should not be handled or moved by the pump, motor, or piping system. Fittings (bath filler, shower arm, etc.) are not included and must be ordered separately. Framing and enclosing materials are provided by others.
For electrical requirements, refer to the "Whirlpool Electrical Installation Instructions" section. Optional American Standard wall tiling bead may be required for recess installations. All finished surfaces of the whirlpool must be protected with a drop cloth during construction. Do not lift the whirlpool by the piping harness at any time.
Required tools and supplies include a level, tape measure, pipe wrench, slip joint pliers, screwdriver, standard woodworking tools, personal safety equipment, caulking gun, nails, putty, waterproof caulking, 1x4 stringers, drop cloth, cement, plaster, and grout.
Optional components such as drains, E-Z Install Heaters, apron kits, and tile bead kits are available and may be required depending on the model and installation type.
The installation involves positioning the whirlpool, leveling the deck, and marking the underside of the deck on the studs. A 1x4 stringer is then attached to the studs, with its top touching the traced line. The rim of the bath should not support weight. Drain components are installed according to instructions, ensuring an opening in the sub-floor for the drain. The floor structure beneath the bath must support the total weight of the bath, water, and bather.
For models 2425L/V-LHO, 2425L/V-RHO, and 2732L, the bath must be supported along its entire bottom using mortar as bedding material (not sand or foam). The mortar should be applied to support the complete bottom, and the whirlpool positioned until the rim is leveled against the stringers. The mortar must completely harden before applying weight to the rim or bottom. Finish materials like tile or wallboard must be self-supporting if they contact the deck.
For models 2645L/V, 2771L/V, 2773L/V, 2774L/V, 2775L/V, 2422L/V, 2711L/V, 2908L/V, 6060L/V, and 7236L/V, the integral support feet are re-shimmed and secured with construction adhesive, silicone, mortar, or equivalent materials. A foundation base of cement, mortar, or grout is recommended for a solid and secure installation. The rim of the bath should not support weight, and the bedding material must harden before applying weight to the rim or bottom. Finish materials must be self-supporting if they contact the deck.
All wiring must be performed by a licensed electrician in accordance with national and local electrical codes. The whirlpool should be installed on a 120 VAC, 15 amp dedicated GFCI circuit for some models (2422, 2425, 2645, 2732, 2771, 2908, and all models listed in the table). For other models (6060, 2775, 2773, 2711, 2774, 7236), a 120 VAC, 20 amp dedicated GFCI circuit is required. The circuit must be hard-wired from the electrical power supply panel, a three-wire circuit with a grounded neutral wire and a third wire for earth ground. An optional heater requires a separate 15 amp maximum GFCI circuit.
During initial start-up, with power ON, the GFCI test button should be pushed. If it pops out, push it to reset. If the GFCI fails to operate or trips without the test button being pushed, it indicates a ground fault or malfunction, and the power must be turned off until the problem is identified and corrected. Two separate branch circuits should be routed to the junction box near the whirlpool, using only copper conductors. The heater and pump must be properly grounded and bonded. An 8 AWG solid copper conductor supplied with the heater should connect the heater bonding lug to the motor frame bonding lug. A second 8 AWG solid copper conductor should connect from the motor frame bonding lug to the home's electrical panel or an approved local bonding point.
Before operation, review the important safety instructions. The E-Z-Install™ heater, once installed and the pump is operating, is fully automatic and helps maintain water temperature. The heater has a preset pressure switch, requiring the pump to be running with water flowing in the whirlpool for the heater to turn on. An indicator light illuminates when the heater is operating.
The heater includes an "Intelligent High-Limit" safety circuit that prevents "false trips" from hot tap water. It only turns off the heater if the thermostat fails. If the high-limit frequently trips, a service technician should be called. To manually reset the high-limit switch: (1) Turn off the whirlpool pump. (2) Drain water from the tub. (3) Remove power from the heater by unplugging or turning off the circuit breaker. (4) The heater circuit will automatically reset in less than 15 minutes. (5) Restore power to the heater. (6) The whirlpool bath is now ready to use.
To operate the whirlpool, ensure the water level is at least one inch (25mm) above the highest jet. Do not operate the system without water (dry running), as this will cause pump damage and void the warranty. Do not fill the whirlpool more than two-thirds full before the user completely immerses themselves. To start the whirlpool, push the center of the button; it will depress and the whirlpool will start. To stop it, depress and release the button.
Water turbulence can be adjusted using the air volume control. Rotating the control counterclockwise increases turbulence, while rotating it clockwise decreases it. The Adjustable Flow Clean Jet™ allows water flow action to be adjusted from vigorous to soft by rotating the nozzle clockwise for vigorous massage and counter-clockwise for soft massage. The air volume control and nozzle adjustment can be balanced for the most desirable condition.
Connect the whirlpool drain to the waste line using the recommended drain assembly instructions, ensuring all drain joints are securely tightened. Check pump couplings to ensure they are hand-tight and not leaking (some loosening may occur during transit). Fill the whirlpool with water to 2 inches above the highest jet. Recheck pump couplings for leaks and ensure no leaks from piping connections while the whirlpool is running.
Remove all construction debris from the bath. Tile grout can be removed with a wooden popsicle stick or tongue depressor; avoid using wire brushes or metal implements on the bath surface. Post-installation clean-up can typically be done with warm water and liquid dishwashing detergent. Stubborn dirt or stains can be removed with granular Spic and Span® mixed with water. Painter's naphtha can be used to remove excess adhesives or wet oil-base paint.
The high-gloss surface is resistant to impact and chemicals and will retain its luster with proper care. Always fill the tub with temperate water, as excessively hot water can cause surface damage. Remove bath mats after use and hang them to dry, as allowing them to dry in the tub can cause surface damage.
Clean the tub after each use with a mild liquid household detergent cleaner. Avoid using Lestoil, Lysol Disinfectant (spray or concentrate), Lysol Basin, Tub and Tile Cleaner, Windex, Mr. Clean, Dow Disinfectant Bathroom Cleaner, or aerosol cleaning products. Harsh chemicals should never be used on acrylic surfaces. Do not use wire brushes, knives, or sharp objects to remove stains, cigarette tar deposits, or other surface blemishes. Abrasive cleaners or powders must not be used, as they will dull the surface. If the glossy surface loses its sheen, dulled areas can be restored by rubbing with a white "automotive type" polishing compound and waxing with a "liquid wax." Do not wax areas where you walk or stand.
Avoid contact with nail polish remover, acetone, dry cleaning fluid, paint remover, or other solvents. Clean the surrounding surface immediately after using caustic drain cleaners. Burning cigarettes will damage the surface. If damage occurs, repairs can be made quickly; contact your distributor or builder for details. Do not permit drain cleaner to enter the circulation system.
To maintain the circulating system, perform a monthly purge and clean:
| Category | Bathtubs |
|---|---|
| Type | Alcove |
| Material | Acrylic |
| Shape | Rectangular |
| Installation Type | Alcove |
| Length | 60 inches |
| Color | White |
| EverClean Surface | Yes |
| Warranty | Limited Lifetime |
| Product Name | EverClean 6060LCE |