SSEETT UUPP IINNSSTTRRUUCCTTIIOONNSS
PLEASE NOTE: Images used are for demonstration purposes only and may not depict the actual product.
AA mm eerr ii ss tt ee pp ®® II nn cc .. 99 00 11 TT aa cc oo mmaa CC tt .. •• PP .. OO.. BBoo xx 11 88 99 •• CC ll ii oo ,, MMII 44 88 44 22 00 (( 88 11 00 )) 66 88 66 -- 44 00 33 55 wwww ww .. aammeerrii ss tt ee pp .. cc oo mm
TTHH EE
DD OO GG HH OO UU SS EE
™™
BB LL II NN DD
Step 3:
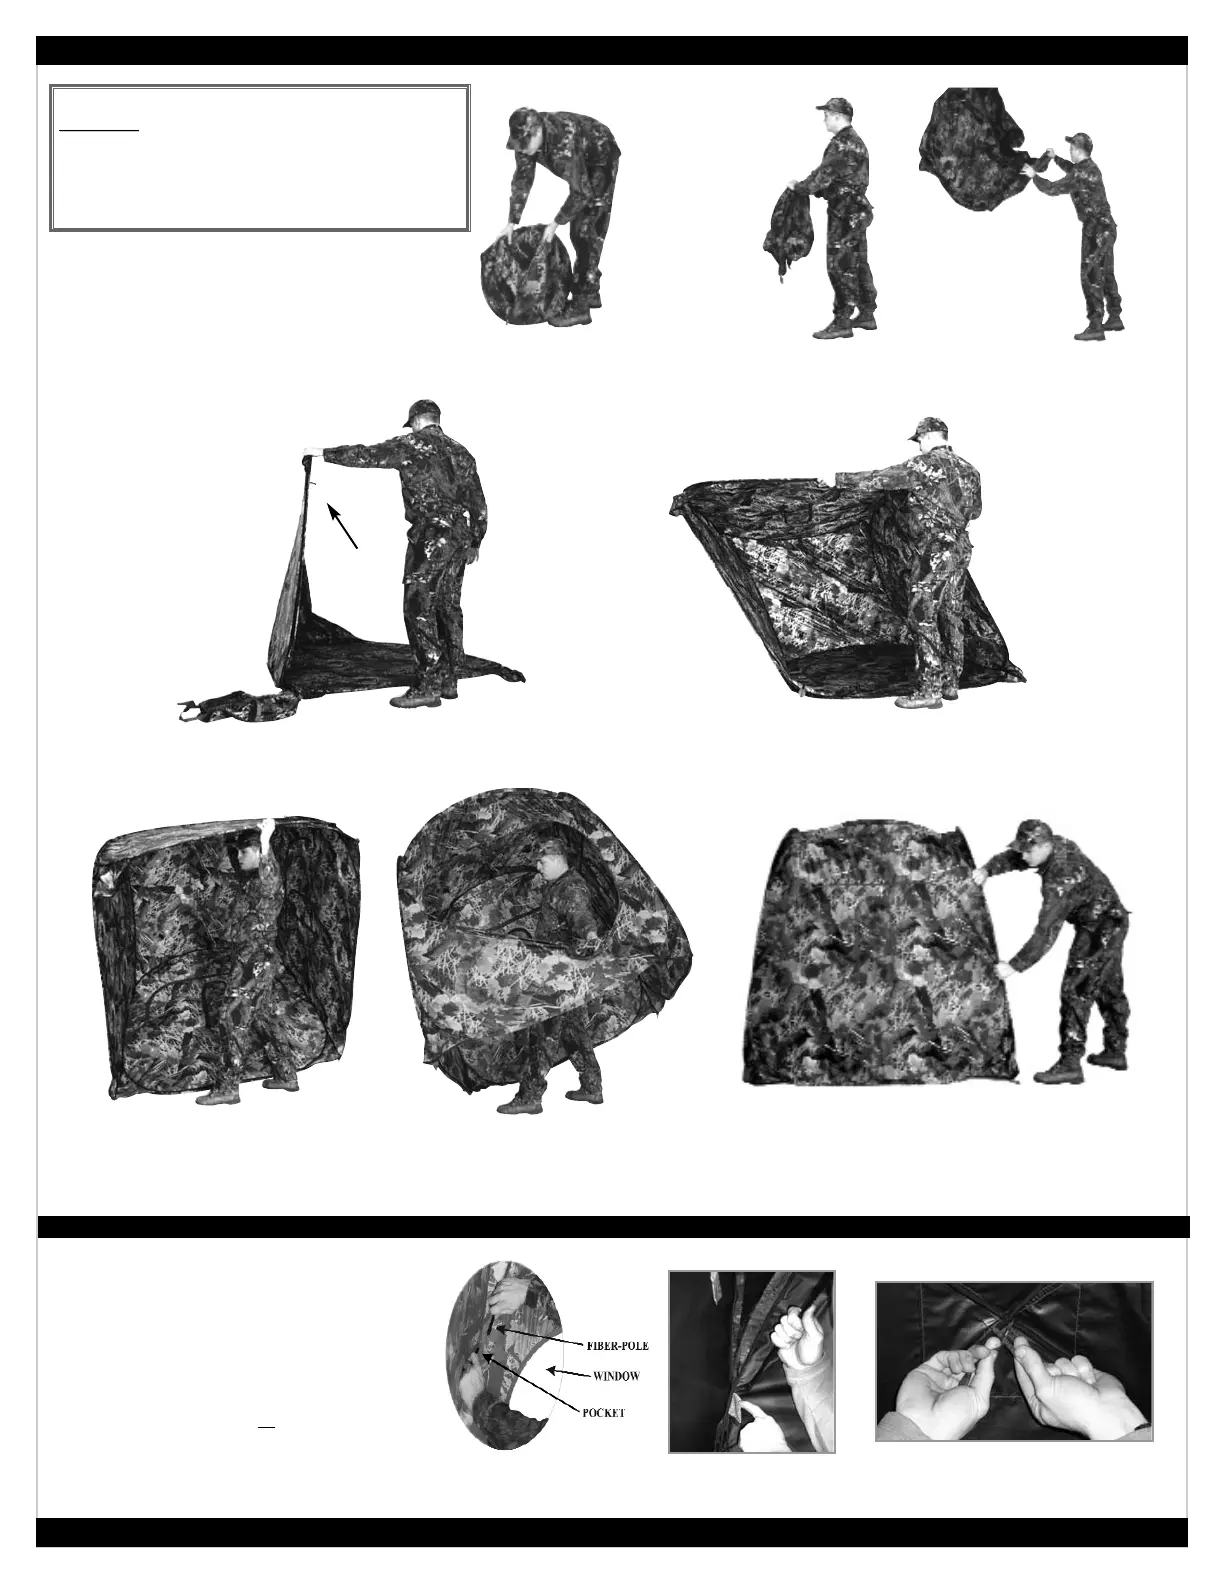
Once it has popped open, unfold BLIND
and lay it flat on ground.
Step 4: Take hold of the corner; put your foot on
BOTTOM SECTION. LIFT TOP SIDE UP.
Step 6:
After standing your blind upright, insert fiber
poles. Use high-wind tie-downs/ground stakes
to secure blind.
Fiber Poles:
Included are 2 fiber poles to arch the roof.
Insert one end of each pole into opposite
pockets inside the blind. The poles will
cross at the peak of the roof.
The pockets are located:
eeiitthheerr aatt wwiinnddooww aarreeaass
oorr
bboottttoomm ccoorrnneerrss
in all 4 corners of blind
..
Secure poles to blind
using tie at the peak of roof.
Step 5:
Lift BLIND OVER YOUR HEAD so you are standing on the
inside when it opens up.
Step 2: Remove your Blind from the back pack. Holding
one of the 3 ring sets of steel, let the other two pop open.
Step 1:
Remove ground stakes and
fiber poles from carry case.
Page 2
FF II BB EE RR PP OO LL EE SS
Window Location
Corner Pocket Location
Secure Fiber Poles at Peak of Roof
©2008
(rev 4/08)
NNEEWW !!
NNEEWW !!
““FFrroomm tthhee GGrroouunndd UUpp””™™
Instruction DVD
included with this product. If you need further
instruction on set up / take down, please refer to
Instructional Chapter on the Main Menu.
 Loading...