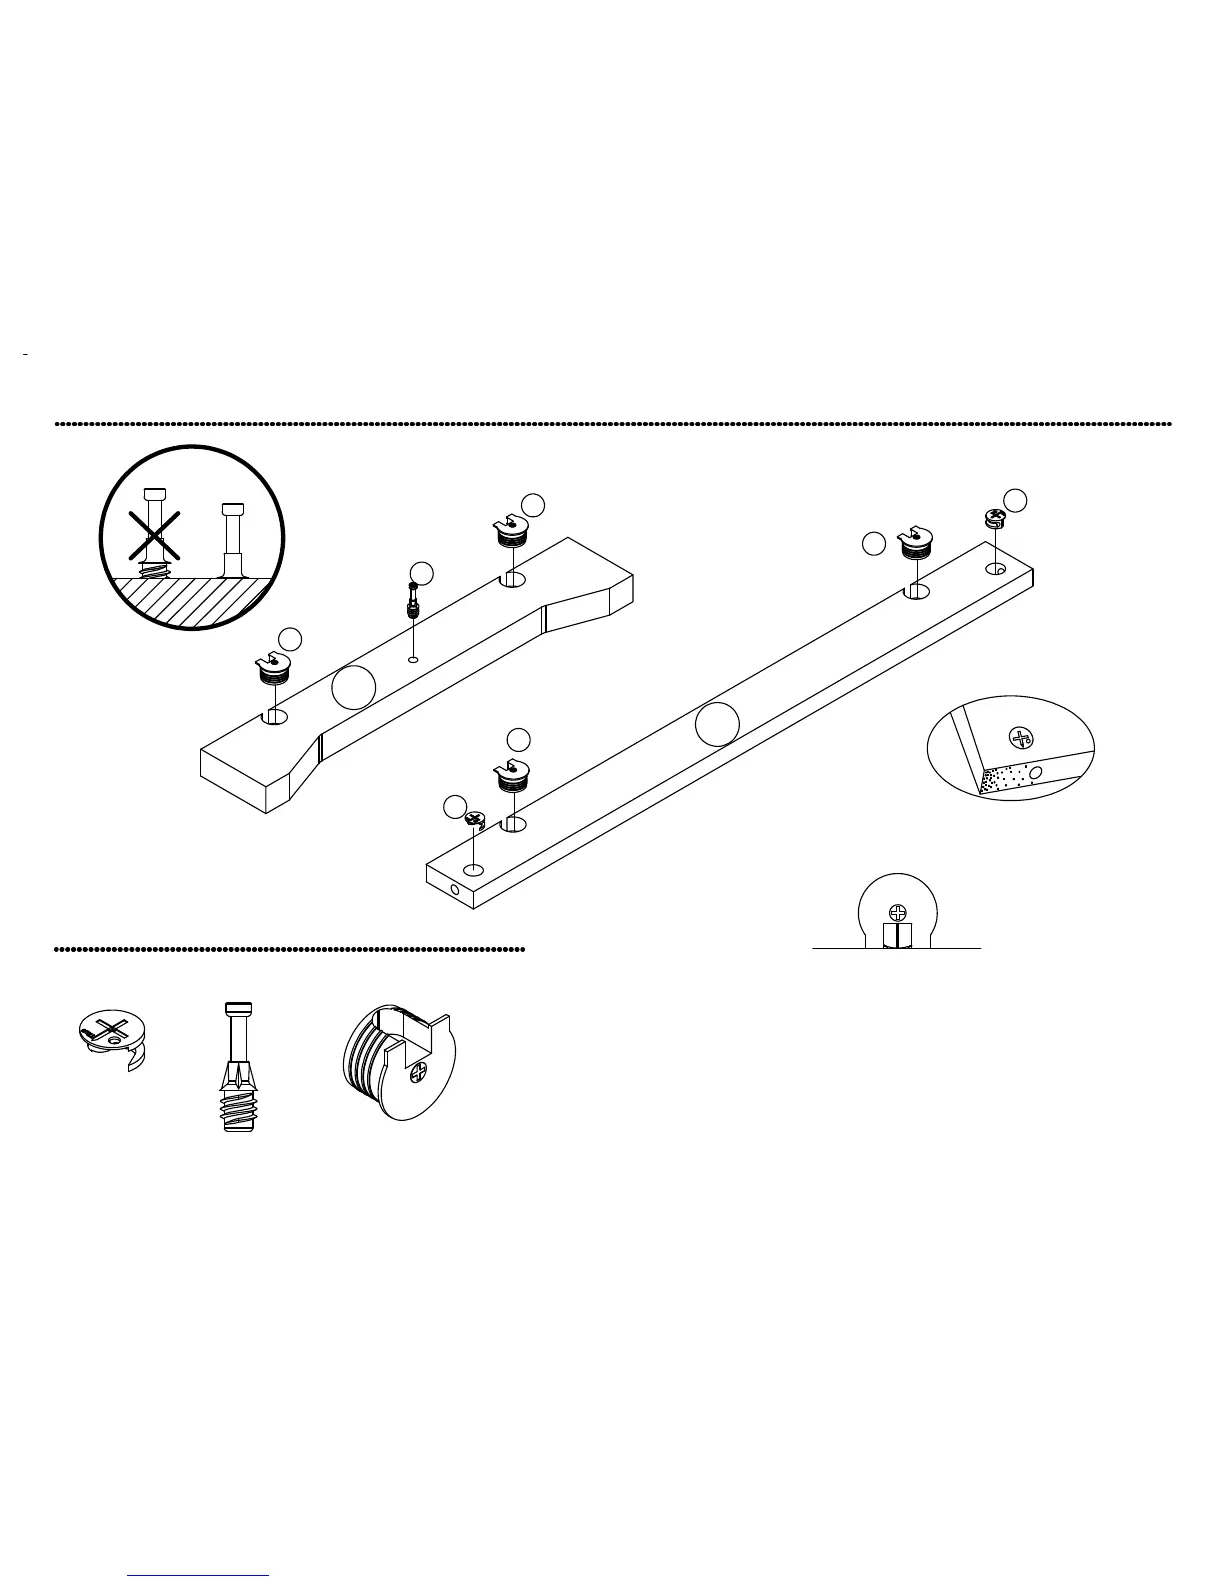
11
step
18
(1) x2
cam lock
(2)
x2
cam bolt
(4) x6
connector housing
You will need to tap the connector (4) with a hammer
to fully insert. Be sure the connector is positioned as
shown before pushing into holes.
x2
F
P
1. Screw-in cam bolts must be screwed down flush.
2. Refer to page 7 for instructions on how to use the cam lock system.
Proper orientation of CAM LOCK
1
1
2
4
4
4
4