3
B. Start the Driver Installation
Click Next to begin the installation.
A. From the Menu page, select Install Software
If the Menu page does not appear, browse the
CD drive and double-click the Autoload.exe file
G. New Hardware Wizard
When the New Hardware Wizard appears and asks
to search for software, select No, not this time.
Click Next to continue.
H. New Hardware Wizard
When prompted by the New Hardware Wizard to
install the software, select Install the Software
Automatically (Recommended) and click Next.
J. Connect to a Wireless Network
Highlight the network that you wish to connect to
and double-click it to connect. If your network
has security enabled, you can enter it in the
Network Key field and click OK.
Windows XP and 2000
I. Connect to a Wireless Network
Once Windows has completed the software installation
locate the Amped Wireless Utility icon and open the
software by double-clicking the icon. Select the
Available Network tab to view nearby networks.
Amped Wireless
USB Wireless-N Driver
and Utility
Do not insert the USB Adapter until after the software/driver has been fully installed.
Once the Menu appears locate the instructions on this SETUP MANUAL for your specific operating system and install
the driver for the USB adapter.
2
Find your Operating System and Install the Software
1
Insert the Setup CD
IMPORTANT:
DO NOT INSERT THE USB ADAPTER UNTIL THE DRIVER HAS BEEN INSTALLED
C. Continue the Driver Installation
Follow the instructions that appear and click
Install to continue the installation.
D. Restart your Computer
A prompt will appear asking you to restart your
computer. Select Yes and click Finish to restart.
E. Attach the USB Cable
Open the bottom cover: Lift the lock tab and slide the cover out.
Insert the mini USB connector into the USB port. Secure the USB Cable by wrapping the cable around the pegs.
Slide the bottom cover back on firmly so it locks. Make sure the USB cable positioned through the cable hole.
G. Connnect to a Wireless Network
Locate the Wireless Icon in the Windows System
tray (bottom right corner) and click it to view
available wireless networks. Highlight your
desired network and click Connect.
Note: if you had a wireless network adapter previously installed on
your computer you may need to disable it. Otherwise it will be
necessary to scroll down to locate the Amped Wireless network
adapter and select a network to connect to.
H. Connect to a Wireless Network
If the network you are trying to connect to has
security enabled you will need to enter it here.
B. Start the Driver Installation
If prompted, click Yes to begin the installation.
A. From the Menu page, select Install Software
If the Menu page does not appear, browse the
CD drive and double-click the Autoload.exe file
Windows 7 and Vista
Follow the Instructions for your Operating System:
F. Insert the High Power USB Adapter
After the computer has fully rebooted, locate two
available USB ports and insert the USB Adapter.
Windows should automatically begin installing the
driver for use with the USB Adapter. If only one
USB port is available, insert the USB connector
labeled Primary.
a
b
c
a
b
a
b
c
a
b
c
?
D. Restart your Computer
A prompt will appear asking you to restart your
computer. Select Yes and click Finish to restart.
?
C. Continue the Driver Installation
Follow the instructions that appear and
click Install to continue.
F. Insert the High Power USB Adapter
After the computer has fully rebooted, locate two
available USB ports and insert the USB Adapter.
The Found New Hardware Wizard should appear.
If only one USB port is available, insert the USB
connector labeled Primary.
c
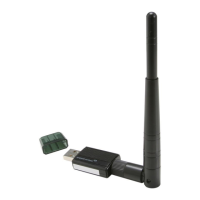
K. Position the Directional Antenna
The UA600EX has a high power directional antenna.
For optimal performance position the adapter
towards the direction of your wireless network.
For wall and pole mounting instructions view the
included Mounting Instructions on the opposite side
of this SETUP MANUAL.
I. Position the Directional Antenna
The UA600EX has a high power directional antenna.
For optimal performance position the adapter
towards the direction of your wireless network.
For wall and pole mounting instructions view the
included Mounting Instructions on the opposite side
of this SETUP MANUAL.
E. Attach the USB Cable
Open the bottom cover: Lift the lock tab and slide the cover out.
Insert the mini USB connector into the USB port. Secure the USB Cable by wrapping the cable around the pegs.
Slide the bottom cover back on firmly so it locks. Make sure the USB cable positioned through the cable hole.
Windows Instructions: This Side Mac Instructions: Back Side
— R E A D F I R S T —
SETUP MANUAL
UA600EX
High Power Wireless-N 600mW Pro USB Adapter