EasyManua.ls Logo

Anatek Blue ESR User Manual

Anatek Blue ESR
12 pages
To Next Page IconTo Next Page
Page #1 background imageLoading...
Page #1 background image
This document was written by Bob Parker and edited by John Bachman at AnaTek Corporation. Some graphics
and text courtesy of Silicon Chip March/April issue 2004.
Blue ESR Meter Kit
Assembly, Use &
Troubleshooting Manual
Bob Parker designed the Blue ESR meter supplied by
AnaTek Corporation
100 Merrimack Road, P. O. Box 1200
Amherst, NH 03031 USA
603.672.0172, FAX 603.836.4436,
esrquestion@anatekcorp.com
Forget about capacitance meters - an ESR meter is the way to go when it comes to identifying faulty
electrolytics. This well-proven design is auto-ranging, low cost and simple to build.
In-circuit testing, made possible by using <100mV test voltage
which does not forward bias diodes or transistors.
Auto-ranging to cover 0.01-99Ω.
Non-polarized test leads due to no DC component in the test
signal.
Single pushbutton to easily control all functions.
Automatic switch-off after three minutes when the meter is idle.
Low battery voltage warning - “b” blinks on the display.
3mm LED displays for easy viewing from a distance.
Chart of typical electrolytic capacitor ESR figures on the front
panel.
Built in self test
Integral test leads
Question and Answer IconNeed help?

Do you have a question about the Anatek Blue ESR and is the answer not in the manual?

Anatek Blue ESR Specifications

General IconGeneral
BrandAnatek
ModelBlue ESR
CategoryMeasuring Instruments
LanguageEnglish

Summary

Parts List and Assembly Order

Resistor Color Codes

Reference for identifying resistor values using color bands.

Semiconductors List

List of transistors, diodes, and ICs used in the kit.

Capacitors List

List of electrolytic, ceramic, and MKT capacitors.

Miscellaneous Components

Includes switches, connectors, grommets, and tie wraps.

Construction Process

PC Board Inspection

Examine the PC board for defects like hairline fractures in tracks.

Soldering Best Practices

Tips for proper soldering, avoiding bridges and lifting the iron correctly.

Component Installation

Installation Sequence

Sequence for installing components from smallest to largest.

7-Segment Display Headers

Properly installing headers for 7-segment displays for alignment.

Optional IC Sockets

Option to use sockets for integrated circuits instead of direct soldering.

Test Lead Setup

Banana Plug Connection

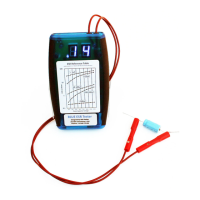
Connecting test leads to banana plugs and securing them.

Display and Connector Installation

Decimal Point LEDs

Correct placement and orientation of decimal point LEDs.

Battery Connector Soldering

Soldering the battery snap connector to the PC board.

Initial Power-Up Checks

Calibration Procedure

Battery Warning Adjustment

Final Enclosure Assembly

Securing Board and Battery

Securing the PC board and installing the battery and enclosure.

Interpreting Measurements

Basic ESR Meter Operation

Important Precautions

Charged Capacitor Safety

Safety advice regarding discharging capacitors before testing.

Interference Avoidance

Avoiding interference from CRT monitors and other sources.

Test Lead Inductance Effects

Using straight leads to prevent measurement errors.

Advanced Meter Uses

Device Maintenance

Troubleshooting Guide

Self-Test and Fault Codes

Running the self-test and interpreting fault codes for diagnosis.

Common Assembly Faults

Identifying common assembly issues like soldering defects.

Optional Modifications

Disable Automatic Switch-Off

Procedure to disable the automatic power-off feature.