Do you have a question about the ancnoble GG-005 and is the answer not in the manual?
Components included in the GG-005C-2 model: controller and AC adapter.
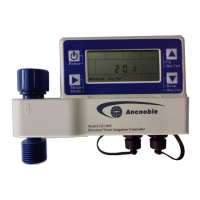
Components included in the GG-005C-1 model: controller, solar panel, and sensor.
Valve is USA hose standard NH-11.5 for direct faucet screw-on.
Prepare necessary water outlet connectors and pipes.
How to connect the moisture sensor and solar panel to the controller.
Connect valve to water source first, then sensor and panel.
Install four AA rechargeable batteries into the controller's battery box.
Bury sensor, fix solar panel, set parameters, and add waterproof cover.
Bury sensor based on crop root system depth for optimal readings.
Place sensor where irrigation water does not reach for rain detection.
Fix solar panel in a location with plenty of sun for efficient charging.
Push and hold the Power key until two beeps to turn on the controller.
Use the Menu/Mode key to cycle through operating modes.
Sets the start irrigation threshold based on soil dryness.
Sets the turn off point based on soil wetness.
Adjust control levels using the Up/Down keys.
Prevents flooding by limiting watering duration.
Sets the time frame for irrigation to occur.
Sets the start time for scheduled watering.
Sets the time interval between watering cycles.
Sets how long each watering cycle lasts.
Sets an upper limit for soil moisture to prevent over-saturation.
Adjusts the system's current time for accurate operation.
Overview of how the controller, sensor, and solar panel connect.
Highlights benefits like optimized irrigation and rain prevention.
Explains why the controller beeps and how to resolve alarm conditions.
| Display | 3.5 digit LCD |
|---|---|
| Power Supply | 9V battery |
| Operating Temperature | 0-50°C |
| Dimensions | 148mm x 75mm x 35mm |
| Weight | 200g (including battery) |