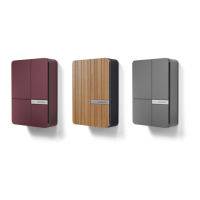
The Andersen Quartz is a home EV charge point designed for convenient and stylish charging. It is available in both tethered and socketed configurations, allowing for flexibility in how users connect their vehicles.
Function Description:
The Andersen Quartz serves as a smart home EV charger, enabling users to charge their electric vehicles efficiently and securely. It integrates with the Andersen app, providing a range of smart features for managing charging sessions, monitoring energy usage, and optimizing costs. The device is designed to comply with UK Government Regulations for Smart Charge Points, including default charging schedules.
Important Technical Specifications:
The manual does not explicitly list detailed technical specifications such as voltage, amperage, or power output beyond "7.2 kW" shown in app screenshots. However, it implies standard Type 2 charging cable compatibility for socketed versions. The device features an LED status light and a multi-function button for basic operation and setup. Wi-Fi connectivity is crucial for accessing its smart features.
Usage Features:
Starting a Charge Session (Socketed):
- Ensure the LED status light is solid white, indicating standby mode.
- Connect a Type 2 charging cable to the charge point.
- Plug the charging cable connector firmly into the vehicle's charge point socket.
- The LED status light will turn solid green (connected) and then pulsate green (charging).
- If charging doesn't start, check for enabled charging schedules (refer to page 9 for government regulations).
Stopping a Charge Session:
- Charging stops automatically when the desired charge level is reached or a schedule ends.
- To stop manually, use the "Stop charging" button on the Andersen app Overview screen.
- Before removing the connector, ensure the car is unlocked to release the cable.
- Unplug the connector firmly from the vehicle. If it doesn't release, ensure the vehicle is unlocked or consult the vehicle manual.
Andersen App Features:
- Simplified Setup: New users can easily add their vehicle, charge point, and energy tariff. Existing Konnect+ App users can log in to transfer their settings.
- Estimated Mileage Added: View estimated miles added to the car after a charge session, based on vehicle make/model consumption.
- Updated App Notifications: Control push and email notifications for weekly charging reports, device online status, error messages, and start/end of charge sessions.
- Overview Screen:
- Displays charge point status, current charge session information (total energy used, estimated miles added, duration, cost).
- Allows starting/stopping charging.
- Includes a "Remote Security Lock" option to disable the charge point and prevent unwanted sessions.
- Live Eco-System View: Swipe left to view real-time energy usage data (only available with a CT clamp installed for grid monitoring and/or solar functionality). Shows solar and grid energy contribution to charging.
- Live Graph View: Swipe left a second time to view real-time energy usage in graph form (appears after ~10 minutes of charging and >0.5 kWh delivered).
- Charge History and Reporting:
- View historical data by day, week, month, and year in table or graph format.
- Includes cost of charge, amount of grid energy used, amount of solar energy used (if configured), and duration of charge sessions.
- Ability to download reports as spreadsheet files.
- Scheduled Charging:
- Set schedules to charge during low-cost or off-peak tariff times.
- Choose specific days, times, and durations.
- Government default schedules (8:00-11:00 and 16:00-22:00) are set by default due to regulations but can be disabled in the app.
- Power Source Settings:
- Control the amount of solar and grid energy used for charging (only available if solar is configured with a CT clamp).
- Option to supplement solar energy with grid power using a toggle and slider.
- Note: Solar charging is not permitted below 1.4 kW due to regulations.
- General Settings:
- Charge Point Profiles: Set and amend charge point profiles.
- Dark Mode: Switch between light and dark app themes.
- Help Centre and Tutorials: Access support resources.
- Notifications: Control specific notifications (session started/ended, error warnings, weekly charging usage, device online status).
- Charge Point Settings:
- Device Information: View charge point details, add/remove charge points.
- Network: View and amend Wi-Fi connection details and signal strength.
- Energy Tariff: View and edit tariff information for accurate cost calculations.
- EV Regulations: Manage government default charging settings.
- Power Settings: Adjust maximum power (e.g., 24A (5.4kW)).
- Light Settings: Adjust convenient lighting and LED brightness.
- Solid white: Standby mode.
- Solid magenta: Waiting for scheduled charge.
- Solid orange: Waiting for sufficient solar to start charge.
- Pulsating green: Vehicle is charging.
- Solid green: Vehicle has finished charging.
- Solid blue: Charge point is locked by user.
- Solid red: Error detected.
- Flashing cyan: Setup mode.
- Pulsating yellow: Rebooting.
- All colours pulsating sequence: Firmware update in progress.
- Multi-function button: Located at the bottom, behind the status light. Only use when instructed by the app or customer care, as incorrect use can remove Wi-Fi credentials.
Maintenance Features:
- Caring for metal front fascia: Use a damp cloth to clean the unit and its sides. Avoid abrasive cleaners. Do not remove screws or parts.
- Caring for Accoya wood front fascia: Wipe with a damp cloth regularly to remove dirt and insects, extending lifespan. Use a cotton wool bud to clean grooves. Clean with warm water and a soft cloth, rinse, and wipe dry.
- Looking after the tethered cable and connector:
- When not in use, store the cable facing downward to prevent moisture corrosion.
- Ensure the cable is disconnected from the vehicle.
- Be careful not to twist the cable.
- Damage due to uncared for or misused cables is not covered by Andersen warranty.