music les by making the settings shown above.
Setting Up Roon Local
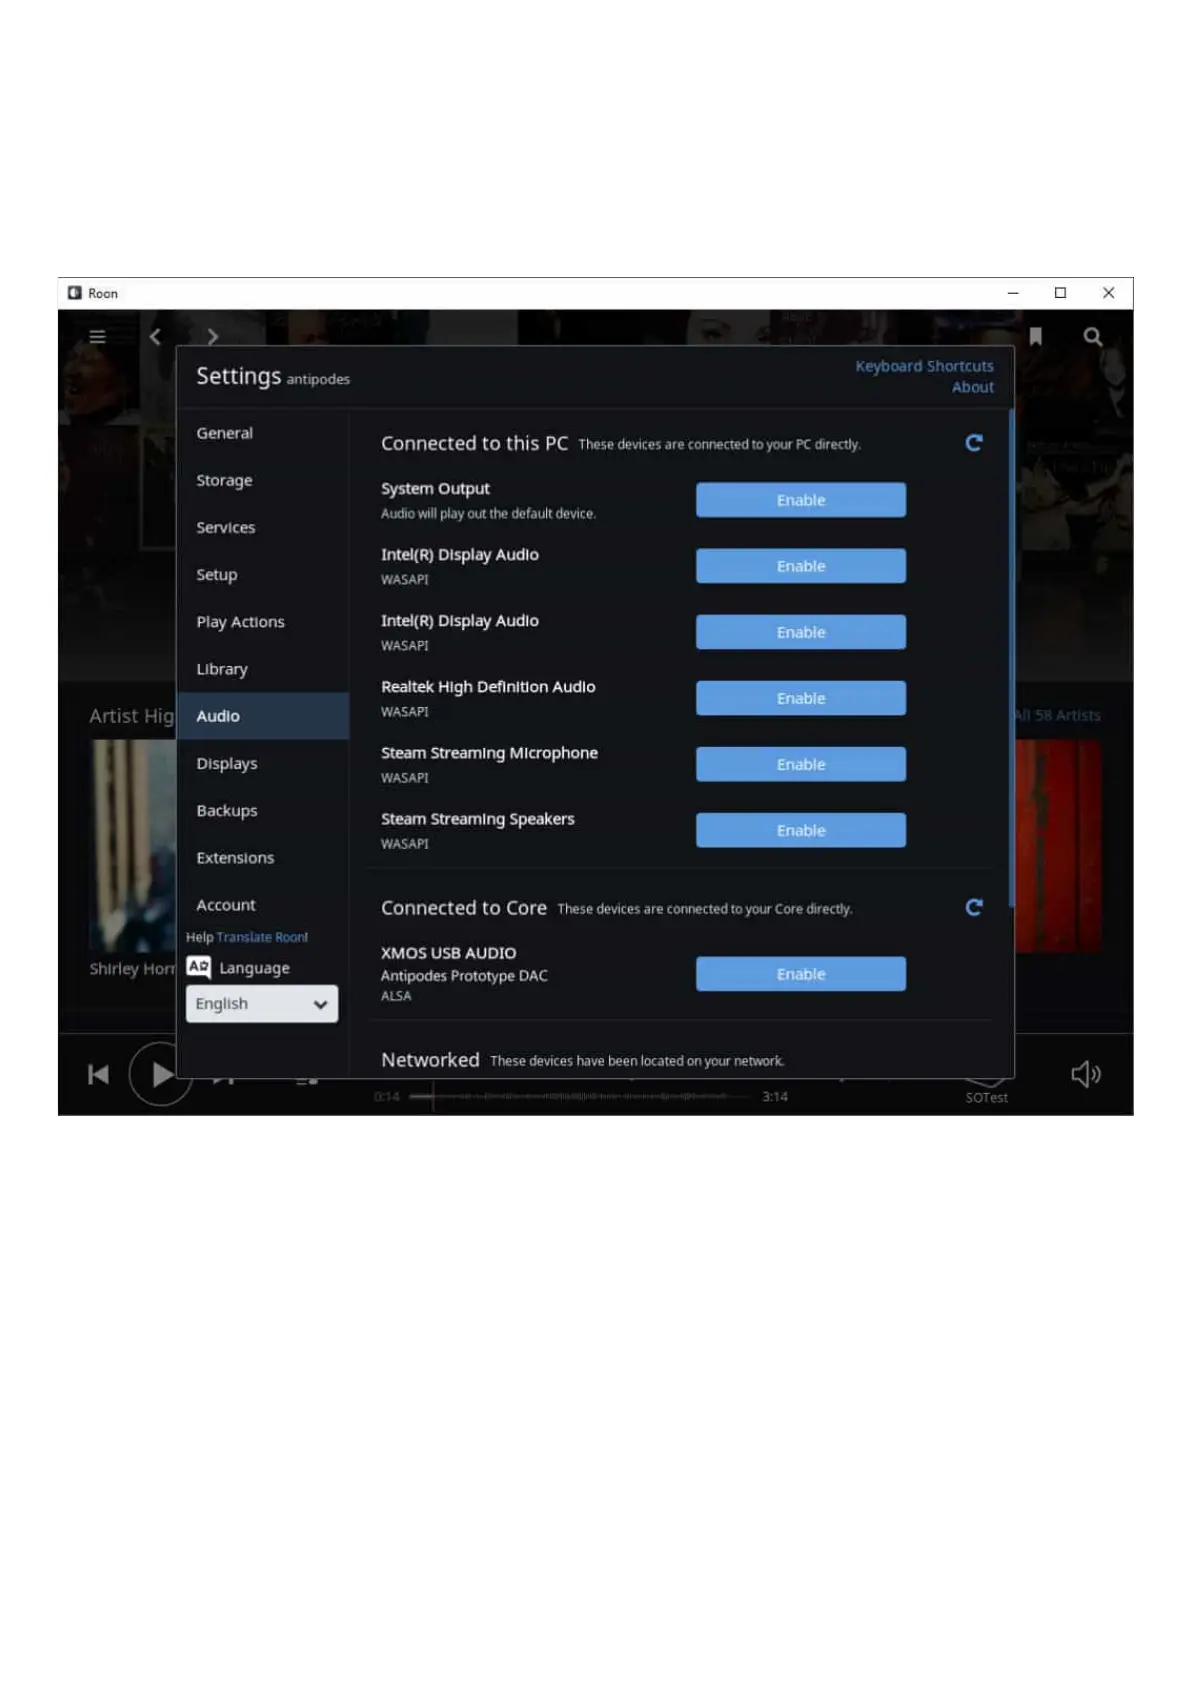
Once Open Roon (remote control) on your desktop/laptop, tablet or smartphone. Click on the button ‘Manage Audio Devices’, or click on the
menu icon top left, then on ‘Settings’ and then on ‘Audio’.
The screen that opens needs a little explanation.
At the top we have ‘Connected to this …’. Ignore this section, as it is just displaying the outputs available on the remote device you are using,
but you can enable these if you wish.
The next section down is labelled ‘Connected to Core’. This displays available outputs on your Antipodes and in the image at right, it shows
that an ‘Antipodes Prototype DAC’ is connected.
The next section down is labelled ‘Networked’ and displays the available compatible player devices on your network, that you can stream to.
You can enable any or all of these devices for Roon playback, play them independently, or group any set or sets of them in order to synchronise
their playback, and now you can play music with Roon Remote.
To use Roon Server Local, you need to make sure none of the alternative Roon playback methods described in the rest of this section are
enabled. The easiest way to address this is to use the ‘App Switcher’ to select a non-Roon related renderer.